Featuring over 350 tried and tested recipes that can be prepared at home. From comfort food to restaurant style. Plus 110+ articles on Kitchen and Cooking Tips, Restaurant Reviews and more.
Showing posts with label Chocolate Coconut Cake (with Coconut Pastry Cream filling and Buttercream Frosting. Show all posts

Monday, 1 April 2019

Martha Stewart’s Classic Pound Cake


This year on my birthday, my best friend Neha gave me a baking handbook by Martha Stewart. The book has many delish recipes. I thought I will start with Pound Cake because it has always been one of my favorites.

I am so glad I waited all this time to bake this cake. Since this is from my birthday book, it makes the recipe even special. This recipe makes a perfect pound cake – buttery, moist, dense and every bit flavorful. Unlike many new variations of Pound cake, this recipe uses only six ingredients:
  • Butter: Of course! Butter makes the base of Pound Cake, it’s what makes it rich and delicious. We need properly softened butter. Just keep it outside at room temperature for an hour or so. And don’t forget to use only unsalted butter while baking. This is very important. You don’t want to add extra saltiness in sweet goods.
  • Flour: While many recipes use cake flour for this cake, I have followed the directions of the book and used the regular All-Purpose Flour. Remember, do not substitute flours unless you are sure it can work.
  • Sugar: This is a large cake, but it’s not overly sweet. A balanced amount of sugar helps make the cake sweet but not overwhelming.
  • Eggs: Eggs help the cake to rise, make it open textured and control the density. In short they provide structure to the cake, making it moist, soft and not chewy.
  • Vanilla Extract & Salt: Both are used for flavor.


One Bowl Recipe:
This means that you can do everything in the same mixing bowl so less clean up later on. Just make sure to use a different bowl to crack the eggs. Add them one by one in the mixing bowl after checking for any shells. I think as long as you follow the directions, step by step, without skipping something, you will do fine. Pound cake is not hard to bake, I actually baked this awesome cake the very first time. Yes, the recipe also plays a very important role. 

Baking Time:
The cake will be dense but not at all heavy and the crumb will be soft and smooth. The vanilla induces a mild fragrance and flavor to the cake while the salt cuts any extra sweetness. Keep an eye on the cake as it bakes, if it starts browning too soon, tent the top with an aluminum foil. It may take more than an hour to bake so after 50-55 minutes insert a skewer to check. Keep an eye on it and set small timers. Be very careful not to over-bake the cake because that will result in a dry cake. Every oven has a blind baking spot where the heat is irregular so after an hour rotate the baking pan for an even baking.

Test to check:
Use a long wooden skewer to test if the cake has finished baking. This cake will rise up quite a bit and a toothpick wont be able to go all the way in and check properly. Insert in the center of the cake and continue baking till the skewer comes out clean. If you see moist crumbs but no batter that means the cake is baked through. Remember we will wait for 10-15 minutes for the cake to cool down before turning it up on the wire rack. The cake will continue to cook during this process drawing the leftover heat from the baking pan. So be attentive while testing.


How does Pound Cake get its name?
Traditionally, Pound Cake was prepared by using exactly one pound each of flour, sugar, butter and eggs. I read somewhere that the very first American cookbook called the American Cookery (1796) had the recipe of Pound Cake in it. However, it is said to have come from Northern Europe. If you think how the baking process has evolved since then, it is absolutely amazing. Today there is no limit to what you can do and add in a cake. Like this recipe uses slightly different proportions of the ingredients but the result is every bit rich and delicious. The crumb is soft, buttery and dense and not at all dry or crumbly.

Remember, a plain pound cake can be served with many variations. I read somewhere that Pound Cake can be paired with the following:
  • Macerated Berries (Berries Soaked in Alcohol)
  • Fresh Strawberries, Whipped Cream and torn Mint Leaves
  • Fresh Blueberries and Simple Syrup
  • Vanilla Ice Cream and Chocolate Syrup
  • Sliced Bananas, Toasted Coconut and Honey
  • Sprinkle Some Confectioner’s Sugar on it
  • Or Just Eat Plain!


Try this sweet, dense, and incredibly easy cake and then post in the comments section how it turned out. Serve it:

With Brunch
With coffee
When you have guests coming over
Or just for comfort!

Store Pound Cake:
  • At room temperature, tightly sealed for 3-4 days.
  • In the fridge, in a box for 6-7 days. I recommend cutting the cake into slices.
  • In the freezer for up to 3 months. I recommend cutting the cake into slices, then freezing them in individual zip lock bags. You can also stack them on pieces of parchment paper, then freeze them in a single big zip lock bag.


Makes one 9-by-5-inch loaf
‘This recipe does not contain the traditional pound each of butter, eggs, flour and sugar but its proportions produce the most delicious results.’

Ingredients:
  • Unsalted Butter - 1 ½ cups (3 sticks), room temperature, plus more for pan
  • All-Purpose Flour - 2 cups 
  • Granulated Sugar - 1 ½ cups 
  • Eggs - 6 large 
  • Pure Vanilla Extract - 1 teaspoon 
  • Salt - 1 teaspoon 


Directions:
  • Preheat the oven to 350 degrees F. 
  • Butter a 9-by-5-inch loaf pan; set aside.
  • In a medium bowl, whisk together the flour and salt; set aside.
  • In the bowl of an electric mixer fitted with the paddle attachment, beat the Butter, Granulated Sugar and Vanilla on medium-low speed until light and fluffy, 3-5 minutes, scraping down the sides as needed.


  • Add the eggs, one at a time, beating until combined. 
  • With mixer on low speed, add flour mixture; beat until just combined.
  • Spoon the batter into the prepared pan and smooth with a spatula. 
  • Bake until cake is golden, 50 minutes to an hour or until a skewer inserted in center comes out clean. Tent with aluminum foil if browning too quickly.
  • Transfer to a wire rack to cool, 10-15 minutes. 


  • Turn out the cake onto the rack to cool completely.
  • Cake can be kept at room temperature, wrapped well in plastic, for up to 3 days


Some more cake recipes you may like:

Monday, 21 August 2017

Decorate the Cake

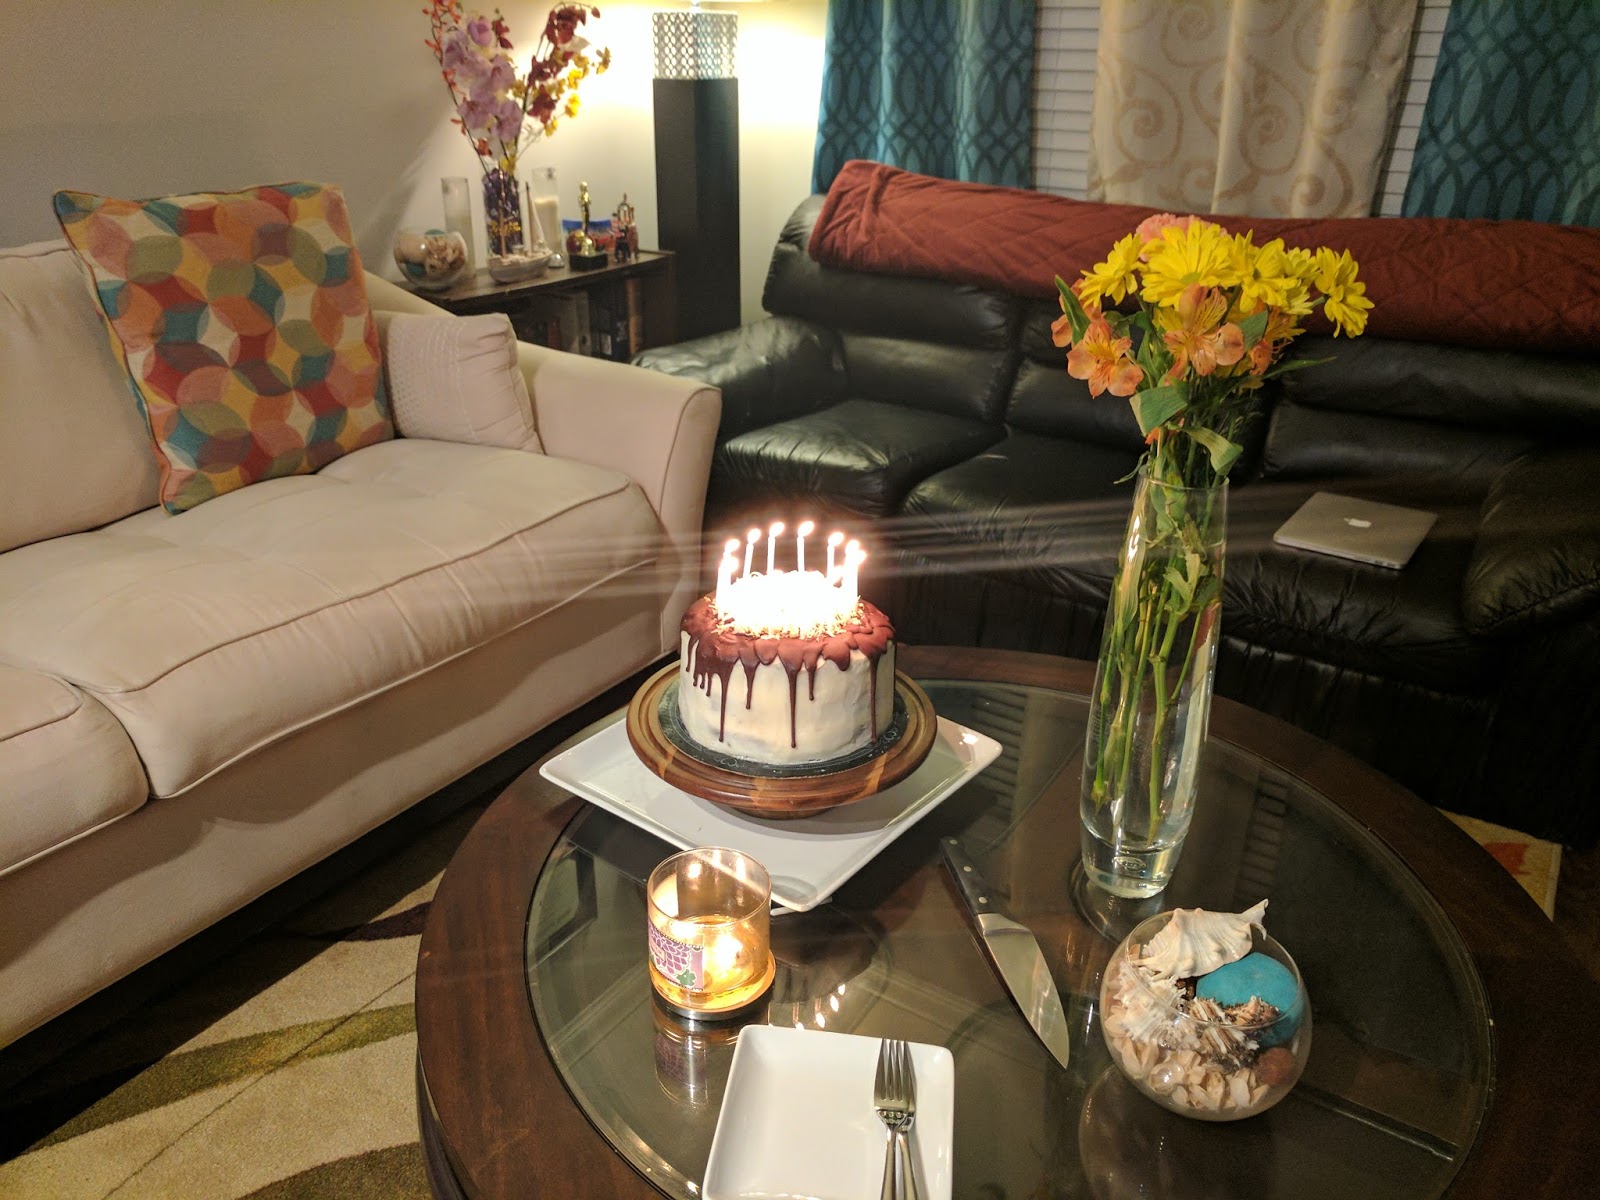
This is undoubtedly one of my favorite steps. Presentation matters a lot to me and I believe in decorating the cake as best as I can. A glaze, nuts or fruits does the trick. Of course a birthday cake dazzles with the candles as well.


Take out the cake from the freezer. Place the Glaze and Toasted Coconuts on the kitchen counter. 


As you can see the cake is looking pretty decent after the second layer of frosting and remember I am not a professional baker so yours may turn out even better.

Is your glaze ready? Good, let it cool for a few minutes before putting it on the cake.
  • Pour half of the Chocolate Glaze over the top of the cake (in the center).
  • Use a spoon or spatula to evenly spread it over the top.
  • Drizzle the remaining glaze along the edge of the cake all the way around, allowing it to drip down the sides. 
  • Sprinkle shredded coconut over the top.


Tips:
  • The warm glaze will set quicker when it comes into contact with the cold cake. You will actually see the warm glaze dripping down the sides of the cake and freezing mid way.
  • Make sure to add the shredded Coconut on to the Glaze without any delay so that it can stick to the Glaze and not fall off.


Transfer the Cake to your Cake Stand or Serving Platter:
  • Obviously we are not going to serve this beautiful cake on the turntable itself, so make sure you have your stand or platter handy.
  • Now remember, we put a little frosting on the turntable before placing the cardboard on it. We have frozen the cake a few times plus there is the weight of the cake layers, the frosting at this time will be pretty hard to move. Be very careful. I was unable to do this step myself so I asked the birthday boy to do the honors. Debarshi used the long serrated knife to smoothly cut the frosting and then we transferred the cake on the stand.


Enjoy this decadent Cake with friends and family and make sure to have a big slice yourself for all the hard work you put in.

This cake is sure to woo everyone and I hope all the photos, tips and tricks help you. In case you have any questions, I will be happy to answer them.

Bon Appetit!


Recommended Reading:

Prepare the Chocolate Glaze


Just like the Pastry Cream, this was the first time I prepared a Glaze for a cake. Now don’t be intimidated by the list of ingredients because a Glaze is really easy and quick to prepare. It not only adds another flavor in the cake but also helps to keep the quantity of frosting in check. You can use the Glaze as a decoration on top of the cake and once you get a hang of it don’t be afraid to use it over other cakes as well.


Ingredients:
  • Semisweet Chocolate - 8 tablespoons coarsely chopped
  • Unsalted Butter - 4 tablespoons, cut into pieces
  • Light Corn Syrup - 2 tablespoons 
  • Shredded Sweetened Coconut – ½ to 1 cup (I toasted it)


Let’s do a little prep by chopping the Chocolate:
  • Use a sharp big knife to chop the chocolate. Try not to use your hands but an offset spatula to scrape and pick up the chocolate and work in a cool kitchen because the chocolate will start melting. Keep it in a cool dry place until ready to use. 


Directions:
  • Place the Chocolate, Butter and Corn Syrup in a medium heatproof bowl set over a pot of barely simmering water. Stir until melted and smooth. Remove from heat and let cool for 5 minutes.


Next toast the Coconut, now you can of course skip this step, I did this as per Debarshi’s wish and I have to say toasting the coconut not only created a nice crisp texture but also brought out a delicious nutty flavor. I toasted the Coconut on stove top using these simple directions:
  • Place the desired amount (½ to 1 cup) of Coconut flakes in a large skillet.
  • Cook over medium heat, stirring frequently, until the flakes are mostly golden brown.
  • As our Coconut is sweetened it tends to brown faster so, it will take less time.
  • Remove from heat as soon as they are toasted and transfer to a bowl.


Tips:
  • Prepare the glaze according to the directions. Allow the glaze to cool before applying it to the cake. The glaze should be of the consistency of corn syrup. Test the consistency by taking a spoonful from the bowl and drizzle back into the glaze; the drizzled glaze should leave a trail.
  • Make sure the cake is cooled completely before applying a glaze with a thin consistency. If it is a glaze that needs to be spread, a slightly warm cake will allow the glaze to spread more easily, but if the cake is too warm the glaze may run off the cake.
  • Use a tablespoon or whisk to drizzle the glaze over the cake; allow it to run over and down the sides. Or, slowly pour the glaze over the top of the cake from a measuring cup with a pour spout.
  • The glaze will set fairly quickly so if you need to spread it out, use the back of a tablespoon to work it around as desired before it begins to set. If you try to spread it once it starts to set up, you will damage the smooth appearance of the glaze.
  • Allow the glaze to set up on the cake for 2 hours. Refrigerate if the glaze or filling contains perishable items.
  • If you are going to add nuts or another garnish to the glaze, be sure to add it before it begins to set up so that it will stick to the glaze.


Now we are all set, the cake is baked and frosted, glaze is ready so let’s proceed to Decorating the Cake:


Recommended Reading:

Apply the Final Coat


Now that our cake is baked, frosted and crumb coated, it is time to give it that professional look. 

We left our cake in the freezer after doing the crumb coat. Now let’s take it out and apply the second layer of frosting on it.


(Cake covered with Frosting – Crumb Coat)

  • Cover the entire cake with the Buttercream, using the same frosting method described earlier (Refer to the Apply the Crumb Coat article)
  • Cover it evenly using the offset spatula and then use the bench scraper to smooth the edges.
  • Place it in the freezer to chill for about 30 minutes so that the Buttercream hardens. Then wrap it in at least three layers of plastic wrap and place it back in the fridge to chill completely for at least an hour or two, before adding the glaze.


See how the cake looks after the second layer of frosting and remember I am not a professional baker so yours may turn out even better.

Once the Buttercream is hard enough, it is time to decorate the cake. We will be using Chocolate Glaze and Toasted Shredded Coconuts to decorate the Cake which will not only add to its beauty but also elevate the flavors. So, let’s prepare the Glaze.


Recommended Reading:

Apply the Crumb Coat


Last year while baking the Chocolate Raspberry cake for Debarshi’s birthday, I realized that as soon as I started applying the ganache on the cake, it started crumbing. I knew there was no way I could work on the cake anymore so I put the cake in the freezer and later applied the second layer of ganache which brought that beautiful even coat. Obviously at that time I didn’t know that the first coat of a frosting or ganache is always the crumb coat. I didn’t have the turntable, scraper or the offset spatula to do everything perfectly. However, this year Debarshi got me everything and I will say, it elevated the cake to another level of perfection.

So, what is a Crumb Coat?
A crumb coat is a thin layer of frosting that's spread over the cake first. If you've also been in my shoe, then you know that it is impossible to have a beautiful layer of frosting or ganache on the cake with all those little crumbs. A crumb coat (also called dirty icing) acts like a base coat and seals these crumbs. So when we apply the second coat, it looks smooth and even.

Now you can very well do a crumb coat on the serving platter with a rubber spatula like I used to do. However, if you love baking and don’t mind investing for it, I would suggest a few things:

Offset spatula – This is a very useful tool for applying smooth and even coats of frosting or ganache. The long narrow blade is easy to move and reaches all the edges of the baking pan or cake thus evenly spreading the batter or frosting.

Bench scraper – I use it not only for scraping the extra frosting off the cake but also to divide the bread dough into equal quantities. 

Turntable – If you have also frosted a cake without a turntable (like me), then you have no idea what you are missing. The fact is, you can still bake a pretty nice homemade cake without all these things but having these extra tools at hand make everything so easy. A turntable will allow you to rotate the cake while you are cutting or assembling it. Decorating becomes so easy because half of the work is being done by the turntable. Use it to rotate the cake while you scrape the extra frosting or trim the layers evenly.

Cake cardboard – I got my cake cardboards from Walmart and a three pack cost me less than a dollar. It is extremely useful to easily transfer the fully assembled cake from the turntable to the serving platter or cake stand. Hold the cardboard round in place on the stand with a little dollop of frosting.


Let’s do a little prep:
  • You will need the cake layers, pastry cream filling and buttercream frosting for the crumb coat.
  • Make sure your cake layers are cold otherwise the filling and frosting will start melting away.
  • Check the consistency of your frosting. You should be able to scoop it up with your spatula and turn it upside down over the bowl without it falling or sliding back into the bowl. The frosting should hold its shape perfectly.


Directions to assemble:
  • Take a little bit of the frosting and put it on the turntable so that the cardboard bottom does not move around. 

  • Place the cardboard on the turntable.


  • Start by spreading a thin layer of icing on your cake board. This way your cake will stick to your board.
  • Place your first layer on the board (remember we are assembling the cake now so we will be removing the parchment from all the layers before assembling them together).


  • Divide the Coconut Pastry Cream into two parts. Spread half of the pastry cream over the top of this layer. Fill the sides with the Buttercream Frosting. 


Tip: The buttercream frosting is all sugar so if you want you can fill the layers only with the pastry cream filling and coat the assembled cake all over with the frosting.


  • Smooth the pastry cream with the offset spatula. Try to slowly rotate the turntable with your other hand so that the offset spatula can easily smooth all over.
  • Once your filling is nice and flat, you can continue stacking your cake layers. So, remove the parchment from the second cake layer and place it on top of this layer. 
  • Repeat with the remaining Pastry Cream.
  • Remove the parchment from the third cake layer and place it on top of this layer. 


Tip: Make sure you are smoothing the Pastry cream to a uniform level. Once you top it with another layer of cake, there is no going back.


  • Now we have used all the Pastry Cream filling. It’s time to start working with the frosting. 
  • Take about a cup of frosting and spread it over the top and sides of the cake with the offset spatula.
  • Start by smoothing a thin layer over the top of the cake. 


Tip: Always add more icing than you think you need. It's much easier and cleaner to remove icing than add it.


  • If any buttercream from the layers overflowed, you can spread that over the sides of the cake.
  • Start adding additional frosting to the sides of the cake. Always start with more than you need. Lift some of the frosting from your bowl and spread it over the side of the cake. Hold your spatula at 90 degrees against the cake, and use your other hand to turn the turntable to apply the frosting evenly.
  • Using a large cake scraper, remove frosting from the sides of the cake until the cake layers begin to show through. Once you have a nice thick coat of frosting, hold your bench scraper flat against the side of your cake. Then turn the turntable and the scraper to make a nice, smooth coat of icing. 

Tip:
  • Hold the scraper very lightly against the cake. It should just touch the cake and scrape the extra frosting.  
  • A good trick of getting a really nice crumb coat is to have an extra, empty bowl nearby. Every time you get crumbs on the spatula, just wipe the frosting into the extra bowl. This makes sure that your real bowl full of buttercream is totally free of crumbs.
  • If you find your cakes are sliding around and won’t stay stacked properly, stack them as best you can and then place them in the freezer to harden the buttercream. After about 20 minutes, they should stay put and you can continue crumb coating your cake.


  • After finishing the edges of the cake, you will have peaks on the top edges of the cake. To get rid of these peaks, move your offset spatula in a swiping motion, pulling the buttercream from the outer edge toward the center of the cake. 
  • After the crumb coat put the cake in the freezer for 30 minutes. Then wrap a plastic warp all around the hard frosting and put it back in the freezer until you are ready to do the final coat.


Our cake is already coming together and looking beautiful right? Now we will do the Final Coat which will cover all the imperfections.


Recommended Reading:

Prepare the Buttercream Frosting


Frosting (or icing) is one of the best ways to cover your cake. It not only covers all the imperfections of the cake but also adds a beautiful sweet flavor to the cake itself. Use the leftover frosting to prepare or coat cookies and cupcakes.


Ingredients for the Buttercream frosting:
  • Unsalted Butter – ¾ cup, softened (this will be 1 and ½ sticks of Butter)
  • Canned Coconut Milk - 6 tablespoons 
  • Confectioners' Sugar - 3-4 cups 
  • Coconut Flavor - ½ teaspoon

Tips:
  • Soften the butter by allowing it to sit at room temperature on the kitchen counter for 25 to 30 minutes prior to making the frosting. Don’t heat the butter in the microwave, this will result in a loose, runny consistency in the frosting. Test the butter by bending it, if it bends without breaking, it’s ready to use.
  • Shake the can of Coconut Milk vigorously before opening it. The fats and liquids separate in the can after sitting. You want a combination of both for the frosting, so mix it very well.
  • Make Confectioners' Sugar at home - Pour granulated sugar into a blender or food processor. Blend the sugar until it is a fine, fluffy powdered sugar. The more refined, whiter sugars will make the fluffiest powdered sugars. You can use the powdered sugar immediately or save it for later (If using Nutri bullet, use the milling blade).

Directions:
  • Combine the Butter and Coconut Milk in a large mixing bowl. 
  • Using the stand mixer fitted with the whisk attachment, beat until combined and creamy.
  • Add 2 cups of Confectioner's Sugar, beat on medium-low speed until most of the sugar is moistened. Gradually add in the remaining sugar, one cup at a time. 

  • You may need more or less sugar depending on how soft the butter is. Beat on medium-low speed until the sugar is moistened. Turn the speed up to medium-high and beat until light and fluffy. Scrape down the sides of the bowl as needed.


Make ahead tip:
  • Frosting will keep for up to 4 days stored in the refrigerator in an airtight container. Let it stand at room temperature to soften before use.
  • Or it can be frozen for up to 3 months. When ready to use, place in the refrigerator overnight to thaw. Let it stand at room temperature to soften before use.

Now that our cake, filling and frosting is ready, let’s assemble the cake and apply the Crumb Coat.


Recommended Reading:

Prepare the Coconut Pastry Cream filling


Once the layers have been baked it is time to prepare the filling. This was the first time I prepared a Pastry Cream Filling and it sure made me feel like a professional baker. The procedure may look complicated but have patience, it will pay off. The filling will have a light and creamy texture with the decadent flavor of Coconut. The butter will make it silky thus melting on your tongue almost instantly.


Ingredients for the Coconut Pastry Cream:
  • Canned Coconut Milk - 1 cup 
  • Egg Yolks - 4 large 
  • Granulated Sugar – 1/3 cup 
  • Cornstarch - 2 tablespoons and 1 and ½ teaspoons 
  • Coconut flavor- 1 teaspoon 
  • Unsalted Butter - 2 tablespoons, cut into pieces
  • Shredded Sweetened Coconut – ½ cup 


Directions:
  • Bring the Coconut Milk up to a simmer in a medium saucepan. 


Tip: It is important to shake the can of coconut milk vigorously before opening it. The fats and liquids separate in the can after sitting. You want a combination of both for the filling, so mix it very well.

  • Use the stand mixer for the next step (if doing manually be ready for some serious whisking):
  • In a separate bowl, whisk the Egg Yolks, Sugar, Cornstarch and Coconut Flavor until blended and pale in color. 


  • Slowly pour in the hot milk while whisking continuously. If doing manually stand in front of a fan and pour the milk very slowly so that the egg doesn’t curdle. 


  • Return the mixture back to the pot and whisk over medium-high heat until thickened, about 3 minutes. Pour the thickened pastry cream through a fine mesh sieve.


  • Stir in the butter until fully melted. 


  • Place a piece of plastic wrap directly on top of the pastry cream, making sure it is touching the surface, and refrigerate until cooled completely. 


  • Stir in the shredded coconut before adding the filling on the cake layers.


Tip:
Refer to my article on Basic Kitchen Measurements to know how to separate the egg yolk from egg white.

Now let’s proceed to the next step - Buttercream Frosting:

Recommended Reading: