Featuring over 350 tried and tested recipes that can be prepared at home. From comfort food to restaurant style. Plus 110+ articles on Kitchen and Cooking Tips, Restaurant Reviews and more.
Showing posts with label Prepare the Buttercream Frosting. Show all posts

Tuesday, 14 November 2017

Yummy Brownies


Photo Courtesy: Dr. Debarshi Chatterji


A few weeks back I started watching a series called ‘The 70s Show’ and in it they always show Mrs. Forman baking Brownies. She is one of the main characters in the show and is portrayed as a very loving, caring and joyful mother who loves to take care of her family and friends and she loves to bake! She bakes for fun, she bakes when she is stressed and she bakes to make everyone happy and one of her most frequent bakes is Brownies. They have been showing it so frequently that I started craving to bake and eat some delicious Brownies. So, I looked up a recipe and gave it a try. Result? Delicious mouth watering chocolate rich brownies. The best part about this recipe is, you wont even need a stand mixer or a hand beater. Just a bowl and spatula with the ingredients and you are ready. Measure, mix, bake and above all enjoy! I followed the example of my favorite character and shared this with everyone I know and believe me it made me as happy as Mrs. Forman!

Happy Baking!


Ingredients:

For the Brownie - 
  • Unsalted Butter – ½ cup (or 1 stick) + more for greasing the pan
  • White Sugar - 1 cup (or ½ cup Truvia)
  • Eggs - 2 
  • Vanilla Extract - 1 teaspoon 
  • Unsweetened Cocoa Powder - 1/3 cup 
  • All-Purpose Flour – ½ cup + a handful for flouring the pan
  • Salt – ¼ teaspoon 
  • Baking Powder – ¼ teaspoon 


For the Frosting - 
  • Unsalted Butter - 2 tablespoons, softened 
  • Unsweetened Cocoa Powder - 1 tablespoon
  • Honey - 1 tablespoon 
  • Vanilla Extract - ½ teaspoon 
  • Confectioners' Sugar - 1 cup 


Tip: 
  • Keep the Butter outside at room temperature so that it softens. Do not melt it in the microwave as it will make the frosting very runny.


Directions:
  • Grease and flour an 8-inch square pan. I used cold butter for this step, I rubbed it all over the pan using my fingers for a smooth even spread, specially around the edges. 
  • To flour the pan, add a handful of flour on the pan and move it around so that it sticks on the butter. Then tilt the pan upside down over the sink so that the extra flour falls off.


  • Place the Butter in a large microwave safe bowl and microwave for a minute so that it melts. You can also do this step in a saucepan over your stove top.
  • Preheat the oven to 350 degrees F.
  • Now remove from butter from heat (or take out the bowl from the microwave), and in the same bowl, stir in the White Sugar, Eggs and Vanilla Extract. 
  • Sift in the Unsweetened Cocoa Powder, All-Purpose Flour, Salt and Baking Powder and beat them together. 


  • Spread the batter into the prepared pan. Smooth with a spatula.


  • Bake in the preheated oven for 25 to 30 minutes (Do not overcook).

Tip: Prepare the frosting while the Brownie is in the oven. See directions below.
  • Once baked, take it out of the oven and transfer to a cooling rack. Don’t take the brownie out of the tray yet. Switch off the oven.


Let’s make the Frosting: 
  • While the Brownie is baking, let’s prepare the frosting. Now you can very well skip this step, however, if you are planning to apply the frosting, make sure to utilize the baking time so that the frosting spreads evenly over the warm brownies.
  • Combine the Unsalted Butter, Unsweetened Cocoa Powder, Honey, Vanilla Extract and Confectioners' Sugar in a small bowl.
  • Stir until smooth. 


  • Frost brownies while they are still warm. 
  • Let the frosting set, allow the brownies cool down a bit then cut them into big pieces and serve.


Tips:
  • If you have any leftover plain icing, use it for this.
  • If your icing is in the freezer, make sure to keep it outside for 2-3 hours, prior starting the baking. This will give it ample time to soften up. Do not microwave!


Recommended Reading:

Monday, 21 August 2017

Decorate the Cake

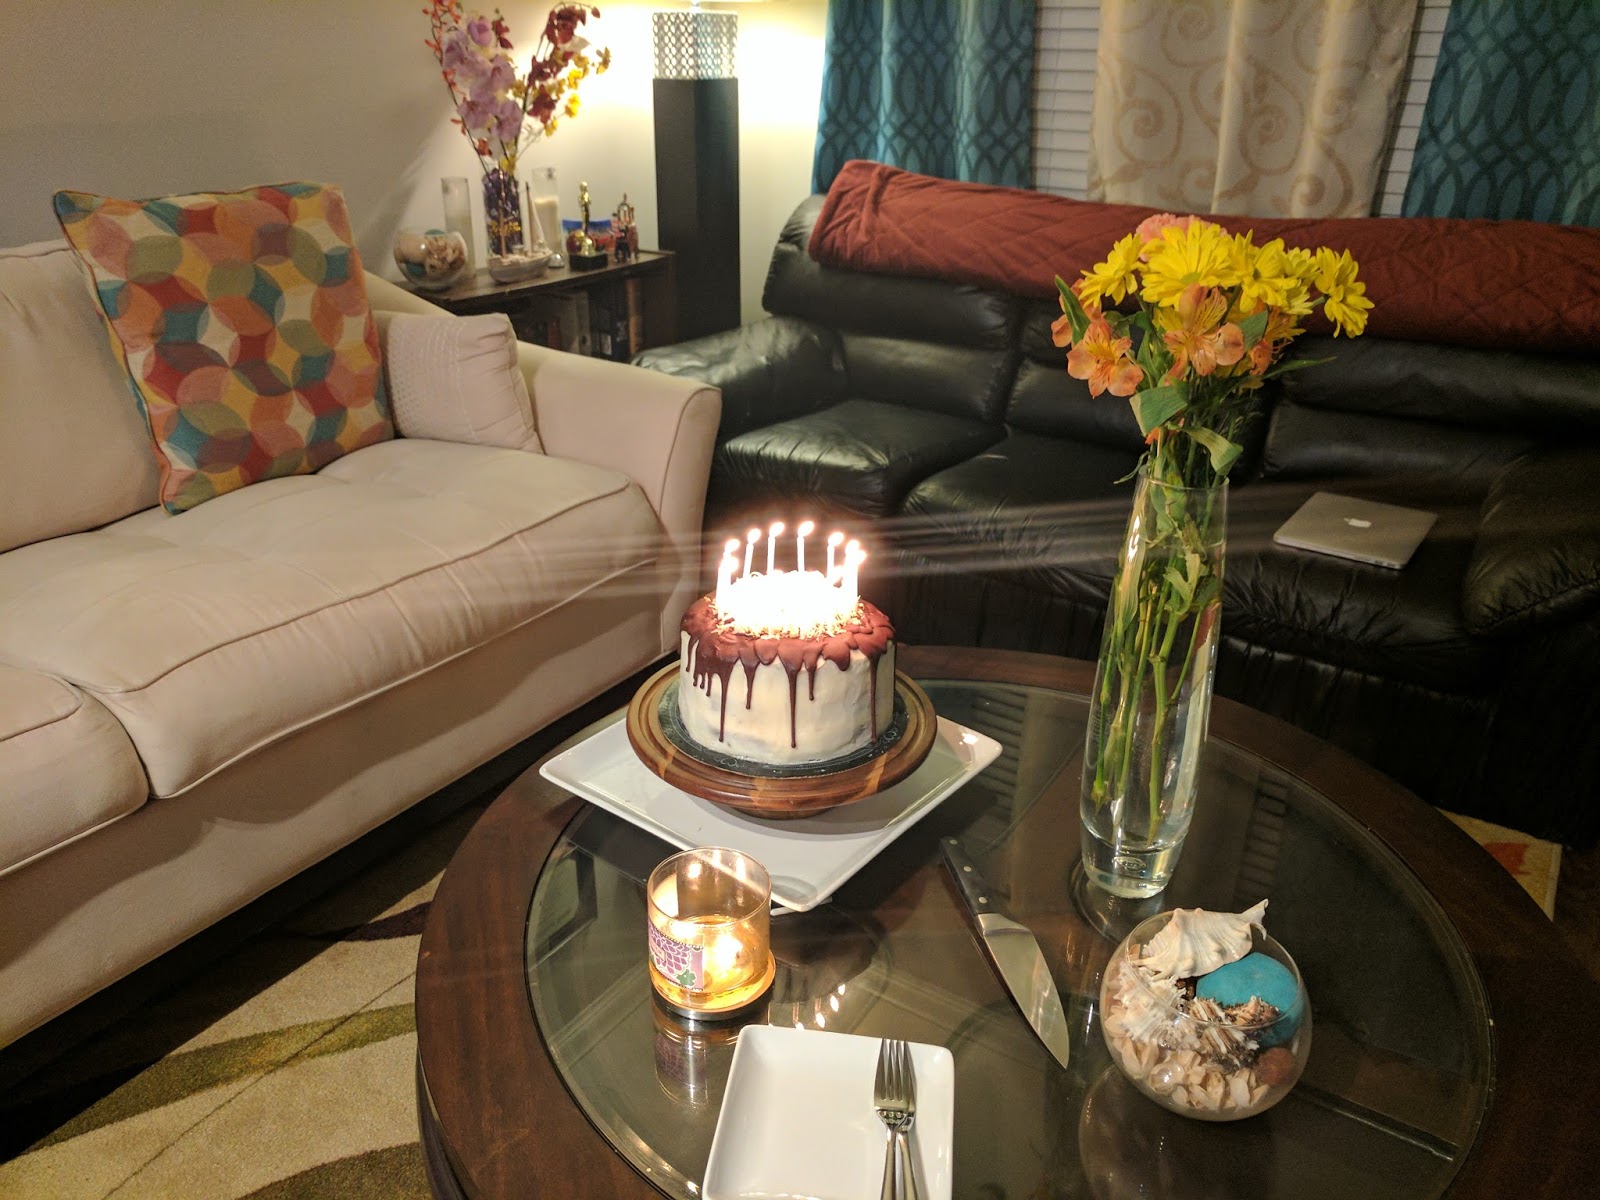
This is undoubtedly one of my favorite steps. Presentation matters a lot to me and I believe in decorating the cake as best as I can. A glaze, nuts or fruits does the trick. Of course a birthday cake dazzles with the candles as well.


Take out the cake from the freezer. Place the Glaze and Toasted Coconuts on the kitchen counter. 


As you can see the cake is looking pretty decent after the second layer of frosting and remember I am not a professional baker so yours may turn out even better.

Is your glaze ready? Good, let it cool for a few minutes before putting it on the cake.
  • Pour half of the Chocolate Glaze over the top of the cake (in the center).
  • Use a spoon or spatula to evenly spread it over the top.
  • Drizzle the remaining glaze along the edge of the cake all the way around, allowing it to drip down the sides. 
  • Sprinkle shredded coconut over the top.


Tips:
  • The warm glaze will set quicker when it comes into contact with the cold cake. You will actually see the warm glaze dripping down the sides of the cake and freezing mid way.
  • Make sure to add the shredded Coconut on to the Glaze without any delay so that it can stick to the Glaze and not fall off.


Transfer the Cake to your Cake Stand or Serving Platter:
  • Obviously we are not going to serve this beautiful cake on the turntable itself, so make sure you have your stand or platter handy.
  • Now remember, we put a little frosting on the turntable before placing the cardboard on it. We have frozen the cake a few times plus there is the weight of the cake layers, the frosting at this time will be pretty hard to move. Be very careful. I was unable to do this step myself so I asked the birthday boy to do the honors. Debarshi used the long serrated knife to smoothly cut the frosting and then we transferred the cake on the stand.


Enjoy this decadent Cake with friends and family and make sure to have a big slice yourself for all the hard work you put in.

This cake is sure to woo everyone and I hope all the photos, tips and tricks help you. In case you have any questions, I will be happy to answer them.

Bon Appetit!


Recommended Reading:

Prepare the Chocolate Glaze


Just like the Pastry Cream, this was the first time I prepared a Glaze for a cake. Now don’t be intimidated by the list of ingredients because a Glaze is really easy and quick to prepare. It not only adds another flavor in the cake but also helps to keep the quantity of frosting in check. You can use the Glaze as a decoration on top of the cake and once you get a hang of it don’t be afraid to use it over other cakes as well.


Ingredients:
  • Semisweet Chocolate - 8 tablespoons coarsely chopped
  • Unsalted Butter - 4 tablespoons, cut into pieces
  • Light Corn Syrup - 2 tablespoons 
  • Shredded Sweetened Coconut – ½ to 1 cup (I toasted it)


Let’s do a little prep by chopping the Chocolate:
  • Use a sharp big knife to chop the chocolate. Try not to use your hands but an offset spatula to scrape and pick up the chocolate and work in a cool kitchen because the chocolate will start melting. Keep it in a cool dry place until ready to use. 


Directions:
  • Place the Chocolate, Butter and Corn Syrup in a medium heatproof bowl set over a pot of barely simmering water. Stir until melted and smooth. Remove from heat and let cool for 5 minutes.


Next toast the Coconut, now you can of course skip this step, I did this as per Debarshi’s wish and I have to say toasting the coconut not only created a nice crisp texture but also brought out a delicious nutty flavor. I toasted the Coconut on stove top using these simple directions:
  • Place the desired amount (½ to 1 cup) of Coconut flakes in a large skillet.
  • Cook over medium heat, stirring frequently, until the flakes are mostly golden brown.
  • As our Coconut is sweetened it tends to brown faster so, it will take less time.
  • Remove from heat as soon as they are toasted and transfer to a bowl.


Tips:
  • Prepare the glaze according to the directions. Allow the glaze to cool before applying it to the cake. The glaze should be of the consistency of corn syrup. Test the consistency by taking a spoonful from the bowl and drizzle back into the glaze; the drizzled glaze should leave a trail.
  • Make sure the cake is cooled completely before applying a glaze with a thin consistency. If it is a glaze that needs to be spread, a slightly warm cake will allow the glaze to spread more easily, but if the cake is too warm the glaze may run off the cake.
  • Use a tablespoon or whisk to drizzle the glaze over the cake; allow it to run over and down the sides. Or, slowly pour the glaze over the top of the cake from a measuring cup with a pour spout.
  • The glaze will set fairly quickly so if you need to spread it out, use the back of a tablespoon to work it around as desired before it begins to set. If you try to spread it once it starts to set up, you will damage the smooth appearance of the glaze.
  • Allow the glaze to set up on the cake for 2 hours. Refrigerate if the glaze or filling contains perishable items.
  • If you are going to add nuts or another garnish to the glaze, be sure to add it before it begins to set up so that it will stick to the glaze.


Now we are all set, the cake is baked and frosted, glaze is ready so let’s proceed to Decorating the Cake:


Recommended Reading:

Prepare the Buttercream Frosting


Frosting (or icing) is one of the best ways to cover your cake. It not only covers all the imperfections of the cake but also adds a beautiful sweet flavor to the cake itself. Use the leftover frosting to prepare or coat cookies and cupcakes.


Ingredients for the Buttercream frosting:
  • Unsalted Butter – ¾ cup, softened (this will be 1 and ½ sticks of Butter)
  • Canned Coconut Milk - 6 tablespoons 
  • Confectioners' Sugar - 3-4 cups 
  • Coconut Flavor - ½ teaspoon

Tips:
  • Soften the butter by allowing it to sit at room temperature on the kitchen counter for 25 to 30 minutes prior to making the frosting. Don’t heat the butter in the microwave, this will result in a loose, runny consistency in the frosting. Test the butter by bending it, if it bends without breaking, it’s ready to use.
  • Shake the can of Coconut Milk vigorously before opening it. The fats and liquids separate in the can after sitting. You want a combination of both for the frosting, so mix it very well.
  • Make Confectioners' Sugar at home - Pour granulated sugar into a blender or food processor. Blend the sugar until it is a fine, fluffy powdered sugar. The more refined, whiter sugars will make the fluffiest powdered sugars. You can use the powdered sugar immediately or save it for later (If using Nutri bullet, use the milling blade).

Directions:
  • Combine the Butter and Coconut Milk in a large mixing bowl. 
  • Using the stand mixer fitted with the whisk attachment, beat until combined and creamy.
  • Add 2 cups of Confectioner's Sugar, beat on medium-low speed until most of the sugar is moistened. Gradually add in the remaining sugar, one cup at a time. 

  • You may need more or less sugar depending on how soft the butter is. Beat on medium-low speed until the sugar is moistened. Turn the speed up to medium-high and beat until light and fluffy. Scrape down the sides of the bowl as needed.


Make ahead tip:
  • Frosting will keep for up to 4 days stored in the refrigerator in an airtight container. Let it stand at room temperature to soften before use.
  • Or it can be frozen for up to 3 months. When ready to use, place in the refrigerator overnight to thaw. Let it stand at room temperature to soften before use.

Now that our cake, filling and frosting is ready, let’s assemble the cake and apply the Crumb Coat.


Recommended Reading:

Prepare the Coconut Pastry Cream filling


Once the layers have been baked it is time to prepare the filling. This was the first time I prepared a Pastry Cream Filling and it sure made me feel like a professional baker. The procedure may look complicated but have patience, it will pay off. The filling will have a light and creamy texture with the decadent flavor of Coconut. The butter will make it silky thus melting on your tongue almost instantly.


Ingredients for the Coconut Pastry Cream:
  • Canned Coconut Milk - 1 cup 
  • Egg Yolks - 4 large 
  • Granulated Sugar – 1/3 cup 
  • Cornstarch - 2 tablespoons and 1 and ½ teaspoons 
  • Coconut flavor- 1 teaspoon 
  • Unsalted Butter - 2 tablespoons, cut into pieces
  • Shredded Sweetened Coconut – ½ cup 


Directions:
  • Bring the Coconut Milk up to a simmer in a medium saucepan. 


Tip: It is important to shake the can of coconut milk vigorously before opening it. The fats and liquids separate in the can after sitting. You want a combination of both for the filling, so mix it very well.

  • Use the stand mixer for the next step (if doing manually be ready for some serious whisking):
  • In a separate bowl, whisk the Egg Yolks, Sugar, Cornstarch and Coconut Flavor until blended and pale in color. 


  • Slowly pour in the hot milk while whisking continuously. If doing manually stand in front of a fan and pour the milk very slowly so that the egg doesn’t curdle. 


  • Return the mixture back to the pot and whisk over medium-high heat until thickened, about 3 minutes. Pour the thickened pastry cream through a fine mesh sieve.


  • Stir in the butter until fully melted. 


  • Place a piece of plastic wrap directly on top of the pastry cream, making sure it is touching the surface, and refrigerate until cooled completely. 


  • Stir in the shredded coconut before adding the filling on the cake layers.


Tip:
Refer to my article on Basic Kitchen Measurements to know how to separate the egg yolk from egg white.

Now let’s proceed to the next step - Buttercream Frosting:

Recommended Reading: