Featuring over 350 tried and tested recipes that can be prepared at home. From comfort food to restaurant style. Plus 110+ articles on Kitchen and Cooking Tips, Restaurant Reviews and more.
Showing posts with label Pecan Cake with Rum Frosting. Show all posts

Monday, 1 April 2019

Martha Stewart’s Classic Pound Cake


This year on my birthday, my best friend Neha gave me a baking handbook by Martha Stewart. The book has many delish recipes. I thought I will start with Pound Cake because it has always been one of my favorites.

I am so glad I waited all this time to bake this cake. Since this is from my birthday book, it makes the recipe even special. This recipe makes a perfect pound cake – buttery, moist, dense and every bit flavorful. Unlike many new variations of Pound cake, this recipe uses only six ingredients:
  • Butter: Of course! Butter makes the base of Pound Cake, it’s what makes it rich and delicious. We need properly softened butter. Just keep it outside at room temperature for an hour or so. And don’t forget to use only unsalted butter while baking. This is very important. You don’t want to add extra saltiness in sweet goods.
  • Flour: While many recipes use cake flour for this cake, I have followed the directions of the book and used the regular All-Purpose Flour. Remember, do not substitute flours unless you are sure it can work.
  • Sugar: This is a large cake, but it’s not overly sweet. A balanced amount of sugar helps make the cake sweet but not overwhelming.
  • Eggs: Eggs help the cake to rise, make it open textured and control the density. In short they provide structure to the cake, making it moist, soft and not chewy.
  • Vanilla Extract & Salt: Both are used for flavor.


One Bowl Recipe:
This means that you can do everything in the same mixing bowl so less clean up later on. Just make sure to use a different bowl to crack the eggs. Add them one by one in the mixing bowl after checking for any shells. I think as long as you follow the directions, step by step, without skipping something, you will do fine. Pound cake is not hard to bake, I actually baked this awesome cake the very first time. Yes, the recipe also plays a very important role. 

Baking Time:
The cake will be dense but not at all heavy and the crumb will be soft and smooth. The vanilla induces a mild fragrance and flavor to the cake while the salt cuts any extra sweetness. Keep an eye on the cake as it bakes, if it starts browning too soon, tent the top with an aluminum foil. It may take more than an hour to bake so after 50-55 minutes insert a skewer to check. Keep an eye on it and set small timers. Be very careful not to over-bake the cake because that will result in a dry cake. Every oven has a blind baking spot where the heat is irregular so after an hour rotate the baking pan for an even baking.

Test to check:
Use a long wooden skewer to test if the cake has finished baking. This cake will rise up quite a bit and a toothpick wont be able to go all the way in and check properly. Insert in the center of the cake and continue baking till the skewer comes out clean. If you see moist crumbs but no batter that means the cake is baked through. Remember we will wait for 10-15 minutes for the cake to cool down before turning it up on the wire rack. The cake will continue to cook during this process drawing the leftover heat from the baking pan. So be attentive while testing.


How does Pound Cake get its name?
Traditionally, Pound Cake was prepared by using exactly one pound each of flour, sugar, butter and eggs. I read somewhere that the very first American cookbook called the American Cookery (1796) had the recipe of Pound Cake in it. However, it is said to have come from Northern Europe. If you think how the baking process has evolved since then, it is absolutely amazing. Today there is no limit to what you can do and add in a cake. Like this recipe uses slightly different proportions of the ingredients but the result is every bit rich and delicious. The crumb is soft, buttery and dense and not at all dry or crumbly.

Remember, a plain pound cake can be served with many variations. I read somewhere that Pound Cake can be paired with the following:
  • Macerated Berries (Berries Soaked in Alcohol)
  • Fresh Strawberries, Whipped Cream and torn Mint Leaves
  • Fresh Blueberries and Simple Syrup
  • Vanilla Ice Cream and Chocolate Syrup
  • Sliced Bananas, Toasted Coconut and Honey
  • Sprinkle Some Confectioner’s Sugar on it
  • Or Just Eat Plain!


Try this sweet, dense, and incredibly easy cake and then post in the comments section how it turned out. Serve it:

With Brunch
With coffee
When you have guests coming over
Or just for comfort!

Store Pound Cake:
  • At room temperature, tightly sealed for 3-4 days.
  • In the fridge, in a box for 6-7 days. I recommend cutting the cake into slices.
  • In the freezer for up to 3 months. I recommend cutting the cake into slices, then freezing them in individual zip lock bags. You can also stack them on pieces of parchment paper, then freeze them in a single big zip lock bag.


Makes one 9-by-5-inch loaf
‘This recipe does not contain the traditional pound each of butter, eggs, flour and sugar but its proportions produce the most delicious results.’

Ingredients:
  • Unsalted Butter - 1 ½ cups (3 sticks), room temperature, plus more for pan
  • All-Purpose Flour - 2 cups 
  • Granulated Sugar - 1 ½ cups 
  • Eggs - 6 large 
  • Pure Vanilla Extract - 1 teaspoon 
  • Salt - 1 teaspoon 


Directions:
  • Preheat the oven to 350 degrees F. 
  • Butter a 9-by-5-inch loaf pan; set aside.
  • In a medium bowl, whisk together the flour and salt; set aside.
  • In the bowl of an electric mixer fitted with the paddle attachment, beat the Butter, Granulated Sugar and Vanilla on medium-low speed until light and fluffy, 3-5 minutes, scraping down the sides as needed.


  • Add the eggs, one at a time, beating until combined. 
  • With mixer on low speed, add flour mixture; beat until just combined.
  • Spoon the batter into the prepared pan and smooth with a spatula. 
  • Bake until cake is golden, 50 minutes to an hour or until a skewer inserted in center comes out clean. Tent with aluminum foil if browning too quickly.
  • Transfer to a wire rack to cool, 10-15 minutes. 


  • Turn out the cake onto the rack to cool completely.
  • Cake can be kept at room temperature, wrapped well in plastic, for up to 3 days


Some more cake recipes you may like:

Monday, 20 August 2018

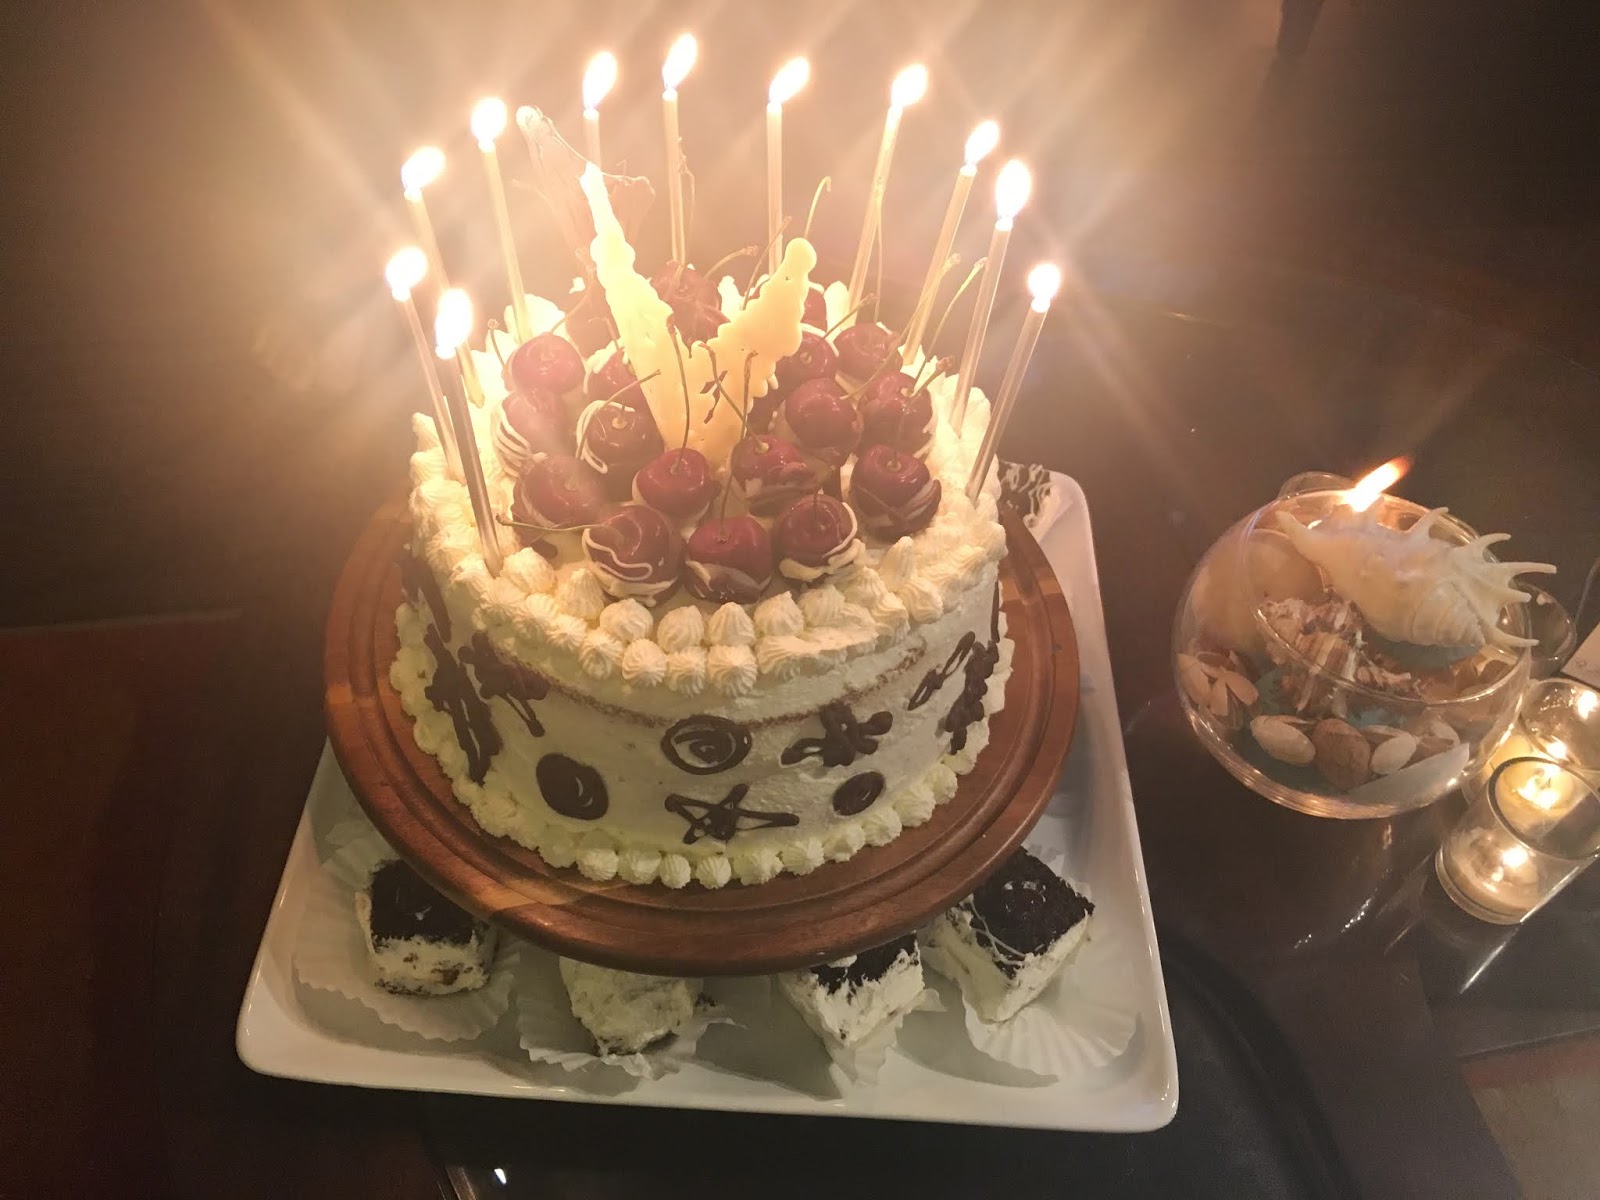
Black Forest Gateau


There is a show on Netflix called ‘The Great British Bake Off’. It features best amateur bakers from all over Britain and every week they are given a baking task. Debarshi and I are huge fans of this show. There are tons of new recipes and ideas with loads of helpful tips and tricks and if you love to bake, I would recommend to watch this show and try some recipes. You will be amazed what all you can do with a good recipe and step by step instructions. 


As you know, I love celebrating birthdays. Well, I don’t worry about mine because that is Debarshi’s department but when it comes to his birthday I try to do whatever I can to make it unique. Last month we were watching this baking show and it featured the Black Forest Gateau cake and immediately both of us said, “Oh! How I miss this cake”. Do you know why? Black Forest is one of the most common cakes sold in Indian bakeries! As I have told you before, you can see a lot of French and German inspired baked goods in any Indian bakery. Now if you are thinking, how is it possible because Black Forest is a boozy cake, then let me tell you, it is very common for the Indian bakeries to prepare and serve varieties of non alcoholic and even eggless cakes. This is done to cater all age groups and dietary preferences.

We also decided to go with a non alcoholic cake so that we can freely share the cake with whoever comes to our home to celebrate Debarshi’s birthday.


For a self taught baker trying new recipes is always fun however, this one turned out quite complicated. I actually had to throw away the first two sponges because they didn’t turn out right!  But I didn’t loose hope and I got it right the second time and I successfully baked the whole cake from scratch. If you have been following my blog, you know that I started this tradition of baking homemade cakes four years back when I baked my first cake from scratch - Pecan cake with Rum frosting for Debarshi’s birthday.


Next year I baked a delectable Chocolate Raspberry Cake with Chocolate Ganache. This is one of Debarshi’s all time favorite cakes and he loves eating the ganache so much that sometimes he asks me just to make some ganache as a dessert.


Last year Debarshi selected a delicious Chocolate Coconut Cake for his birthday. It was loaded with Coconut Pastry Cream and Chocolate Glaze. That cake was again a huge success and not only us but all of our friends absolutely loved it.


This Black Forest Gateau cake is actually the recipe of Mary Berry who is a British food writer. Now let me tell you, just copying the recipe was not enough because almost everything was different in the original recipe. Starting from the oven temperature to the quantity of ingredients to the ingredients themselves. Plus, I wasn’t making the original alcoholic cake so I had to make a lot of changes. I also tried to keep it budget friendly because I don’t like spending extra money for something which can be substituted. But I have to tell you, all that effort really paid off. The very first bite of the cake was so heavenly that I almost cried. I have baked a lot of different types of cakes in the last few years, but to recreate something which both Debarshi and I have had hundreds of times from our local Indian bakeries is sheer happiness. It brought back all those childhood memories and the joy was incomparable. Of course I have to thank all our friends who tasted the cake and liked it. Believe me I felt quite popular that day and above all Debarshi loved it! He loved having this decadent cake baked especially for him for his birthday.


Now whenever you are baking a complicated cake like this one, patience is the key. If you are planning to bake the entire cake in a single day, not only will you get immensely tired but also make silly mistakes. The key is to do one step at a time and that is done by approaching the goal in small steps.

For the convenience of everyone, I have uploaded the steps in separate links so that the images can easily load even on slower connections. I have uploaded photos so hopefully you will have loads of help if you do decide to try this amazing recipe.

Happy baking!


Whenever you decide to bake the cake, start with the Cherry Filling. I used dried cherries and you have to soak them for two days to obtain that delicious juice.


Make ahead:
  • Dip 2 cups of Dried Cherries in equal amount of water (2 cups) in a medium bowl.
  • Cover and refrigerate for 2 days. This will help the cherries to absorb water and they will become soft.
  • Check the packet to see if the cherries have sugar, normally dried fruits have some sugar added in them.
  • Make sure to complete this step before baking the cake layers. The dried fruits need time to soak properly.


Follow the below links to bake, fill and decorate the cake:


Tips:
  • An offset spatula is one of the most useful tools in the kitchen. Use it to stir the melting chocolate and to apply filling and topping on the cake. 
  • When working with Chocolate and whipped cream, work in a cool kitchen otherwise they will melt quickly.
  • You can use Kirsch (the cherry liqueur) or prepare a non-alcoholic version of the cake like I did.
  • Make sure everything is chilled before you start whipping the cream because it will whip better. I always keep my mixer bowl and whisk in the fridge beforehand to chill them before starting.
  • Because of the whipped cream, this cake will not keep very long in the fridge. I would recommend to finish the cake within 2-3 days. Keep the cake inside the fridge at all times. 

Share and enjoy!


Recommended Reading:

Tuesday, 28 November 2017

Easy Pecan Pie


Photo courtesy: Dr. Debarshi Chatterji


Thanksgiving for us means Pecan Pie and lots of good food. As I have mentioned before, it is a thanksgiving tradition for us to go to Vicki and Calvin’s place and enjoy a delicious homemade meal with them. Vicki would prepare a ton of mouth watering southern dishes with the turkey, mashed potatoes and green beans. Victoria would bring homemade bread with cranberry sauce and we usually take an Indian side dish with us. For dessert, Vicki would bake her delicious Pecan Pie and even though we would be totally full by that time, we would enjoy it with them and stuff us till we groan! Yes, that is how we celebrate Thanksgiving with them. They are our family away from home. 

This year since we moved to Kansas City, we couldn’t visit them during thanksgiving and it was definitely a downer for us. Specially for Debarshi, since he had been visiting them for 7 years! So, to cheer up both of us, I decided to bake a Pecan Pie. Now, normally I would go all the way and start from scratch, right from preparing the pie dough. However, this time I decided to go for a shortcut and I should say, it turned out really good. Well, a picture is worth a thousand words so what do you think?


Now this recipe is pretty simple and straight forward. Make the filling, bake the pie, cool it, refrigerate then serve and enjoy! I was a bit uncertain about the result (as I am always with the new recipes) but when we finally ate it, it was delicious! We loved the Pecans and the corn syrup and since the recipe is so easy I am going to bake this again for one of our get together parties. 

If you are a Pecan Pie lover, don’t wait, this delectable pie uses only seven ingredients so try this today!


Ingredients:

  • Granulated Sugar - 1 cup 
  • Light Corn Syrup - 1 cup 
  • Butter - 2 tablespoons, sweet, unsalted, melted 
  • Vanilla Extract - 1 teaspoon
  • Eggs – 3, large
  • Pecans - 1 ½ cups, halves
  • Deep Dish Pie Shell - 1 (unbaked and frozen)


Let’s make the filling: 

  • Mix the Granulated Sugar, Light Corn Syrup, Butter, Vanilla Extract and Eggs together in a bowl. The mixture will be thick so make sure the sugar is mixing well with everything.


Directions to Bake the Pie:
  • Preheat the oven to 350 degrees F. 
  • Pour the pecans in the bottom of the unbaked pie shell. 
  • Pour the syrup mixture over the top.


  • Place the Pie plate on a cookie/ baking sheet. 
  • Bake for about 60 minutes, then gently shake the pie to check if the filling jiggles slightly in the center.
  • Take it out of the oven and place on a cooling rack to cool completely (approximately 2 hours) then refrigerate. 
  • Serve with whipped cream (optional).


Tips: 
  • Spray or grease the cookie pan before placing the pie crust on it. This will help an easier clean up in case the syrup overflows.


Recommended Reading:

Tuesday, 13 June 2017

Pecan Cake with Rum Frosting


Photo Courtesy: Dr. Debarshi Chatterji

I first baked this amazing Pecan cake two years back on Debarshi’s birthday. Back then I didn’t have the stand mixer or the cooling racks so there was a lot of manual labor involved. However, all those efforts sure paid off and the cake turned out awesome! This time I baked it for our 4th marriage anniversary and I made a couple of changes. Needless to say that this time the cake tasted even better. 

This recipe will make a dense cake, dense but flavorful and absolutely delectable. The original recipe says to bake a single layer cake with frosting on top, but this time I baked two layers by dividing the batter into two baking pans. This baked two even thin layers thus reducing the density. I also doubled the amount of frosting and spread half of the frosting between the two layers and spread the remaining frosting all over the cake. This helped infuse moisture in the layers thus making the cake even softer. Once you spread the top layer with frosting go nuts with the remaining pecans and decorate the cake as you like.


My first attempt at the Pecan Cake with Rum Frosting on Debarshi’s birthday (Cake says ‘Happy Birthday Dr. Debarshi’).


I think this cake has a unique flavor because of the Pecan and butter with the hint of Rum. You can taste the Pecan in every bite and if that is not enough for you then eat some mouthwatering frosting. This homemade sweet and buttery frosting makes you take another slice of the cake!

We have also used buttermilk for this cake which will not only balance the overall sweetness but also add another flavor profile in it. Since the cake uses a lot of pecans I would suggest you to ensure before serving that no one is allergic to it. Also, please use good quality pecans. Believe me good quality ingredients greatly improve the taste of the cake.  Remember you will be putting your time and effort in this cake so don’t skimp on small things. 

Prepare the cake whenever you want and enjoy it with your loved ones like I did. 


Ingredients for the Cake:
  • All Purpose Flour – 1 ½ cups
  • Light Brown Sugar – ½ cup
  • White or Granulated Sugar – ½ cup
  • Baking Soda – ½ teaspoon
  • Baking Powder – 1 teaspoon
  • Kosher Salt – ½ teaspoon
  • Buttermilk – ¾ cup
  • Egg – 3, Large 
  • Vanilla Extract - 1 teaspoon
  • Pecan – 1 cup
  • Butter – 1 stick, unsalted, plus more for greasing the pan


Ingredients for the frosting and decoration:
  • Butter - 1 stick, unsalted
  • Pecan – 1 ½ cups
  • Confectioners’ Sugar – 4 cups 
  • Heavy Cream – 4 tablespoons 
  • Dark Rum – 2 teaspoons
  • Vanilla Extract – 1 teaspoon 


Others:
  • Cake Pan – 2 pans of 8 inches each, either square or round
  • Vegetable Oil Spray –optional (for greasing the pan)
  • Parchment Paper 
  • Spatula
  • Cake Stand or a Heavy Big Plate
  • Cooling Racks


Let’s do some prep:
  • First we should do some preparations. So, half an hour prior baking the cake, take out the butter and eggs from the fridge and keep them on your kitchen counter. We are doing this to bring them to the room temperature. This will help them to mix evenly with the other ingredients and also prevent any over mixing of the batter. 
  • Let’s cut the Parchment Paper. Place the Pan on the Parchment paper and draw a circle or square on the outer edge of the pan.
  • Coat the cake pan with the Vegetable Oil spray or butter.
  • Line the bottom with the Parchment paper and spray it again. 


Let’s bake the Cake:
  • Take your food processor or chopper and finely grind/ chop the Pecans (1 cup).
  • Sift all the dry products (All Purpose Flour, Baking Powder, Baking Soda and Salt) in a large bowl and mix the Pecans in it.
  • Preheat the oven to 350°F.
  • If using a stand mixer, attach the whisk and beat the Butter (1 stick) with the Light Brown Sugar and White or Granulated Sugar until its light and fluffy about 5-6 minutes. 
  • Beat in the eggs one by one. 
  • Gradually add the Pecan mixture in the bowl and mix until just combined.
  • Add the Buttermilk and the Vanilla Extract (1 teaspoon) and stir.
  • Transfer the batter into the prepared pans and place in the oven.
  • Bake until golden brown, about 20-22 minutes. I use a tooth pick to check if the center has been cooked. Very carefully insert the toothpick into the center and pull it out. If the toothpick comes out clean, the cake is ready, otherwise, cook for a couple more minutes and don’t forget to use the timer every time.
  • Now whenever the toothpick comes out clean, it’s time to take out the cakes from the oven. I recommend slightly pulling the rack outside the oven so that we can get a better grip while holding the hot pans. 
  • I usually wait for about 5-10 minutes, then remove the cake from the pan (I run a short knife around the edges to release the cake) and invert it on the cooling rack. This ensures the cake does not have a soggy bottom.
  • Peel the parchment paper.


Time to assemble the yummy Cake and decorate it with Frosting and Pecans:
  • All right, do you have a cake stand? If no, then use a heavy big plate. If yes! Awesome!
  • Touch the cake with your finger. If it’s still warm then you will have to wait, if it has cooled down then you are ready. Remember the frosting will melt away if the cake is warm.
  • If you want to trim the cake this is the perfect time to do it. I didn’t do anything special for this cake. I wanted it to look homemade.
  • Wash the whisk and the bowl of the stand mixer. Use a paper towel to dry it completely. 
  • Beat the Butter (1 stick), Confectioners’ Sugar and the Heavy Cream until fluffy.
  • Add the Dark Rum and the Vanilla Extract (1 teaspoon) and mix everything together.
  • Your Frosting is ready, now pour a little less than half of the Frosting over the cake and pay special attention to those areas where you want to have an even shape. Spread it evenly with a spatula.
  • Sprinkle a couple of chopped Pecans on top of it.
  • Very carefully place the second layer of the cake on top of this frosted layer.
  • Pour the remaining Frosting on it. Spread it evenly with the spatula over top and sides for an even coverage and to smooth the edges. I used a fork to draw some lines all over the frosting. 
  • You may chop all the remaining Pecans and sprinkle on top of the cake or you can decorate with a few full pieces and chop a few, whatever you feel like doing.
  • Cover the cake with the cake dome and place it in the fridge till you are ready to serve. 


Tips:
  • You can grease the pans either with butter or canola oil.
  • You can of course use artificial rum flavoring for the frosting or skip it altogether and just use the vanilla extract. You can find Rum flavoring in the baking aisle of any grocery store.


  • While baking the cake, do not forget to start a timer and keep an eye on it.
  • It’s important to keep a space all cleared out for transferring the hot pans from the oven. I usually transfer them on the kitchen counter.
  • Do not skip the cooling rack step otherwise the cake bottom will become soggy.
  • Kids love to bake or help you in small things. You can ask them to help you mix or spread the Frosting. Afterwards they can have the spatula with the bowl to lick and enjoy. However, you may not want to hand them over the frosting mix (if you are using Rum).
  • Cover the cake with the cake dome whenever you are keeping it in the fridge. The dome prevents any mishaps and also blocks any unwanted smells.
  • Remember that the baking time will change if you are changing the pan size. So keep an eye on it.
  • It’s always better to break the egg in another bowl before adding it to the batter. Egg shells don’t taste very good in a yummy cake.
  • Keep paper towels handy for an easier clean up.


Recommended Reading:

Wednesday, 24 August 2016

Remember the characteristics of a good quality Cake


  • A good quality cake should be moist but not too wet so make sure your layers are not dry by over baking and not under cooked. Use a tooth pick to check if the center has been cooked thoroughly.
  • Maintain a good texture. If you want to trim the sides do it with a sharp knife, else the smooth Ganache should be able to cover all the sides and bring a nice smooth texture.
  • If the cake batter has been mixed perfectly it should bring a consistent color all through the cake.
  • Smell the cake. If you feel it has a slight burning odor, then I am sorry you will have to bake it again. It is a bit difficult to judge the baking time as Chocolate has a dark color so keep checking and use short timers.
  • Place the flat bottom sides in the middle on top of each other to have the perfect balance between the layers.
  • Make a huge cake so that you can share it with everyone you love.
  • Make it look attractive, do not be afraid of improvising. Add fruits, Chocolate, edible decorations etc.
  • Read through the entire recipe and all the tips. Keep all the ingredients and tools at hand.
  • Pre-heat the oven before you start mixing the wet and dry ingredients together. Do not let the batter sit at room temperature for too long. Prepare the pans in advance.
  • Do not skip the step where you need to cool the cake layers on a cooling rack. This will make the bottoms soggy.
  • Use fresh eggs. 
  • Cool the layers thoroughly before adding the Ganache on it.
  • If the recipe calls for butter do not substitute it with oil or any other form of butter (example: Spreadable butter).

Recommended Reading: