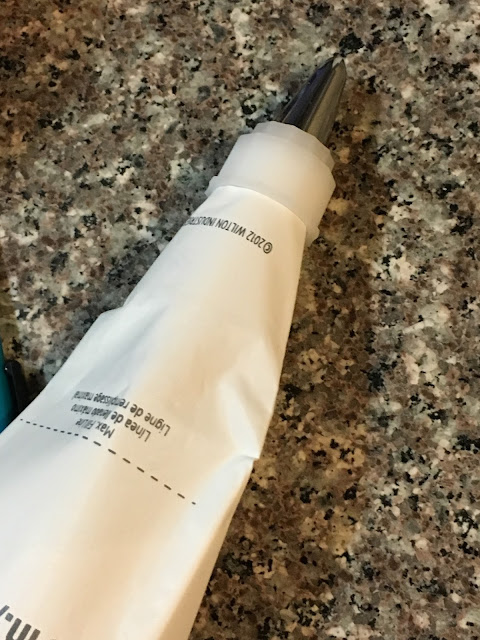
So before we start assembling the Piping Bag, let me tell you what it is. A Piping Bag also known as a Pastry Bag or Decorating Bag is a cone or triangular shaped bag. You can easily find a plastic Piping Bag which you can wash and reuse. You may also choose to use a disposable bag which is good only for a single use. A Piping Bag comes handy when you want to decorate or fill your baked products. It has a wider opening at the end (used to fill the frosting or filling) and a narrow opening at the front (through which the piped product comes out). Personally I used to think that using a Piping Bag will be a hassle but actually it isn’t and once you get a hang of it, you will be amazed at its versatility.
Now buying a Piping Bag is not enough because you also have to buy the Decorating Tips and Couplers. But don’t worry because they mostly come in a set and you can easily find them at Walmart or most grocery stores (Baking aisle). Being a novice myself, I had to go through several articles just to understand how the whole thing works and to make things easier for you I am going to guide you step by step.
Different types of Decorating Tips
A Piping Bag, Tip and two-piece Coupler
A Coupler is a two-part device, the longer part (the Base) goes inside the bag and the shorter part (the Ring) gets attached with the Tip. This helps us to change the Decorating Tips without changing the bag.
To assemble the Piping Bag:
- Remove the Ring from the Coupler Base.
- Drop the Coupler Base, narrow end first, into the bag and push it down as far as you can.
- Using a pen, mark a spot on the outside where the Base ends. This will cut any extra plastic and create a better flow for your piping.
- Remove the Coupler Base and cut the bag at the mark you just made.
See above? The marked area of the bag needs to be cut because it is extra and will obstruct the flow. I do recommend getting a good quality Piping Bag so that you can wash and reuse it. That way you wont have to repeat these steps the next time you are piping.
- Now push the Coupler Base down the Piping Bag and attach the Ring with the Tip on the front of the bag. Twist to lock the Tip. Your Piping Bag is ready.
- Now let’s make our Chocolate Whipped Cream Frosting.
Tips:
- I like using a Ring and Base Coupler because it gives me the flexibility to change the Tip whenever I want. I can do some designs with the Plain Tip and then change the Tip to create a different design. All I have to do is unscrew the Ring, change the Tip and lock it back.
- It is important to choose the right type of Tip because it will help you to pipe easily. I am still a beginner so I just pipe the basic designs. Once you get a little used to, you can pretty much do anything using different Tips. Sky is the limit!
To fill the Piping Bag:
- Place the Piping Bag in a glass so that the Tip is balanced.
- Using a rubber spatula or wide spoon, scoop up your filling and fill it in the bag. Do not overfill. Scrape off any extra filling.
- Once you have filled the bag, push all the filling carefully towards the Tip of the bag and twist it where the filling starts. This will give a better pressure on the Tip and also keep the top part closed.
- Before starting on your baked product, try doing a test round in the bowl of the filling. This will push out any unexpected air bubbles and also give you a better idea of the pressure you will be applying to pipe.
- Always hold the bag at the place where you twisted. This will help you to push all the filling smoothly towards the Tip while avoiding any spill from the open end.
- Don’t be afraid if the piping doesn’t turn out that good. Remember practice makes you perfect. Just keep your hand steady and keep the Piping Tip a bit above the surface you are piping, on a perpendicular angle. That will help it flow easily.
- Apply pressure steadily and slowly. When you are done piping stop applying pressure and lift the Tip up.
- If you need to pause in the middle of piping, place the bag in a tall glass. That way the filling wont spill and it will be easier to pick up the bag again.
- I have a small Piping Bag because I don’t bake huge cakes normally. You can buy a bigger one although I feel smaller bag is easier to manage at a beginner level.
- Use a turn table to pipe your cake so that it moves smoothly and does not break your piping.
- Once you are all done with your piping, cover your cake with the cake dome and place it inside the fridge.
The cake is now ready to be served!
Recommended Reading:


#lifewithoutalu #homemade #delicious #greattaste #bake #baking #bakingfromscratch #bakinglove #bakingrecipes #bakingtime #cake #cakes #cakesofinstagram #cakestagram #cakecakecake #cakelover #cakelove #cakeinspiration #cakelife #recipeontheblog #pipingbag #decoratecake #cakedecorating #cakedecoration
ReplyDelete