Featuring over 350 tried and tested recipes that can be prepared at home. From comfort food to restaurant style. Plus 110+ articles on Kitchen and Cooking Tips, Restaurant Reviews and more.
Showing posts with label French Paratha. Show all posts

Wednesday, 23 May 2018

How to re-use the leftover dough


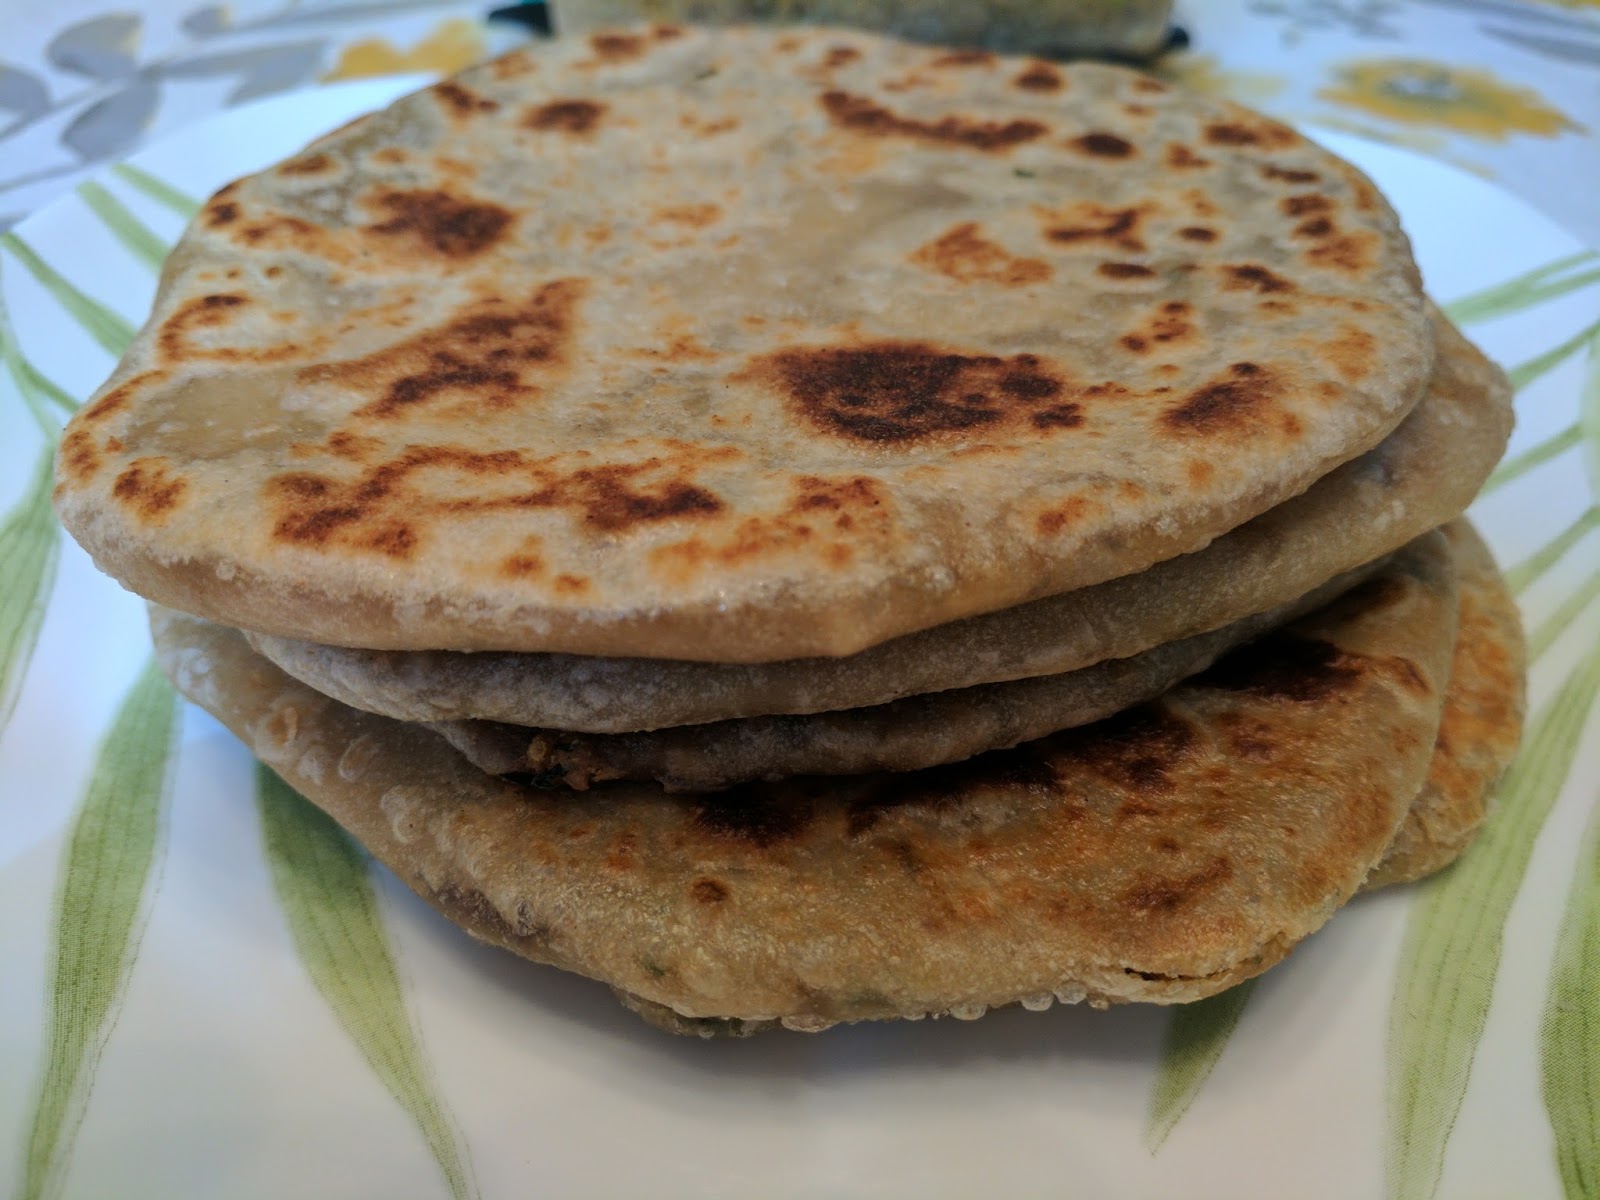
Photo Courtesy: Dr. Debarshi Chatterji

(Thanks to Ishita di and Joyeeta di for sharing this wonderful idea with me.)

I love making Luchi and Parathas from scratch. I make them on weekends, special occasions, while inviting guests and it often happens that I am left with a lot of dough. This usually leaves me with only one option, use up all the dough by making extra breads (Luchi or Paratha). Once they are ready you can either consume them within the next few days or freeze them. In order to freeze the breads, I cool them completely then pack them up in aluminum foils and zip locks. Then, whenever we feel like eating them, I keep them for a few hours in the fridge or about 20 minutes at room temperature. It is really easy to warm them up on the stove top or in the microwave and then you can enjoy them with any curry or Sabji. While this option works well, it also means that after laboring in the kitchen the whole day and entertaining guests, I have to spend additional time in the kitchen to prepare breads which will be consumed later. Earlier I didn’t know what else to do with the leftover dough, however recently, I came to know that we can just freeze it! I tried this and it worked so well that I thought of sharing this with you.


Suppose you have some leftover dough (now don’t go for this option for small amounts of dough, I follow this only if it is more than a cup), first divide the dough into two or three parts (depends on how much you have left, small portions are best to freeze) then put the dough in a zip lock bag, seal it and place it in the freezer. When ready to use, keep it outside at room temperature for two- three hours so that it gets properly thawed, then roll and fry the Luchis or Parathas. Make sure that your dough fits properly in the zip lock bag and there is no air inside it. Roll the bag and secure the lock so that maximum air is pushed out. You can also use parchment paper to divide the dough into portions or use smaller bags for easy access.


A Luchi/ Paratha dough will usually have a really good amount of moen (oil) in it. You can also use it to prepare some Namkeens. I took the recipe from my mom and prepared a test batch with it. It was a success and the next time I prepare it, I will make sure to click some photos and share the recipe with you.

Tip:
  • It is always good to write on the zip locks exactly what you are freezing, especially when you are doing it in portions. You can write ‘Dough for Paratha, Bag 1 of 3’ and so on.


Recommended Reading:

Monday, 20 November 2017

Debarshi’s Alu ka Paratha (Fried Bread stuffed with Potatoes)


Photo and Recipe courtesy: Dr. Debarshi Chatterji

In our home, Paratha department belongs to Debarshi and whenever I crave for a crispy hot Paratha I just request him. I guess I got into this Paratha routine when I was living in Delhi and used to eat a Paratha almost everyday! So this weekend I requested for Alu Parathas and this time I followed Debarshi around the kitchen and took the recipe. As I have mentioned earlier, Debarshi never measures his ingredients, he decides on the spot what all he needs to add to create a lip smacking taste and hence it is natural that every time his recipe is slightly different. Well, these Parathas were amazing and hence I think this is the perfect recipe for me to share.

I think cooking is one of the best ways to show your loved ones how much you care for them. However, this does not necessarily mean that you have to jump in the kitchen and toil for hours. Sometimes just being around is also a great way to spend some time together. Growing up, I have seen my parents doing just this thing. Every evening my dad would sit on a chair just outside the kitchen while my mom cooks and they would talk and share with each other about their day and what all they did. Last year when I went home, I saw them doing the same thing and this brought a smile on my face because now I know that this is their way of spending some quality time together every day.


Well, I have my own way of spending time with Debarshi while he cooks. I assist him in small things like chopping the onion or by making a ginger, garlic, tomato paste (while he prepares his gourmet mutton curry). I help to find him the spices and clean up after him. Since he only has to cook the food, he really enjoys his time in the kitchen and once the cooking and eating part is over I take charge and clean everything up. So you see, by working together we not only enjoy our time in the kitchen but also turn a regular weekend meal to something special. 

Winter and holidays are the perfect time to enjoy these Parathas so give them a go this weekend and don’t forget to chat, laugh and have a merry time with your spouse/ partner.

Bon Appetit!


Ingredients for the filling:
  • Potato –1 ½ big russet potatoes, cut in halves
  • Salt – about 2 pinches (for boiling the potatoes) + about ½ teaspoon (taste and adjust accordingly in the filling)
  • Oil – 4 tablespoons
  • Onion – ½ of a big onion
  • Green Chilies - 2-4
  • Garlic – 3-4 cloves
  • Cilantro – about ½ cup chopped
  • Cumin Powder – ½ teaspoon
  • Red Chili Powder – ¼ teaspoon
  • Garam Masala – ½ teaspoon
  • Amchur – ½ teaspoon


Ingredients for the dough:
  • Whole Wheat Flour – ½ cup
  • All Purpose Flour – 1 ½ cup for dough + about ½ cup for rolling the Parathas
  • Salt - ½ teaspoon 
  • Oil – 4 tablespoons (to be used while kneading the dough) + plus 2-3 tablespoons for frying the Parathas


Some preparations first:
  • It’s time to take out the pressure cooker. Wash the potatoes and put them in the pressure cooker with enough water (normal tap water) to cover it.
  • Add 2 pinches of Salt and attach the rubber and the whistle on the lid and cover the cooker.
  • Heat the cooker on medium heat and wait for 2-3 whistles.
  • Turn off the heat and let it cool down.
  • Once the pressure drops and the lid opens, remove the potatoes from the cooker and transfer to a colander or a sieve so that all the water drains out and they can cool and get dry a bit.
  • Allow 5-10 minutes then touch cautiously to check if the potatoes are cool enough to handle.
  • Peel the potatoes (carefully certain spots may still be hot).
  • Now take the Onion, Green Chilies and Garlic and chop them finely. Use your food chopper for this step.
  • Next, chop the Cilantro as well.


Directions for kneading the dough:
Note: I am using the stand mixer. If kneading by hand, mix and knead for a good enough time to develop the gluten properly. Refer to my article on Tandoori Roti.

  • Add the Whole Wheat Flour, All Purpose Flour, Salt and Oil (4 tablespoons) in the bowl.
  • Attach the Whisk and give them a whir on the lowest speed until well blended.
  • Now we start the kneading, attach the hook and start the mixer on the lowest speed and slowly start adding half a cup of water in the flour. I give it time to knead and form the dough. If the sides are sticking with the bowl too much I switch off the mixer and clean the sides using a spatula.
  • I keep it running until the dough begins to come together adding a tablespoon of water at a time.
  • At this stage it will look dry, normally for 2 cups of flour 1 cup of water will be sufficient so make sure not to add too much water at this stage. Keep running the mixer.
  • Now sometimes the dough turns out a bit stickier, I usually add a little flour and keep kneading it until it’s smooth and almost non sticky.
  • Remove the hook and cover the bowl. Let the dough rest while we prepare the filling.


Tip: Use lukewarm water for a smooth soft dough.

Let’s prepare the filling:
  • Mash the boiled potato. You can use a potato masher or even your hands to remove any lumps (let it cool down if using your hands).

  • Heat a wok over medium high heat.
  • Add about 4 tablespoons of Oil in it.
  • Add the Onion, Garlic and Green Chili in the wok and fry them till they are golden brown in color (frying softens the onions and helps it to mix well with the mashed potato).
  • Add the mashed Potato in it and mix well.
  • Fry the mixture for a while then start adding the spices (Salt, Cumin Powder, Red Chili Powder, Garam Masala and Amchur). Mix everything well and fry the whole mixture on medium heat for about 15 minutes. 
  • Add the Cilantro, mix well and fry for another 5 to 10 minutes.
  • Allow the filling to cool down a bit.
  • The prepared filling will look like below. Now lets’ fry the Parathas.


Directions to roll the Parathas:
  • Let the filling cool down a bit so that it’s easier to handle.
  • Apply some oil on the rolling pin and board.
  • Re-knead the dough for a few seconds. Then divide the dough into two equal parts. Roll each part into a log like a thick breadstick. Divide both the logs into 8 equal pieces. 
  • Now these 8 pieces will make 8 Parathas. Take a piece of dough between your palms and roll it into a ball. Put all the other balls of dough back in the bowl and cover it. This will prevent the dough from drying out. This stuffed Paratha will be thick so there should be enough dough in each piece to form a cup so that we can put the Filling inside it. 


  • Now take a piece of dough and roll it with both your palms. Press the dough roll with both your palms and start flattening the edges, the trick is to keep the edges thin and the center thick.
  • Put about 2 tablespoons of the filling in the center of this dough cup. 


  • Carefully pull the edges together to close it and make a crown on top, it will look like a garlic head.


  • Press the ball between your palms lightly to flatten it a little like a disc. Do the same with all the dough balls. Fill them up with the Filling and close the edges and flatten them like discs.


  • Dip that disc of dough lightly into the All Purpose Flour. This will give it a smoother texture. Place the disc on the rolling board and start rolling it. Debarshi usually spreads a little flour whenever the dough starts to stick on the board and rolls it into a round shape with even thickness on all sides. 
  • Roll the Parathas very gently so that the filling does not breaks out.
  • It takes some time and experience to measure the filling. It may break out or not spread evenly.
  • Have patience, it will still taste good. 


Tip: Start from the center and roll the rolling pin over the dough using a light but even pressure. Turn the dough over and add more flour whenever necessary. Try to smooth all the edges and maintain an even thickness.

Now let’s fry the Parathas:
  • Heat a big skillet over medium high heat. Transfer the rolled out Paratha to the pan and do this carefully. Lift the Paratha with both hands and place it on the skillet. If it folds while placing, carefully straighten it using a spatula. 
  • After a couple of seconds, you will see bubbles forming on the Paratha. The texture will look dry this means that the underside of the Paratha is now cooked and ready to be flipped. Flip it using a flat spatula and use a brush to apply Oil on the Paratha. Flip it again and let it cook for about 30 seconds. 

  • In the meantime, apply oil on the other side as well and flip it again. The Paratha will start puffing up. If it doesn’t, press onto the Paratha with your spatula on different places for 5-10 seconds.
  • Flip the Paratha back over and press the other side with your spatula for a few seconds.
  • Turn the heat down to medium low.
  • Transfer the cooked Paratha on a plate lined with paper towel or aluminum foil.
  • Serve the Paratha hot with Pickles, Onion Rings and a dollop of butter.


Recommended reading:

Tuesday, 16 May 2017

Kabiraji Paratha (Fried bread stuffed with Potatoes and Egg)


Photo and Recipe courtesy: Dr. Debarshi Chatterji


Kabiraji means frying fish or chicken cutlets (thin slices of meat) in a batter of egg. This recipe is however, a different version of Kabiraji. You see, a few weeks ago, I asked Debarshi for some simple Alu Paratha but when he boiled the potatoes, he asked me if I would like to try something new. I said, yes! why not? and hence he came up with this recipe. 


Debarshi prepared Potatoes and Egg Paratha and named it Kabiraji. The preparation is very similar to the French Parathas but the part where we cook the eggs is different so I will recommend you to read the entire recipe before starting.

Also, once you prepare and enjoy the yummy Parathas don’t forget to use the leftover Pur (stuffing) to prepare the yummy Pakoras (fritters).


Ingredients for the Pur (stuffing):
  • Potato –1 big russet potato, cut in half
  • Salt – about 2 pinches for boiling the potatoes + ¼ teaspoon for frying the eggs + about ½ teaspoon for making the Pur
  • Eggs – 3, large
  • Oil – 2-3 teaspoons (for frying the eggs) + 4 tablespoons (for making the Pur)
  • Onion – ½ cup, finely chopped
  • Green Chilies - 2-4
  • Cumin Seeds – 1 teaspoon
  • Cilantro – about ½ cup chopped
  • Cumin Powder – ½ teaspoon
  • Red Chili Powder – ¼ teaspoon
  • Coriander Powder – ½ teaspoon
  • Garam Masala – ½ teaspoon
  • Amchur – ½ teaspoon


Ingredients for the dough:
  • Whole Wheat Flour – 1 cup
  • All Purpose Flour – 1 cup
  • Salt - ½ teaspoon 
  • Oil – 4 tablespoons (to be used while kneading the dough) + plus 2-3 tablespoons for frying the Parathas


Let’s do a little prep:
  • It’s time to take out the pressure cooker. Wash the potato and put it in the pressure cooker with enough water to cover it.
  • Add 2 pinches of Salt in it.
  • Attach the rubber and the whistle on the lid and cover the cooker.
  • Heat the cooker on medium heat and wait for 2-3 whistles.
  • Turn off the heat and let it cool down.
  • Once the pressure drops and the lid opens, remove the potato from the cooker and place it in a bowl filled with ice.
  • Allow 5-10 minutes then touch cautiously to check if the potato is cool enough to handle.
  • Peel the potato (carefully certain spots may still be hot).


Let’s fry the eggs:
  • Heat a skillet over medium heat and add 2-3 teaspoons of oil in it.
  • Add the eggs in it one by one.
  • When the eggs begin to set, sprinkle the Salt (¼ teaspoon) and gently pull the eggs across the pan with an inverted spatula, forming large soft curds. Continue cooking – pulling, lifting and folding eggs – until it is thickened and no visible liquid egg remains. Do not stir constantly. 
  • Remove from heat and transfer to a plate.


Tips: 
  • Keep the eggs soft, do not over fry them. See the below photo? This is how they should look.
  • Make sure you are not dropping any egg shells in the skillet. If you are having trouble, use a small bowl. Crack each egg into the bowl, check for shell fragments, then pour it into the pan. This is also a great way to make sure that we are not using any rotten eggs.


Directions for kneading the dough:
  • Add the Whole Wheat Flour, All Purpose Flour, Salt and Oil (4 tablespoons) in the bowl.
  • Give them a whir on the lowest speed until well blended.
  • Now we start the kneading, attach the hook and start the mixer on the lowest speed and slowly start adding half a cup of water in the flour. I give it time to knead and form the dough. If the sides are sticking with the bowl too much I switch off the mixer and clean the sides using a spatula.
  • I keep it running until the dough begins to come together adding a tablespoon of water at a time.
  • At this stage it will look dry, normally for 2 cups of flour 1 cup of water will be sufficient so make sure not to add too much water at this stage. Keep running the mixer.
  • Now sometimes the dough turns out a bit stickier, I usually add a little flour and keep kneading it until its smooth and almost non sticky.
  • Remove the hook and cover the bowl. Let the dough rest while we prepare the Pur (stuffing).


Tip: 
  • Use lukewarm water for a smooth soft dough.


Let’s prepare the Pur (Stuffing):
  • Mash the boiled potato and the egg together. You can use your hands to remove any lumps (let it cool down before using your hands).


  • Heat a wok over medium high heat.
  • Add about 4 tablespoons of Oil in it.
  • Add the Cumin Seeds and let them sputter.
  • Add the Onion and Green Chili in the wok and fry them till they are golden brown in color (caramelizing the onion ensures that it mixes well with the mashed potato and egg).
  • Add the mashed Potato and egg in it and mix well.
  • Fry the mixture for a while then start adding the spices (Salt, Cumin Powder, Red Chili Powder, Coriander Powder, Garam Masala and Amchur). Mix everything well and fry the whole mixture on medium heat for about 15 minutes. 
  • Add the Cilantro, mix well and fry for another 10 to 15 minutes.
  • Allow the Pur to cool down a bit.
  • The prepared Pur will look like below. Now lets’ fry the Parathas.


Let’s do a little prep:
  • Re-knead the dough for a few seconds. Then divide the dough into two equal parts. Roll each part into a log like a thick breadstick. Divide both the logs into 6 equal pieces. 
  • Now these 6 pieces will make 6 Parathas. Take a piece of dough between your palms and roll it into a ball. Put all the other balls of dough back in the bowl and cover it. This will prevent the dough from drying out. This stuffed Paratha will be thicker than the Methi Saag Paratha or Plain Paratha so there should be enough dough in each piece to form a cup so that we can fill the Pur inside it. 


  • Now take a piece of dough and roll it with both your palms. Press the dough roll with both your palms and start flattening the edges, the trick is to keep the edges thin and the center thick. Put about 2 tablespoons of the Pur in the center of this dough cup. 


  • Carefully pull the edges together to close it and make a crown on top, it will look like a garlic head.


  • Press the ball between your palms lightly to flatten it a little like a disc. Do the same with all the dough balls. Fill them up with the Pur and close the edges and flatten them like discs.


  • Dip that disc of dough lightly into the All Purpose Flour. This will give it a smoother texture. Place the disc on the rolling board and start rolling it.
  • I usually spread a little flour whenever the dough starts to stick on the board and roll it into a round shape with even thickness on all sides. 
  • Roll the Parathas very gently so that the stuffing does not break out.
  • It takes some time and experience to measure the stuffing. It may break out or not spread evenly. Have patience, it will still taste good. 


Tip: 
  • Start from the center and roll the rolling pin over the dough using a light but even pressure. Turn the dough over and add more flour whenever necessary. Try to smooth all the edges and maintain an even thickness.


Now let’s fry the Paratha:
  • Heat a big skillet over medium high heat. Transfer the rolled out Paratha to the pan and do this carefully. Lift the Paratha with both hands and place it on the skillet. If it folds while placing, carefully straighten it using a spatula. 
  • After a couple of seconds, you will see bubbles forming on the Paratha. The texture will look dry this means that the underside of the Paratha is now cooked and ready to be flipped. Flip it using a flat spatula and use a brush to apply Oil on the Paratha. Flip it again and let it cook for about 30 seconds. 


  • In the meantime, apply oil on the other side as well and flip it again. The Paratha will start puffing up. If it doesn’t, press onto the Paratha with your spatula on different places for 5-10 seconds.
  • Flip the Paratha back over and press the other side with your spatula for a few seconds.
  • Turn the heat down to medium low.
  • Transfer the cooked Paratha on a plate lined with paper towel or aluminum foil.
  • Serve the Paratha hot with Pickles, Onion Rings and a dollop of butter.


Recommend Reading: 

Tuesday, 5 July 2016

French Chops


In my previous article on French Paratha, we talked about reusing the Pur (stuffing) to prepare French chops. For those who have not been able to read that article, let me tell you some major pointers:


  • French Paratha is a stuffed fried bread prepared by Debarshi.
  • The stuffing is a Potato and Chicken mash with Indian spices.
  • The Paratha is a very good brunch option for the entire family.


Now, if you already have some Pur left then you can proceed to the directions. For those who are trying this the first time, you will need the following ingredients and the directions to prepare the Pur. 


Ingredients:
  • Potato – 1 pound (about 1 big Russet Potato), washed, boiled and mashed
  • Ground Chicken – 1 pound
  • Red Onion – 1 medium, finely chopped
  • Green Chilies – 2-3, finely chopped
  • Garlic – 5 -6, minced
  • Ginger – 1 ½ inch, minced
  • Oil – 4-5 tablespoon, plus 2-3 cups for deep frying the chops
  • Cumin Powder - 1 heaped teaspoon
  • Garam Masala – ½ teaspoon
  • Red Chili Powder – ½ teaspoon
  • Salt - to taste (about 1 teaspoon)
  • Meat Masala - 1 heaped teaspoon
  • Amchur - 1 heaped teaspoon
  • Cilantro – a handful (chopped)
  • Egg – 1, lightly beaten
  • Breadcrumbs – about 2 cups


Let’s prepare the Pur:
  • Heat a wok over medium high heat.
  • Add about 4-5 tablespoons of Oil in it.
  • Add the Onion, Garlic, Ginger and Green Chili in the wok and fry them till they are golden brown in color. 
  • Add the ground Chicken and mashed Potato in it and mix well.
  • Fry the mixture for a while. When the Potato and Chicken are half done start adding the spices (Cumin Powder, Garam Masala, Red Chili Powder, Salt, Meat Masala, Amchur and Cilantro). Mix everything well and fry the whole mixture. The prepared Pur will look like this: 


Let’s prepare the Chops:
  • Let the prepared Pur cool down a bit so that it is easier to handle.
  • Mold small balls of the Pur. I always use my hands for this step. 
  • Press it lightly to form a patty like shape and place it on a plate. Follow the same step for all the balls.
  • Keep an oven safe dish on the kitchen counter near the gas oven and line it with a paper towel.
  • Keep the Egg (in a small bowl) and the Breadcrumbs (in a shallow plate).
  • Dip the patty in the Egg and let the extra drip off.
  • Lay it in the Breadcrumbs and scoop some over to cover the top. Gently press the patty on the crumbs so that it is covered on all the sides. Then set it on a plate. Repeat these steps for all the patties.
  • We are now ready to fry the Chops.


Directions for frying the Chops:
  • Heat a wok on medium high heat (You can also use a deep fryer).
  • When the oil is hot enough to fry, carefully start adding the patties in the oil. Do not place too many patties in the oil all at once as the temperature of the oil will drop and the patties will become greasy.
  • Fry for a minute or two per side till both the sides are brownish red in color.
  • Carefully remove with a spider spoon and place in the dish.
  • Serve with some Dhania Chutney and hot Tea.


Recommend reading: