Featuring over 350 tried and tested recipes that can be prepared at home. From comfort food to restaurant style. Plus 110+ articles on Kitchen and Cooking Tips, Restaurant Reviews and more.
Showing posts with label Debarshi’s Alu ka Paratha (Fried Bread stuffed with Potatoes). Show all posts

Wednesday, 12 September 2018

Loknath wali Meethi Lassi (Sweet Yogurt based drink)


Photo and Recipe Courtesy: Dr. Debarshi Chatterji


I think amidst the mock tails and varieties of smoothies and iced coffees, Lassi is a welcome respite. You will be surprised to know that all that delicious flavor comes at a very little effort and money. It is indeed healthier than the fancy sugar loaded drinks and creates a very homely even rustic impression. Lassi is assured to make everyone happy with its creamy yummy flavor. If you are organizing a little summer party for your friends, there can be nothing better than a refreshing glass of lassi. Plus, it also goes very well with any hot and spicy dishes because it instantly soothes your mouth. 


(Photo features: Lassi with Debarshi’s Amuse Bouche)


As I wrote in my article ‘Lassi and Namkeens of Loknath’, lassi is a drink prepared with yogurt, sugar and rose water. It is sometimes also served as a savory drink or flavored with fruits and nuts and speaking of nuts, I am absolutely nuts for this drink. I love yogurt! and this is ‘The Perfect Summer Drink’ for me. As soon as you lift the glass, a hint of rose water fills up your senses and the very first sip is so relaxing and cool that it just makes you forget all the heat and sun. It works wonders believe me.


I think Lassi tastes absolutely divine and silky on the tongue. Its consistency is thick somewhere between milk and a milkshake. I am sure there are hundreds of version of this delicious beverage but somehow I always love the Lassi served in the Loknath Gali of my hometown (Allahabad) where it is served in a clay cup and topped with a layer of heavy cream (Rabri). Lassi is best enjoyed with snacks (like Samosas and Chaat) or after a heavy lunch (Chole Bhature or yummy Parathas). Because of its easy preparation it is widely sold in almost all the restaurants in Northern India. 


Lassi is also a great way to use up any leftover yogurt. If you don’t have any rose water, try adding some fruit in it for flavor. Debarshi prepared strawberry lassi for our recent get together party and it tasted really good. A cool glass of lassi on a hot summer afternoon is an absolute bliss and if you have also faced the wrath of sun on a humid day you will know what I am talking about.


My mom prefers to make yogurt at home because it is economical and fresher than the store bought ones however, I prefer to get a fresh yogurt container from a good grocery shop (saves time) and you can of course opt any method you seem fit. 

So try this creamy sweet drink today and let me know how it turns out. 


Ingredients:
  • Plain Yogurt - 1 ¾ cups 
  • Ice - 6 cubes, crushed 
  • Ice Water - 1 ½ cups 
  • White Sugar - 2 teaspoons 
  • Salt - 1 pinch 
  • Rose Water – a splash

For garnish (optional):
  • Whipped Cream – 1 cup
  • Pomegranate Seeds – 3-4 tablespoons
  • Mint Leaves – a handful, washed

Directions:
You don’t need a stand mixer or hand mixer for this. Lassi can be easily prepared by using a big whisk. It wont even take a lot of time to blend everything together. However, if you are preparing quite a few glasses a gadget (like a stand mixer or hand mixer) will definitely help.
  • Whisk the Yogurt and Ice Water together. 
  • After 2-3 minutes, add the Sugar and Salt. 
  • Mix the crushed Ice and Rose Water. 
  • Continue whisking till the mixture looks frothy and creamy. 
  • Pour the Lassi in tall glasses and enjoy.

To garnish:
  • Pipe the whipped cream on the cool Lassi and sprinkle some Pomegranate Seeds over it. Stick a Mint Leaf in the cream and voila!


Tips:
  • Refrigerate and enjoy the cool Lassi for up to 24 hours.
  • Substitute Sugar with Truvia or Splenda and enjoy this delicious drink with low calories.


Recommend Reading:

Monday, 4 December 2017

Indian Salad


Photo and recipe courtesy: Dr. Debarshi Chatterji

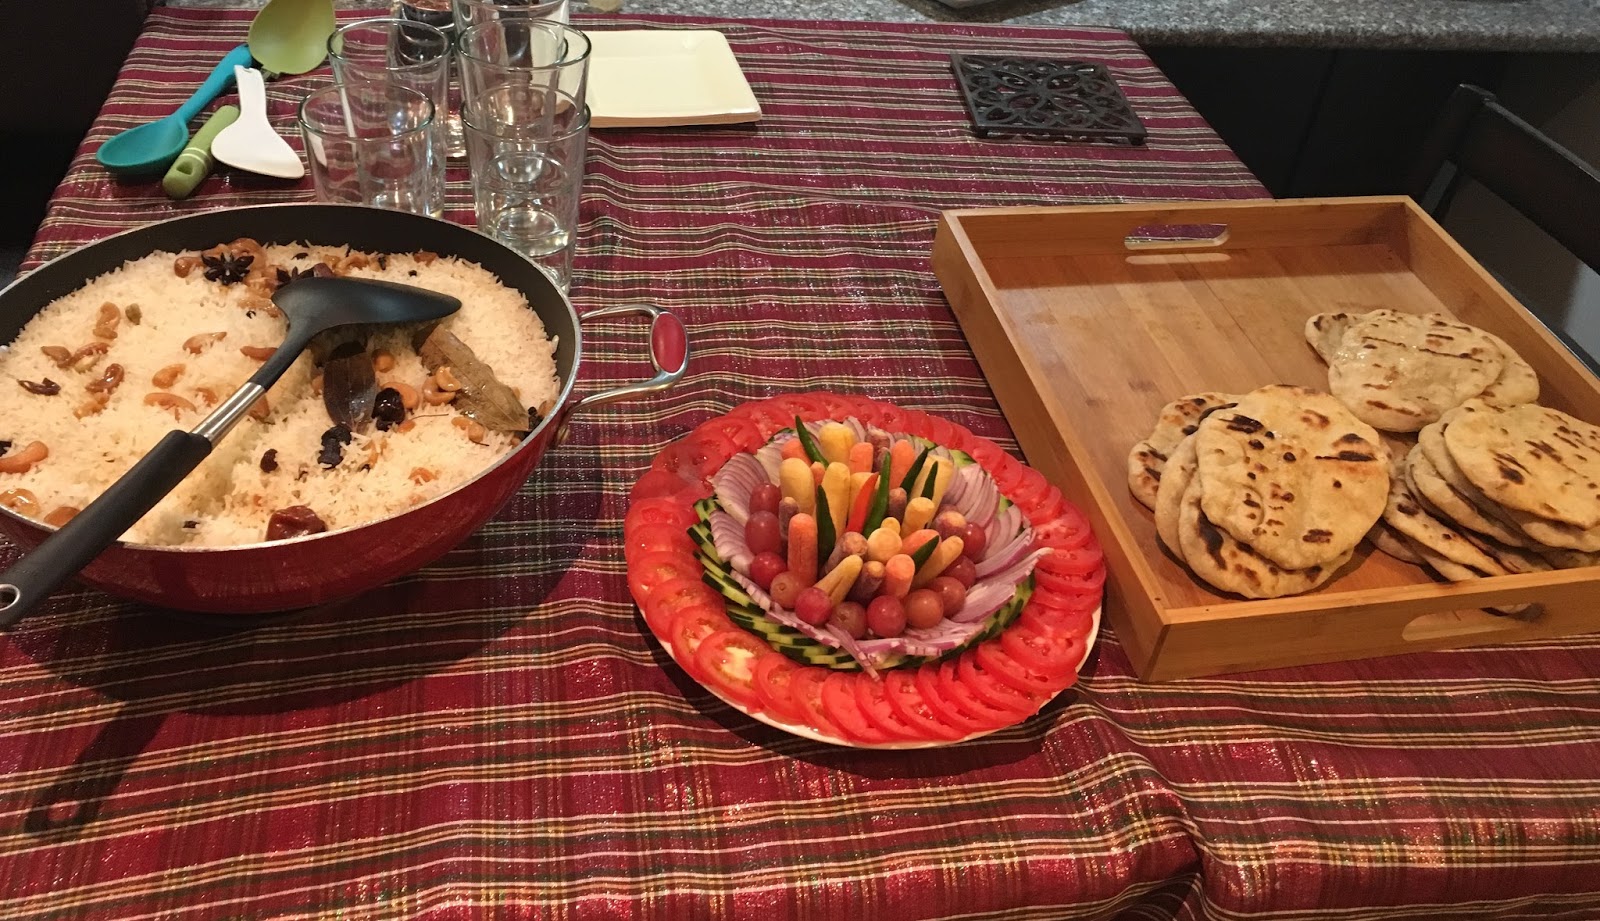
In India, we usually serve Salad as a side dish. They are not the usual appetizer or main course salads, rather they are served as an accompaniment to the main course. Indian main course varies from region to region, but mainly it consists of a soup (dal), a portion of sautéed vegetables (Sabji), a curry prepared with a protein (fish or mutton curry) with rice or flatbreads (roti). This is served with a side dish of freshly available sliced vegetables like tomato, cucumber, onion, carrot etc. Depending on personal preference, you may want to include some fruits or even sprinkle a few drops of lemon or lime on this salad. Although this salad goes great with any Indian main course, I love to serve this with mutton or chicken curries and crispy hot Parathas.


Ingredients:
  • Tomatoes – 3, medium
  • Cucumber – 1, firm
  • Onion – 1, medium, red 
  • Grapes or Olives – a handful (optional)
  • Carrots – baby carrots, a handful
  • Green Chilies – 6-7
  • Plate/ Platter to arrange the salad


Directions:
  • Always choose fresh vegetables. Wash them and let them dry a bit (or wipe them with a paper towel).
  • Choose a sharp knife and carefully start slicing the vegetables. For cucumber, you may choose to peel or leave the skin on. Make sure the slices are thin and even.
  • Start plating, arrange the tomato slices on the outer edge of the plate. Fill the inner circles with slices of cucumber, onion, carrots, grapes and green chilies.
  • Serve the salad with your main course and enjoy.


Recommended Reading:

Monday, 20 November 2017

Debarshi’s Alu ka Paratha (Fried Bread stuffed with Potatoes)


Photo and Recipe courtesy: Dr. Debarshi Chatterji

In our home, Paratha department belongs to Debarshi and whenever I crave for a crispy hot Paratha I just request him. I guess I got into this Paratha routine when I was living in Delhi and used to eat a Paratha almost everyday! So this weekend I requested for Alu Parathas and this time I followed Debarshi around the kitchen and took the recipe. As I have mentioned earlier, Debarshi never measures his ingredients, he decides on the spot what all he needs to add to create a lip smacking taste and hence it is natural that every time his recipe is slightly different. Well, these Parathas were amazing and hence I think this is the perfect recipe for me to share.

I think cooking is one of the best ways to show your loved ones how much you care for them. However, this does not necessarily mean that you have to jump in the kitchen and toil for hours. Sometimes just being around is also a great way to spend some time together. Growing up, I have seen my parents doing just this thing. Every evening my dad would sit on a chair just outside the kitchen while my mom cooks and they would talk and share with each other about their day and what all they did. Last year when I went home, I saw them doing the same thing and this brought a smile on my face because now I know that this is their way of spending some quality time together every day.


Well, I have my own way of spending time with Debarshi while he cooks. I assist him in small things like chopping the onion or by making a ginger, garlic, tomato paste (while he prepares his gourmet mutton curry). I help to find him the spices and clean up after him. Since he only has to cook the food, he really enjoys his time in the kitchen and once the cooking and eating part is over I take charge and clean everything up. So you see, by working together we not only enjoy our time in the kitchen but also turn a regular weekend meal to something special. 

Winter and holidays are the perfect time to enjoy these Parathas so give them a go this weekend and don’t forget to chat, laugh and have a merry time with your spouse/ partner.

Bon Appetit!


Ingredients for the filling:
  • Potato –1 ½ big russet potatoes, cut in halves
  • Salt – about 2 pinches (for boiling the potatoes) + about ½ teaspoon (taste and adjust accordingly in the filling)
  • Oil – 4 tablespoons
  • Onion – ½ of a big onion
  • Green Chilies - 2-4
  • Garlic – 3-4 cloves
  • Cilantro – about ½ cup chopped
  • Cumin Powder – ½ teaspoon
  • Red Chili Powder – ¼ teaspoon
  • Garam Masala – ½ teaspoon
  • Amchur – ½ teaspoon


Ingredients for the dough:
  • Whole Wheat Flour – ½ cup
  • All Purpose Flour – 1 ½ cup for dough + about ½ cup for rolling the Parathas
  • Salt - ½ teaspoon 
  • Oil – 4 tablespoons (to be used while kneading the dough) + plus 2-3 tablespoons for frying the Parathas


Some preparations first:
  • It’s time to take out the pressure cooker. Wash the potatoes and put them in the pressure cooker with enough water (normal tap water) to cover it.
  • Add 2 pinches of Salt and attach the rubber and the whistle on the lid and cover the cooker.
  • Heat the cooker on medium heat and wait for 2-3 whistles.
  • Turn off the heat and let it cool down.
  • Once the pressure drops and the lid opens, remove the potatoes from the cooker and transfer to a colander or a sieve so that all the water drains out and they can cool and get dry a bit.
  • Allow 5-10 minutes then touch cautiously to check if the potatoes are cool enough to handle.
  • Peel the potatoes (carefully certain spots may still be hot).
  • Now take the Onion, Green Chilies and Garlic and chop them finely. Use your food chopper for this step.
  • Next, chop the Cilantro as well.


Directions for kneading the dough:
Note: I am using the stand mixer. If kneading by hand, mix and knead for a good enough time to develop the gluten properly. Refer to my article on Tandoori Roti.

  • Add the Whole Wheat Flour, All Purpose Flour, Salt and Oil (4 tablespoons) in the bowl.
  • Attach the Whisk and give them a whir on the lowest speed until well blended.
  • Now we start the kneading, attach the hook and start the mixer on the lowest speed and slowly start adding half a cup of water in the flour. I give it time to knead and form the dough. If the sides are sticking with the bowl too much I switch off the mixer and clean the sides using a spatula.
  • I keep it running until the dough begins to come together adding a tablespoon of water at a time.
  • At this stage it will look dry, normally for 2 cups of flour 1 cup of water will be sufficient so make sure not to add too much water at this stage. Keep running the mixer.
  • Now sometimes the dough turns out a bit stickier, I usually add a little flour and keep kneading it until it’s smooth and almost non sticky.
  • Remove the hook and cover the bowl. Let the dough rest while we prepare the filling.


Tip: Use lukewarm water for a smooth soft dough.

Let’s prepare the filling:
  • Mash the boiled potato. You can use a potato masher or even your hands to remove any lumps (let it cool down if using your hands).

  • Heat a wok over medium high heat.
  • Add about 4 tablespoons of Oil in it.
  • Add the Onion, Garlic and Green Chili in the wok and fry them till they are golden brown in color (frying softens the onions and helps it to mix well with the mashed potato).
  • Add the mashed Potato in it and mix well.
  • Fry the mixture for a while then start adding the spices (Salt, Cumin Powder, Red Chili Powder, Garam Masala and Amchur). Mix everything well and fry the whole mixture on medium heat for about 15 minutes. 
  • Add the Cilantro, mix well and fry for another 5 to 10 minutes.
  • Allow the filling to cool down a bit.
  • The prepared filling will look like below. Now lets’ fry the Parathas.


Directions to roll the Parathas:
  • Let the filling cool down a bit so that it’s easier to handle.
  • Apply some oil on the rolling pin and board.
  • Re-knead the dough for a few seconds. Then divide the dough into two equal parts. Roll each part into a log like a thick breadstick. Divide both the logs into 8 equal pieces. 
  • Now these 8 pieces will make 8 Parathas. Take a piece of dough between your palms and roll it into a ball. Put all the other balls of dough back in the bowl and cover it. This will prevent the dough from drying out. This stuffed Paratha will be thick so there should be enough dough in each piece to form a cup so that we can put the Filling inside it. 


  • Now take a piece of dough and roll it with both your palms. Press the dough roll with both your palms and start flattening the edges, the trick is to keep the edges thin and the center thick.
  • Put about 2 tablespoons of the filling in the center of this dough cup. 


  • Carefully pull the edges together to close it and make a crown on top, it will look like a garlic head.


  • Press the ball between your palms lightly to flatten it a little like a disc. Do the same with all the dough balls. Fill them up with the Filling and close the edges and flatten them like discs.


  • Dip that disc of dough lightly into the All Purpose Flour. This will give it a smoother texture. Place the disc on the rolling board and start rolling it. Debarshi usually spreads a little flour whenever the dough starts to stick on the board and rolls it into a round shape with even thickness on all sides. 
  • Roll the Parathas very gently so that the filling does not breaks out.
  • It takes some time and experience to measure the filling. It may break out or not spread evenly.
  • Have patience, it will still taste good. 


Tip: Start from the center and roll the rolling pin over the dough using a light but even pressure. Turn the dough over and add more flour whenever necessary. Try to smooth all the edges and maintain an even thickness.

Now let’s fry the Parathas:
  • Heat a big skillet over medium high heat. Transfer the rolled out Paratha to the pan and do this carefully. Lift the Paratha with both hands and place it on the skillet. If it folds while placing, carefully straighten it using a spatula. 
  • After a couple of seconds, you will see bubbles forming on the Paratha. The texture will look dry this means that the underside of the Paratha is now cooked and ready to be flipped. Flip it using a flat spatula and use a brush to apply Oil on the Paratha. Flip it again and let it cook for about 30 seconds. 

  • In the meantime, apply oil on the other side as well and flip it again. The Paratha will start puffing up. If it doesn’t, press onto the Paratha with your spatula on different places for 5-10 seconds.
  • Flip the Paratha back over and press the other side with your spatula for a few seconds.
  • Turn the heat down to medium low.
  • Transfer the cooked Paratha on a plate lined with paper towel or aluminum foil.
  • Serve the Paratha hot with Pickles, Onion Rings and a dollop of butter.


Recommended reading: