Featuring over 350 tried and tested recipes that can be prepared at home. From comfort food to restaurant style. Plus 110+ articles on Kitchen and Cooking Tips, Restaurant Reviews and more.
Showing posts with label Cute Round Loaf of Bread. Show all posts

Monday, 21 May 2018

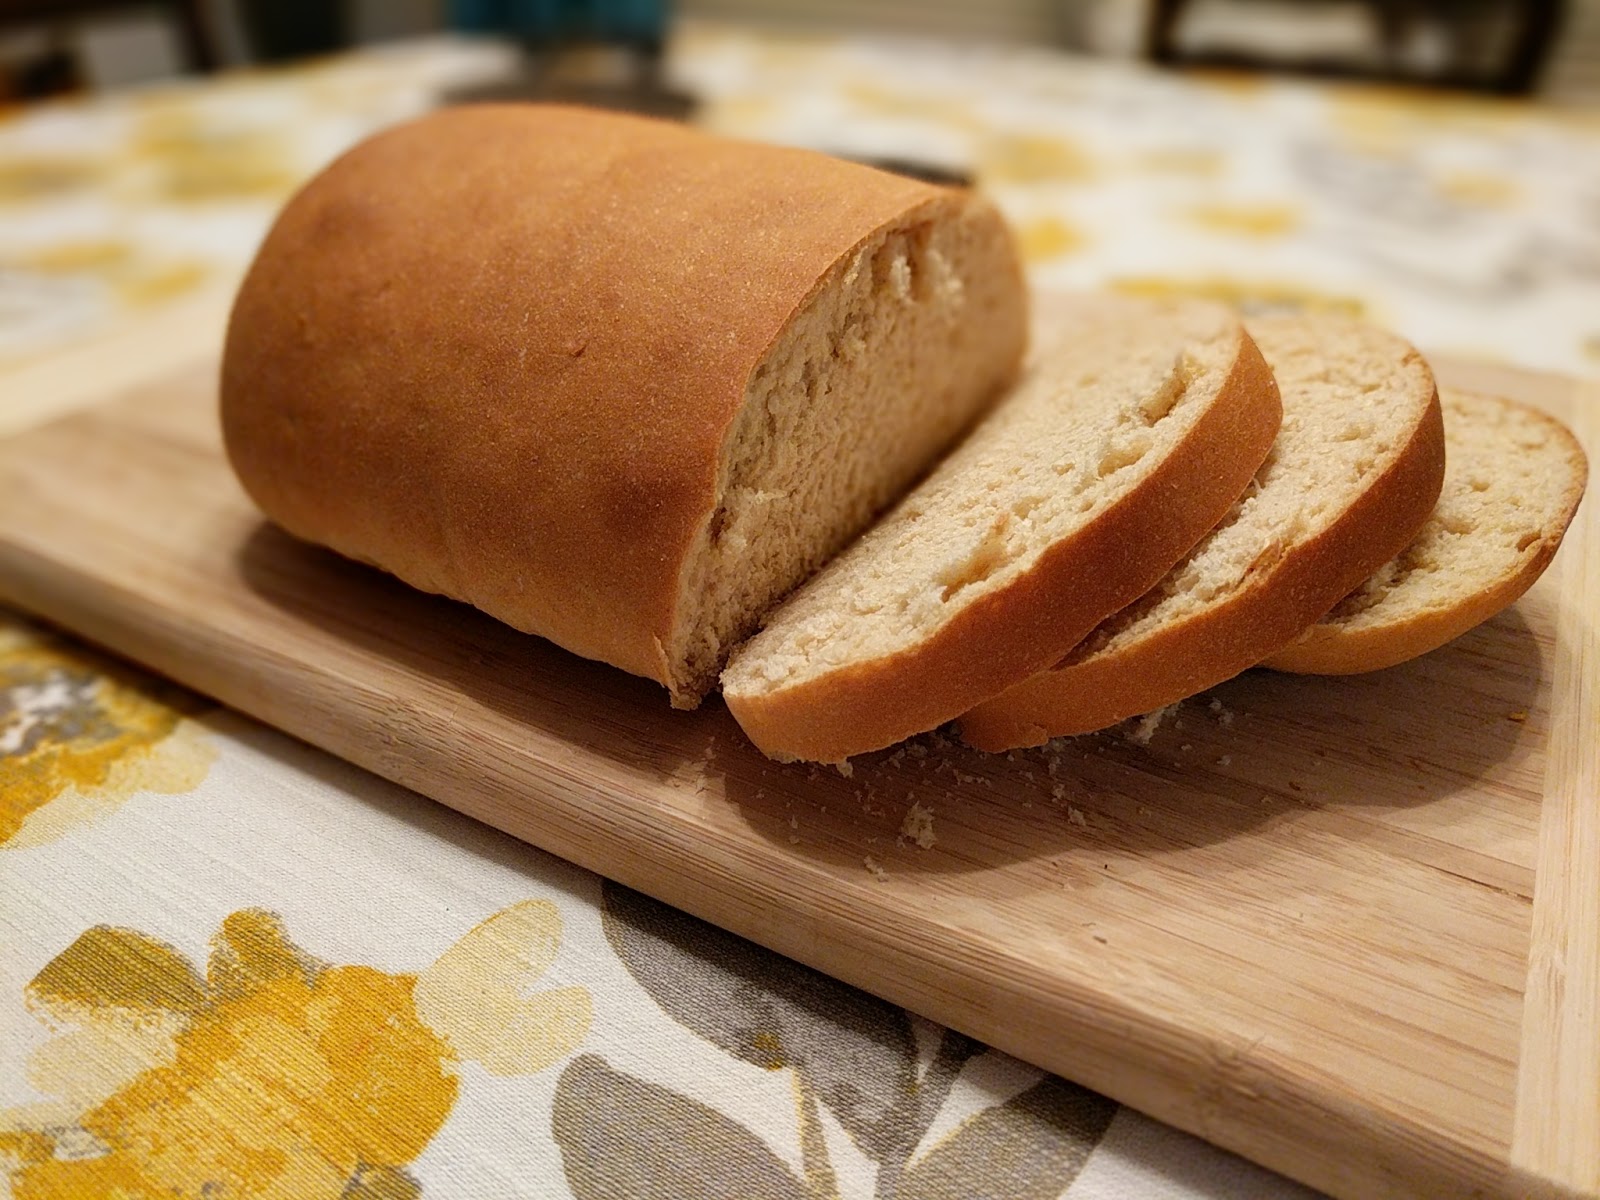
Cute Round Loaf of Bread


When you have deli and cheese sitting in the fridge, bake this hearty bread and make a delicious sandwich! Well, that is what I did. I wanted to have some homemade bread before starting the Keto (Low-carb) diet so I decided to bake this bread. You can also enjoy this with a bowl of soup or stew. We were so excited to see the hot bread straight from the oven that we couldn’t stop ourselves from having a nice thick slice with loads of butter.

If you love baking but don’t know how to do it, let me be your guide. As a self taught baker there have been many hits and misses in my experiments but in that process I have discovered a few recipes which work for me every time. 

If you do try this bread, please let me know. 

Good luck and happy baking!


Ingredients:
  • Active Dry Yeast - 2 teaspoons 
  • All-Purpose Flour - 2 cups, plus more for dusting
  • Salt – ½ teaspoon 
  • Sugar - 4 tablespoons 
  • Unsalted Butter - 4 tablespoons, softened


Directions:
  • In an oven safe dish, pour ½ cup lukewarm water (the water should not be too hot or cold, it should just feel lukewarm on the inner side of your wrist), sprinkle in the Yeast, cover and set aside until foamy.


(See the measuring cup? It’s the Yeast all foamy and ready to work its magic on the flour)

  • After 7-8 minutes add the All-Purpose Flour, Salt, Sugar and Unsalted Butter. Attach the dough hook and run for a few seconds or if kneading by hand, mix for about 30 seconds. 
  • Add the Yeast water and knead into a smooth and soft dough. 
  • Transfer to an oven safe dish and cover it.
  • Set the oven temperature to Warm (or the lowest you can find on the temperature knob, example: 170 degrees)
  • Place the dish in the oven (The dough should feel warm and cozy inside). Switch off the oven.
  • After an hour, take out the dough it should have doubled. 


  • Again set the oven temperature to Warm (or lowest) and punch down the dough.
  • To form a cute round loaf, I used a round baking pan of 6 inches. I greased it with butter and kept it aside.
  • Now clean a surface on your kitchen counter and dust it lightly with the All Purpose Flour. 
  • Turn all the dough onto this floured surface and knead 50 turns. Pull a part of the dough and fold it inside, press and push the dough a little with your palm, flattening it, then repeat the steps.
  • Shape the dough into a round loaf and place it in the greased baking pan.
  • Score the dough – Now this is a very important step and I should tell you I don’t have a proper scoring knife at home. Thankfully you can just use a sharp knife or a serrated bread knife to make cuts in your dough. Why we are doing this step? So that the dough can rise properly and through these cuts. If you choose not to do this, then the bread will just crack from wherever it pleases. To score, hold the knife firmly and make single slashes on the dough in a design you want.
  • Loosely cover it and let it rise in the warm oven for an hour until almost doubled. I usually place the baking pan in a big container and loosely cover it with a kitchen towel. It helps to give it a beautiful rise without any obstructions. Remember if you don’t cover your dough, it will develop a hard top layer.
  • Preheat the oven to 400 degrees. 
  • Bake till it is light golden in color, about 10 minutes. 
  • Once the baking part is complete, transfer the hot bread to a cooling rack.
  • After 5 minutes, run a sharp knife around the edge of the baking pan and using a kitchen towel carefully transfer it on the cooling rack.
  • Enjoy with butter or with soup/ stew or make a sandwich!


Recommended Reading:

Wednesday, 29 March 2017

Bread Dipping Oil with Parmesan and Herbs


A few months back we went to a new restaurant in Montgomery – Bonefish Grill. There they served us a welcome plate with their signature artisan bread and a dipping oil. That combination of a warm crusty bread and fragrant herbed dipping oil was so exciting that I started looking for a dipping oil recipe. I finally found this amazing herb and cheese dipping oil and I baked a beautiful French baguette to serve with it. I served them as a date night appetizer and Debarshi loved it.

As you can see, I have used all dried herbs for making this dip and this is because dried herbs don’t wilt so even after soaking them in the oil for a couple of hours they look the same. The oil tastes heavenly after absorbing all the flavor and fragrance from the herbs plus the Parmesan cheese gives it a creamier taste.

So, next time whenever you are preparing a special meal or maybe planning a small party, try serving some warm crusty bread or baguette with this delicious dip.


Ingredients 
  • Olive Oil – ½ Cup 
  • Dried Basil – ¾ Teaspoon 
  • Dried Parsley - ¾ Teaspoon 
  • Garlic Powder – ½ Teaspoon 
  • Dried Thyme – ¼ Teaspoon 
  • Dried Oregano – ¼ Teaspoon 
  • Ground Black Pepper – ¼ Teaspoon 
  • Dried Crushed Rosemary – 1/8 Teaspoon 
  • Salt - 1/8 Teaspoon
  • Crushed Red Pepper – about 1 teaspoon (or to taste)
  • White Vinegar - 1 Teaspoon 
  • Parmesan Cheese – 2 tablespoons, grated


Directions:
  • Do you have a dipping bowl? If yes, yay! If no, use any small bowl.
  • Add all the dry ingredients in it (Basil, Parsley, Garlic Powder, Thyme, Oregano, Ground Black Pepper, Dried Crushed Rosemary, Salt, Crushed Red Pepper and Grated Parmesan Cheese).
  • Use a spoon to mix everything together. Add the White Vinegar and the Olive Oil in it and stir to mix everything.
  • Let the dry herbs and the cheese soak in the olive oil for about half an hour. 
  • Serve it with a crusty French baguette.


Tips:
  • To measure the dry herbs, I simply take a little less than 1 teaspoon to make ¾ teaspoon. I have found that a little more or less wont make a huge difference in the taste.
  • The first time I prepared this dip, I had some crushed red pepper and parmesan cheese packets from the leftover pizza takeout and I used them so if you have any dried herbs or cheese in your pantry feel free to use them (of course if you can’t remember when you bought the food with which they came with, it will be better to throw them out.)
  • The original recipe said to add some lemon juice but the acidity factor varies from lemon to lemon and hence I prefer to use white vinegar to create that acidic flavor).
  • The original recipe also said to add minced garlic but fresh garlic can have a strong aroma which can overcome the entire flavor of the oil and hence I used the garlic powder (not to be confused with garlic salt).
  • I added more crushed red pepper because we like hot flavors but you can decrease the amount to 1/8 teaspoon).
  • Serve the dip in a beautiful dipping bowl to draw everyone’s attention towards it.
  • Let the herbs soak in the olive oil for about 2 hours for the enriched flavor that would give the oil ample time to absorb all the flavors from the herbs and the cheese will dissolve properly.
  • Do not refrigerate as it will solidify the oil.
  • Use extra virgin olive oil (EVOO).


Tuesday, 14 February 2017

Whole Wheat Bread


Photo courtesy: Dr. Debarshi Chatterji
Stand mixer recommended recipe


I try to stay fit and keep my weight in check but whenever Debarshi cooks his aromatic goat curries I always end up eating some extra rice (or Pulao). Really can’t control it and it happens every time! I think just one more ladle of rice wont be extra but before I know it, I am over weight and running in the gym. So, I decided to give up rice altogether and switch to an all bread diet. We in North India always include flat breads in our meals and believe me it is the healthiest bread cooked on stove top. There are no additional ingredients mixed in the dough, just some Whole Wheat flour kneaded with lukewarm water, rolled into circles and baked on stove top. We call the baked flatbread - Rotis and they go very well with all types of Indian sabjis and curries. Also, since Whole Wheat contains more grains it takes longer to digest and hence we feel full even after eating two thin Rotis. 

When Debarshi is in office I usually try to eat something simple so that I don’t have to spend a lot of time in the kitchen wondering what to cook for myself and for me sandwich is always a good option. I have been buying Whole Wheat breads from the bakeries for some time now and it occurred to me that I can try baking a Whole Wheat bread from scratch. Needless to say, for a baking enthusiast, baking a homemade warm crusty bread is always an attraction. So, I started looking on the internet for some simple Whole Wheat bread recipes. Now this is not a 100% Whole Wheat bread but this is definitely better than the store bought ones.

Now you may ask why the fascination with Whole Wheat? What’s so special about it? well, Whole Wheat has more fibers which help in the digestion, lowers cholesterol, blood pressure and helps control the weight. Last year when Debarshi and I were doing the LCHF (Low Carb High Fat) diet, I realized that despite eating plenty of vegetables and meat, I was having trouble with my digestion. We then found some no carb bread recipes which helped us during our diet. I think we are so used to the idea of eating bread that we cannot imagine living without it. Well, with this bread recipe you may never have to skip eating bread again.

Another good thing about baking a homemade bread is, I can be assured about the quality. Store bought breads have added preservatives which helps them to stay fresh for a longer period of time. I usually bake this bread over the weekends and consume it within a week. I keep this refrigerated all the time and lightly toast it before consuming. As you know, breads are versatile and can be paired with literally anything which means you can use this bread not only for making a PB&J sandwich but also with your favorite deli and cheese. You can also eat it with a leftover curry or Sabji.

Last week I baked a baguette using this bread recipe and it turned out really good. You can also make rolls or burger buns with the same recipe. Remember this is a homemade healthy bread so it may not be perfect but it is every bit nutritious.


Ingredients: 
  • Whole Wheat Flour - 2 Cups (sifted)
  • All Purpose Flour – ½ Cup + ¼ cup for kneading + 2-3 tablespoons (for dusting the surface while kneading)
  • Active Dry Yeast - 2 Teaspoons
  • Sugar - 2 Tablespoons
  • Salt - 1 Teaspoon 
  • Milk – 1 Cup (I use 2%), Heated to 120-130° F 
  • Olive Oil - 2 Tablespoons
  • Egg - 1 (at room temperature)


Directions: 
  • Place all the dry products in the mixing bowl (Whole Wheat Flour, ½ cup All Purpose Flour, Active Dry Yeast, Sugar and Salt).
  • Attach the flat beater to the stand mixer.
  • Start the mixer on the lowest speed then add the Milk, Olive Oil and Egg.
  • Increase the speed to medium high - high and beat for two minutes.
  • This will ensure that everything gets mixed properly.
  • Now turn down the speed to low and start adding about ¼ cup of All Purpose flour. We are doing this to turn the mixture into a dough mass. Note: You may need a little more than ¼ cup of flour for this step. 
  • Now clean a surface on your kitchen counter and dust it lightly with the All Purpose Flour.
  • Turn all the dough onto this floured surface and knead 50 turns. Pull a part of the dough and fold it inside, press and push the dough a little with your palm, flattening it, then repeat the steps.
  • Cover and let the dough rest for 10 minutes.
  • You do not need to put the dough into any warm place for this step. Note: Do not be tempted to let the bread rise for too long.
  • Now shape the dough into any shape you want. It can be a loaf, round, rolls or a baguette. 

Let’s bake a loaf:
  • Grease a 9X5 inch bread pan and place the rolled loaf into this. It should be rectangular in shape.
  • Cover the dough lightly with a clean kitchen towel and let it rise in a warm spot until it’s about one inch taller than before.
  • After 35 minutes, preheat the oven to 375° F.
  • Bake for 30 minutes. 
  • If you want a light golden brown color on the bread then after the first 15 minutes, cover the top of the loaf with a foil tent to prevent over-browning. Note: To put the foil on top of the bread, scrunch the foil and make a dome shaped tent with it. This helps to cover the bread easily.

Let’s bake some rolls:
  • Divide the dough into 4 or 6 pieces and roll them between your palms to form round shapes.
  • Place the shaped rolls in a cookie pan lined with a greased parchment paper.
  • Cover the rolls lightly with a clean kitchen towel and let them rise in a warm spot until it’s about ½ inch taller than before.
  • After 45 minutes, preheat the oven to 350° F.
  • Bake for 14-16 minutes. 

Let’s bake a Baguette:
  • Roll the dough into a long rectangular shape. Roll gently back and forth to reduce the thickness toward one end.
  • Place the shaped loaf in a pan lined with a greased parchment paper.
  • You may score the loaf at this step if you have a sharp knife or a scoring blade. Make deep diagonal slashes across the loaf every 2 inches, or make one lengthwise slash on the loaf.
  • Cover the loaf lightly with a clean kitchen towel and let it rise in a warm spot until it’s about one inch taller than before.
  • After 40 minutes, preheat the oven to 375° F.
  • Bake for 30 minutes. 
  • If you want a light golden brown color on the Baguette then after the first 15 minutes, cover the top of the Baguette with a foil tent to prevent over-browning. Note: To put the foil on top of the Baguette, scrunch the foil and make a dome shaped tent with it. This helps to cover the Baguette easily.

Tips:
  • This bread may get a bit crumbly and dry so use a nice bread knife to cut the slices and don’t forget to add a layer of low fat dressing to make a moist sandwich.
  • Use cucumbers to moisten the sandwich.
  • Never use expired yeast or flour to bake products. Remember you are putting your time and effort in this and expired ingredients are likely to fail.
  • Substitute sugar with a zero calorie sweetener like Truvia.
  • Usually 1 minute 15 seconds in my microwave on high is the perfect temperature for the Milk.
  • I prefer to bring the eggs to the room temperature before adding them in any batter or dough. This makes them easier to mix with the other ingredients.
  • Always transfer the hot bread to a cooling rack.

Monday, 23 May 2016

Jalapeno and Cheddar Cheese Bread


Photo features: Tomato soup in a Sourdough Bread Bowl at Boudin Bakery Cafe Pier 39, San Francisco

Today I was going through our San Francisco trip photos and I saw this Sourdough Bread photo taken at the Boudin Bakery Cafe at Pier 39 and I thought I should write about this bakery which happens to be one of the oldest and famous French bread bakeries of San Francisco. If you ever get a chance to eat a Sourdough bread don’t give it up, its worth it.

We went to San Francisco in winter of 2015 and although California is known for its nice weather somehow it got exceptionally cold. It was a cloudy and windy day when we decided to visit Pier 39 which is very popular for its shops, restaurants, arcades and street performances so lots of touristy things to do yay! It is also famous for the Sea Lions which have become a major tourist attraction so we joined the crowd to see them. 

The Sea Lions are considered highly intelligent animals and they can be used to teach tricks for entertainment. Obviously the crowd was expecting something like the Georgia Aquarium Dolphin show. However, after waiting patiently for about an hour we started wondering if they were going to do anything. Finally, we got tired and hungry and started looking for options. Pier 39 has some very good fish and chips places but Boudin’s bread café stands as an exception with hot soup and bread. 


A view of Pier 39, San Francisco


Sea Lions at Pier 39, San Francisco

Boudin at Pier 39 is a small café although they do have a big restaurant a few blocks away and in total 30 cafes all over California. As soon as we entered the café, we knew what we were going to order as everyone was eating Sourdough Bread and Soup. Their serving style is quite unique; the soups are served in a huge Sourdough Bread bowl. So, without any delay, we also ordered two soup bowls, I had a Tomato soup which was good but a little tart to my taste. Debarshi had a Clam Chowder soup which is their main attraction and he loved it. I only wish they can have some small and medium sized bread bowls as well. For us it was too much food so I suggest, if you can’t have an entire bowl by yourself, share it. 

Although I do not have the Sourdough Bread recipe, I do have another amazing recipe to share with you. It’s a Jalapeno and Cheddar Cheese Bread and tastes awesome. The spicy Jalapenos and creamy Cheddar when combined together creates a unique taste. This bread can be eaten with fruits for breakfast or roasted meat and soup for dinner. I have also prepared it on special occasions and parties and have got some serious compliments and requests for the recipe.


A view of Boudin Bakery Cafe Pier 39, San Francisco

I think the first time we had this bread was when Debarshi was getting his Doctorate. I had just learnt how to bake a Bread and was looking for more baking ideas. Debarshi used to be very busy with his Defense, but he still used to do little things to cheer me up. He started bringing me different types of Bread from the local bakery. We had this bread a couple of times and we liked it so much that I looked up the recipe and started baking it myself.

You know what they say, “Nothing says home like the smell of baking.” So give this a try today!


This photo was taken at our House Warming Party 2014, it features: Jalapeno Cheddar Cheese Bread, Sweet Potatoes with Red Bell Peppers, Pyaz Ke Pakore and Dhania Chutney


Ingredients:
  • All-Purpose Flour – 1 and 1/3 cups
  • Cheddar Cheese (medium) – 2/3 cup, shredded/ grated
  • Jalapeño Peppers (Red and Green) - 2 Tablespoons (half of each), minced 
  • White Sugar - 1 tablespoon and 1 teaspoon 
  • Salt - ¼ teaspoon 
  • Lukewarm Water – 1/3 cup 
  • Active Dry Yeast - 0.5 tablespoon 
  • Vegetable Oil - 2 teaspoons

Directions:
  • In an oven safe dish, pour 1/3 cup lukewarm water (the water should not be too hot or cold just feel lukewarm on the inner side of your wrist), sprinkle in the Yeast and set aside until foamy. If the Yeast doesn’t get dissolved completely stir it a little with a wooden spoon.
  • After 5 minutes add the Flour, Cheese, Jalapenos, Sugar, Salt and Oil and mix well with the Yeast water. 
  • Turn onto a lightly floured surface and knead until smooth and elastic to the touch, about 15 minutes, gradually adding only enough additional flour to keep dough from sticking.
  • Set the oven temperature to Warm (or the lowest you can find on the temperature knob, example: 170 degrees Fahrenheit)
  • Put the dish in oven and cover it. (The dough should feel warm and cozy inside). Switch off the oven.
  • After 1 hour, take out the dough it should have doubled. 
  • Again set the oven temperature to Warm (or lowest) and re-knead the dough. 
  • Divide the Dough into 4 or 6 equal parts and roll each part into round or cylindrical shapes (use a board to roll easily) and arrange them 2 inches apart on a parchment-lined baking sheet on a baking tray(s). 
  • Put the baking tray(s) back in the oven and switch off the oven.
  • Let the bread rise for 30-45 minutes until almost doubled. 
  • Preheat the oven to 400 degrees Fahrenheit. 
  • Bake until lightly golden, about 10 minutes. 
  • Once baking is complete, transfer the hot breadsticks to a cooling rack.

If you are using a stand mixer to knead the dough:
  • Use the hook.
  • The directions I have written above can be used for the stand mixer as well. You may have to knead for some time more as it depends on the speed you are on. I use the lowest speed and knead till the dough is smooth to touch. I add extra flour whenever required.
  • Once the dough has been kneaded I transfer it to an oven safe dish and put in the warm oven for an hour. I do this step as my stand mixer bowl has a rubber attachment below it and it may crack in the oven. If you have a metallic bowl it may warm up inconsistently so always use an oven safe dish big enough to hold all of the dough.


These photos were taken at the Christmas Lunch 2014, featuring: Jalapeño Cheddar Cheese Bread, Rosemary Butter Roasted Chicken and Sweet Potato Mash


I love to improvise a recipe; it gives me the chance to try something new. Like in this case, we were going to a Log Cabin and I decided to bake some Jalapeno Cheddar Cheese bread for the breakfast. Instead of rolling one big bread roll or Breadsticks, I rolled small portions of the dough and transferred them to a greased muffin pan. They turned out to be pretty good, creamy and spicy and looked like cute little muffins. The small portions of the bread were convenient to eat on the road and saved us from eating any junk food.

Photo Courtesy: Dr. Debarshi Chatterji and yes! I will also take a few compliments


Recommended Reading: