Featuring over 350 tried and tested recipes that can be prepared at home. From comfort food to restaurant style. Plus 110+ articles on Kitchen and Cooking Tips, Restaurant Reviews and more.
Showing posts with label Bread Dipping Oil with Parmesan and Herbs. Show all posts

Tuesday, 3 September 2019

Sour Cream Dip


For Debarshi’s birthday this year, I baked a Devil’s Food cake. It turned out really good. Believe me I wish I would have been able to save another piece for myself. Anyway, I got a big pack of sour cream for the cake and after baking it, I realized I still had almost half of the pack left. So, I decided to make a spicy, tangy dip for the party. Thankfully everyone loved it and I thought I should share the recipe, because as it happens, if I don’t share a recipe on time, I just forget about it and then it gets impossible to re-create that recipe.

I served this dip with tortilla chips but you can also throw in some veggies, crackers or other types of chips. Make sure to whip up the dip a few hours before you intend to serve it so that the dip gets cold in the fridge and the flavors blend together nicely. Keep it in an airtight plastic container in the fridge. You can also freeze it, since it doesn’t have any yogurt there is no chance for any runny liquid.

Serve this delish dip at your next party, get-together, game day, family BBQ or ladies night. This makes a perfect munching food and can be enjoyed for hours. If you use readymade dip packets for the seasoning, then this is the time to try the spices which are already in your pantry. Yes, you may not have Chaat masala or Cumin but I am sure if you love Indian food, those spices will be a wonderful addition to your pantry. You will be saving money on those readymade dip packets plus avoid any possible preservatives.


Personally, I don’t like those recipes where you have to use an entire big container of sour cream to make a dip. As you know in our home, we are only two people. If Debarshi and I want to enjoy some chips and dip, then why do I have to use an entire container? So, I prefer smaller quantities which are easy to experiment and can be multiplied if need be. Homemade is the way to go both quality and quantity wise.

Another advantage of serving this cool dip is, if someone starts feeling the heat of my spicy Pakoras or my special potato/ sausage pastries then they can always take a break with this dip and calm themselves. Although I take care not to add any extra heat (red chili powder) in any dish whenever guests/ kids are coming over still having an instant back up plan is always good.

When you are preparing the dip for a large number of people make sure to divide it into 2-3 portions. That way, you can easily refill whenever the dip is all used up. And everyone will be getting fresh cold dip even after several hours.

Before we move on to the ingredients list, I would like to express my gratitude to all my readers. I read each and every comment and reply whenever I can. Please bookmark my blog and share it with every foodie you know. Post on my Instagram #lifewithoutalu with the photo and your comments/ input.


Ingredients:
  • Cream Cheese - 8 ounces, room temperature
  • Sour Cream – 1 cup, plus more if necessary
  • Freshly Ground Black Pepper – ½ teaspoon 
  • Garlic Powder – ½ teaspoon
  • Chaat Masala – ½ teaspoon
  • Roasted Cumin Powder – ½ teaspoon
  • Red Pepper Flakes – ½ teaspoon
  • Green Onions – a handful, chopped


Directions:
  • Take a big bowl because it makes the stirring easier. If the Cream Cheese is too stiff put it in the bowl and microwave for 10-15 seconds.
  • Combine the Cream Cheese and Sour Cream in the bowl and stir until combined and smooth. If necessary, thin out the dip by whisking in more sour cream, a tablespoon at a time. 
  • Mix in the spices (Black Pepper, Garlic Powder, Chaat Masala, Cumin Powder and 
  • Red Pepper Flakes). Stir to combine.
  • Taste to adjust the spices. Mix half of the Green Onions in the dip and chill. 
  • Garnish with the remaining Green Onions before serving.


Love Homemade dips? They are not that difficult to make right! Try these as well:

Tuesday, 16 July 2019

Culinary Herbs


Thyme

Thyme is a member of the mint family. It is widely used in many cuisines and is used both in fresh and dried forms.  It has a lovely gentle flavor which easily blends with the other seasonings. It is for this reason that Thyme is often used as a substitute to rosemary. If you taste it, you will get hints of lemon and mint with a little warmth and peppery undertone. It is used frequently in Italian cuisine, soups and stews, chili, traditional holiday foods (to season the Thanksgiving Turkey stuffing).  

Used in recipes:


Oregano

This is also a member of the mint family. It is also used both dried and fresh although the dried leaves have more flavor than the fresh ones. If you taste it, you will get a warm, aromatic and slightly bitter taste. you may also get earthy/musty, green, hay and minty notes from it.  Oregano is used widely in Italian cuisine: pizza, spaghetti sauces, and other tomato-based sauces. This is not one of Debarshi’s favorite spices and hence I use it only in moderation in my recipes. Oregano goes best with other strong flavors hence garlic pairs beautifully with it. Just like rosemary, oregano is also very pungent and should be used carefully in any dish.

Used in recipes: 


Parsley

Of all the herbs this one is my favorite. This looks very much like cilantro but tastes slightly bitter. It is used in many different cuisines (like European, middle eastern, American). It is used both in its dried and fresh forms to cook and garnish soups, stews and casseroles. Just like lemon, parsley can instantly add flavor in savory dishes. Earlier I used to cook a lot with dried parsley, however, these days I prefer getting it fresh and add it like a garnish. It not only adds a bold flavor to the dishes but also makes the dish look amazingly pretty.

Used in recipes: 

Basil

Before coming to the US, the only Basil I knew was the Holy Basil also known as Tulsi. It is an aromatic plant planted in almost all hindu houses for religious and traditional medicinal purposes. Growing up I have had herbal teas prepared with Tulsi almost every winter. It is prepared with Ginger, Jaggery and Black Pepper and is said to be a wonderful cure against the common cold. It tastes very different than the Basil we use here in US. If you have ever had Pesto or marinara sauce, you know the taste of Basil. I love that we have Basil in our herb garden along with Parsley because it helps me explore more dishes with this aromatic herb.


Used in recipes: 


            Rosemary

            This is also a member of the mint family. If you smell rosemary you will get hints of lemon and pine. It is pungent and slightly bitter in taste and personally I am not a big fan of rosemary. Rosemary easily overpowers the entire dish if used in wrong quantities. It also has a slight warmth and peppery undertone in flavor. Being a forceful herb with a very distinct sharp flavor, rosemary is never used as a substitute to thyme. It is used as a prime seasoning to cook potatoes, pork, shellfish and even rabbit. 

            Used in recipes: 

            Mint

            Mint is widely used in Indian cuisine in biryani, chutney, curry and beverages. It has a cooling flavor which is very different than the other herbs. Because of its aroma Mint instantly brightens the flavor of the dish and is also used in many beverages and desserts. 

            I never use dried mint for my dishes (unless the recipe specifically calls for it) because it doesn’t come close to the aroma and flavor of a fresh bunch. Mint is actually really easy to grow at home too. At our last apartment, Debarshi planted a few varieties of Mint in several pots (Chocolate mint, Peppermint, Spearmint etc.). They grew beautifully without much need for care or fuss and of course were very handy whenever we wanted to add them in anything. When choosing mint, look for green leaves, free from dark spots or yellowing.

            If I have Mint leaves I would instantly make a yummy green chutney with some cilantro and green chili.

            Thursday, 11 July 2019

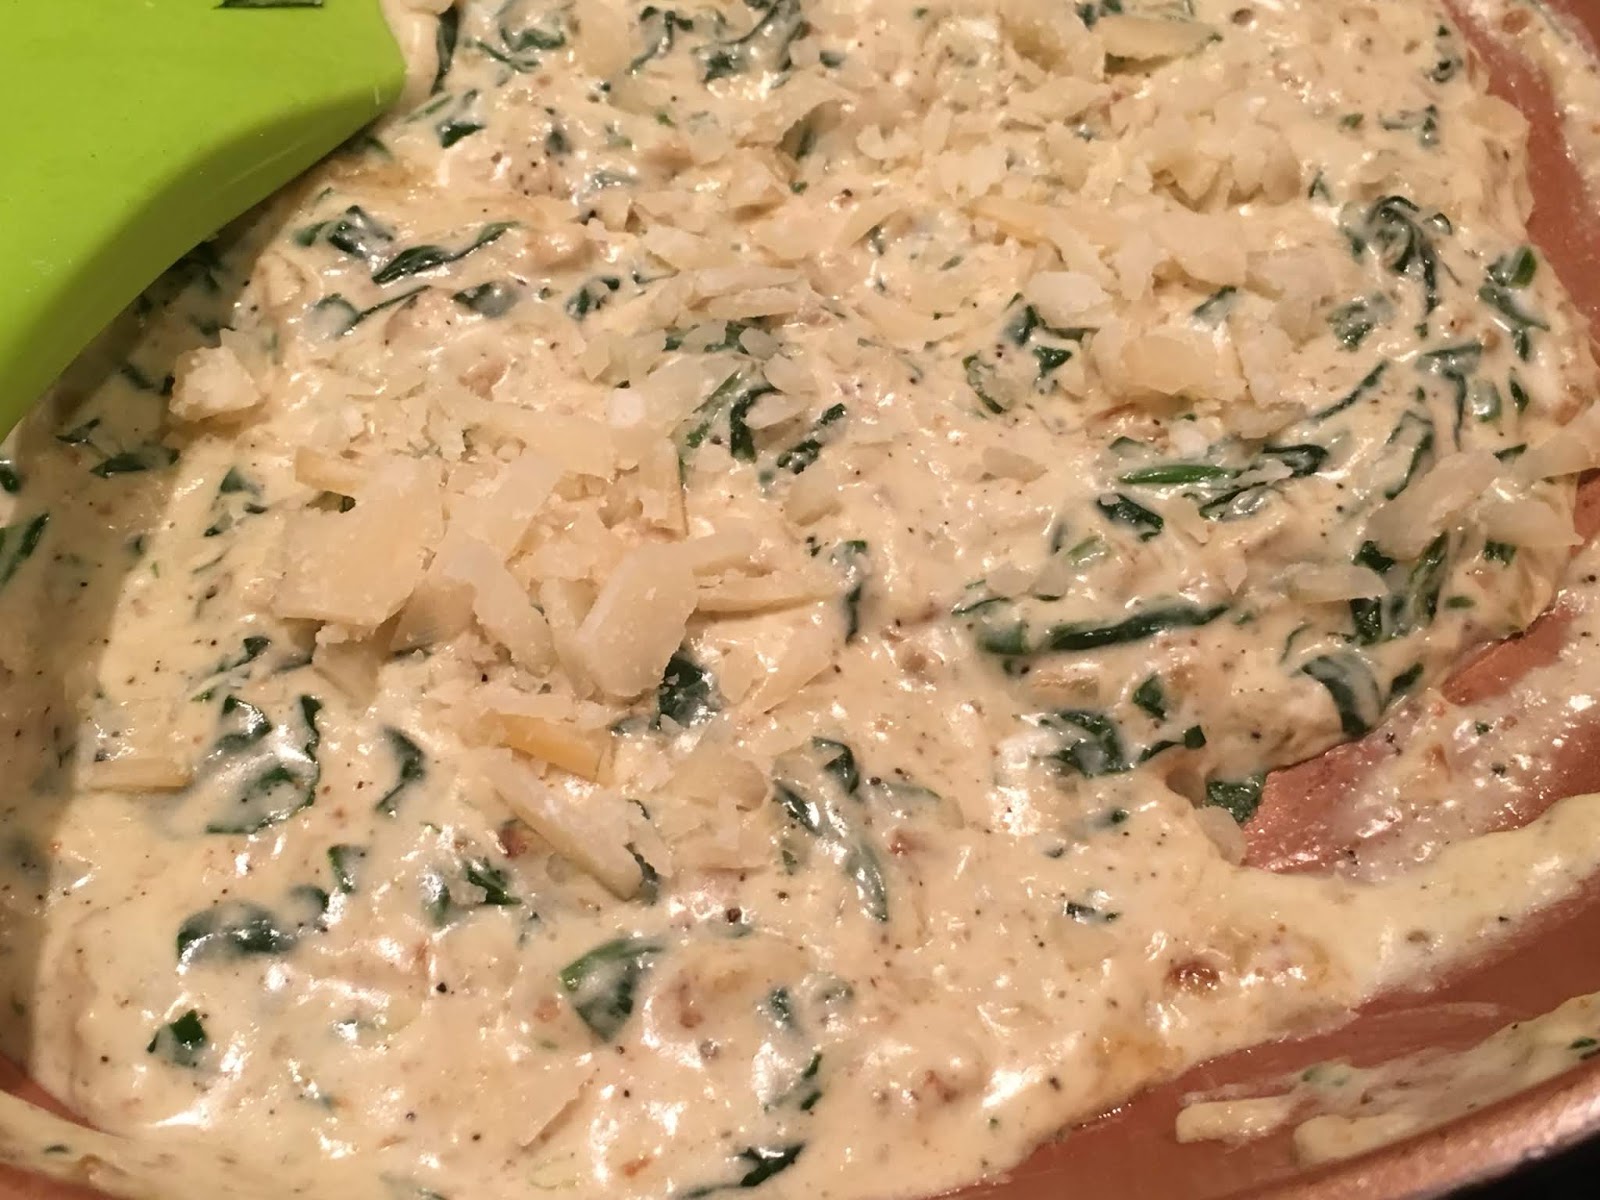
            Spinach Dip


            I am always happy to share simple and quick recipes. Today I have a delish and luscious Spinach dip for you. I prepared this on a movie night with just a few ingredients I had in my fridge. It turned out so good that it was all gone before I could click some more photos. Well, that’s what happens when the food is too good!

            This cool and creamy dip is perfect to serve at game nights and movie nights. Major crowd pleaser too. I prepared it a couple days back for my book club friends and it was gone within minutes! This is so quick and easy that you will want to make this again and again. The fresh spinach adds a beautiful flavor while the Parmesan adds a delicious sharpness and saltiness in the dip. The cream cheese and heavy cream makes it melt in your mouth silky! I have seen several spinach dip recipes online but the special ingredient which adds a beautiful aroma in this dip is the garlic. Do not skip it! Trust me, one clove is not enough to overpower the entire dip, it does however, lends a delicious taste making the dip homemade and special.

            Prepare ahead:
            Prepare this delicious Spinach dip ahead of time, keep it in the fridge and when your guests are there, serve it! This yummy dip can be kept refrigerated for up to three days but I would recommend you to prepare this fresh so that it tastes as good as it looks. Preparing this dip doesn’t require any elaborate list of ingredients or instructions. 

            Can I freeze it?
            I have never frozen this dip so recommending it is difficult. However, the best part about this dip is, it is not prepared with yogurt (which when frozen may break down and make the dip runny). Since, we are using cheese and cream, freezing it should be ok. If you are keeping it refrigerated, then I would recommend consuming it within 2-3 days. Although it tastes great right out of the fridge, I like to microwave it for 10-15 seconds just to slightly melt the cheese. When refrigerating, make sure to use a clean plastic/ glass container and cover it with plastic wrap.

            How long can you leave it out?
            Since homemade dips don’t have any added preservatives in them, leaving them out for a long time wont work. Remember, the cheese, cream and spinach are all perishable items. When you are preparing the dip for a large number of people make sure to divide it into 2-3 portions. That way, you can easily refill whenever the dip is all used up. And everyone will be getting fresh dip even after several hours (I do this every-time we are hosting a game viewing party). Make sure not to let the dip sit at room temperature longer than 3-4 hours.

            What can I serve with it?
            • Hawaiian/ French/ Sourdough Bread
            • Snacks
            • Chips
            • Crackers
            • Baguette
            • Tortilla chips
            • Crudités (assorted Veggies like Celery Sticks, Carrot Sticks, Cucumber Sticks, Bell Pepper Strips, Broccoli, Cauliflower, Fennel and Asparagus Spears)
            • Sausage
            • Crostini
            • Pretzels
            • As a spread on sandwiches

            So give this dip a try and then post on my Instagram #lifewithoutalu with the photo and your comments/ input.


            Ingredients:
            • Spinach – 1 small pack
            • Butter - 1 ½ - 2 tablespoons, unsalted 
            • Onion – ¼ cup, finely chopped 
            • Paprika/ Red Chili Powder – ½ teaspoon 
            • Cream Cheese - 8 ounces 
            • Heavy Cream – ¾ cup (or more) 
            • Salt – to taste (about ¼ teaspoon)
            • Freshly Ground Black Pepper – ½ teaspoon 
            • Parmigiano Reggiano - 1/3 cup, grated
            • Garlic - 1 big clove, crushed


            Directions:
            • Wash the spinach well.
            • Squeeze as much liquid out of the spinach as possible with a clean dishtowel or paper towels. 
            • Melt butter in a big pan over medium-high heat. 
            • Sauté the Onion with the Garlic until soft, 3–5 minutes. Add ¼ teaspoon of Salt. Mix well.
            • Stir in Paprika and cook until fragrant, about 30 seconds. 
            • Add the Spinach, Cream Cheese, Heavy Cream and Black Pepper and cook, stirring often, until everything is warmed through and slightly reduced, 8–10 minutes; the spinach will wilt in the meantime.


            • Mix ½ cup of the Parmigiano Reggiano. Taste to adjust the Salt.


            • Transfer to a serving bowl and garnish with the remaining Parmesan cheese. Serve immediately with snacks/ chips.


            With the football season coming in, it is always best to have a couple of different types of dips at hand. Try these dip recipes as well:

            Thursday, 10 January 2019

            No Knead Dutch Oven Artisan Bread


            When I look back on my baking adventures, I cannot help but smile. I have been very lucky to be blessed by a husband who is a foodie. Even my friends, love my baked goods. Needless to say it has taken many failed attempts to be where I am today.


            I started my baking adventures with a ready to bake cookie mix. Later one of my friends showed me how to bake bread rolls from scratch. I have been baking ever since and have learned quite a few delicious recipes. Be it cookies, cakes, pies or muffins, I love baking them all (and that too right from scratch). I also keep searching and experimenting with different types of bread recipes. I am still a novice but recently I discovered a fool proof recipe which bakes beautiful crusty bread without any labor.


            Now usually when we think about Breads, the first thing which comes to our mind is kneading. Kneading helps to develop the gluten which then helps to make the bread firm on the outside but open and light textured on the inside. This kneading part is the most crucial part of bread baking. Without the correct amount of kneading and gluten formation, the bread will not rise properly, neither will it have that chewy texture. Well, what if I tell you that you can bake a beautiful loaf of bread without worrying about the kneading part. I think most people don’t attempt to bake breads at home because of all the time and effort that goes in it. However, any homemade good is free from preservatives and that is one of the reasons I focus on homemade food.


            Paul Hollywood says in the British baking show; a slower rise gives more flavor to the bread. Now when we are adding hot/ lukewarm water in the flour, the yeast rushes to work. With the active Yeast and kneading we develop the gluten. But what will happen if we add room temperature water to the flour? Naturally the yeast will take more time to develop which will make the dough more flavorful. You must be thinking what will happen with the gluten? Do we still have to knead the dough before popping it in the oven?


            No! That is why this recipe is called No Knead Bread. All you have to do is mix four ingredients – Flour, Salt, Yeast and Water. Cover and let it sit at room temperature for almost 18 hours. Straightaway transfer that mix in the Dutch Oven, bake and voila! Delicious crusty homemade bread. This recipe is so simple yet so flawless that it will win you over. Perfect for the busy ladies or mommies as well as for your date nights. The time you are actually working on the bread is so short that you can easily fit it between your other tasks. After all, who doesn’t like homemade bread baked from scratch?


            You know what I realized after reading this recipe? I wasn’t paying any attention to the steaming part of bread baking. Unless the dough gets enough steam it will not form a crust. Yes, we can always spray some water on the bread while it is baking. I have also used other methods (ice/ water in a tray) to create that perfect amount of steam. The breads used to turn out good but honestly, considering all that time and effort, those breads just don’t stand before this crusty bread. Specially after knowing that we don’t have to do any of these steps to create the proper amount of steam. So, what is the secret?


            Dutch Oven! When we bake the bread in the Dutch Oven (or Dutch Pot) with the lid on, it creates steam inside the pot. This steam is the water we mixed earlier in the dough. Since the lid seals, the moisture in the dough has nowhere to go but to convert to steam. This keeps the crust softer for a long time and helps to expand the bread in the initial stages of baking. It also creates a nice glossy crust on the bread. Just remember to follow the directions step by step. When preheating the oven, make sure to place the Dutch oven inside. This sort of transforms it into a small version of a professional steam injected oven. The Dutch oven distributes the heat and steam more evenly in the bread thus hardening the crust.


            There is just one catch with this bread. You can’t plan it at the last minute. Since the dough has to sit at room temperature for almost 18 hours, you have to plan this ahead. You will feel a bit skeptical the first time, because the mixed dough will look like a sticky mess. Plus, the waiting time will make you question the recipe. But take my word, the resultant bread will be absolutely gorgeous.


            Last but not the least, please use fresh ingredients. Yeast will not work if it has expired. So, pay close attention while adding the ingredients. Do not skip the parchment paper because it not only prevents the dough from sticking on the bottom of the pan but also helps to lift it out once the baking is done.


            Some of the online recipes may suggest to shape the dough in a ball before baking it but I have never done that and I don’t think there is any need. You don’t even have to touch the sticky dough. Just push it out using a large rubber spatula on the parchment paper. Then transfer the parchment in the Dutch oven and do this carefully because the oven is hot! I have a big 5 quart Dutch Oven and the dough spreads out a bit. So, if you have a smaller one, you may consider using it so that the bread ends up taller.


            Photo Courtesy: Dr. Debarshi Chatterji


            I think, this bread checks all the boxes of my expectations –


            First, the Salty taste, which is just yum! You can of course add some garlic or cheese for more flavor (like I do sometimes).
            Second, the texture. The bread will have a hard crust on the outside and a light, soft middle. You will see the air pockets showing how the yeast worked. Always use a good serrated knife to cut the slices.
            Third, the overall method. My god, it cannot get any easier than this and this bread has endless possibilities. You can:

            Dunk it in a soup
            Spread jam, soft cheese or butter on it
            Top it with tomato, basil and olive oil
            Make an egg in a hole
            French Toast
            Make a Sandwich
            Or eat it just like that

            The best part is, this bread not only tastes store bought but looks as well. This bread has become a staple at our home. I baked this delicious bread on Thanksgiving and we absolutely loved it. We even enjoyed it the next morning with some butter, coffee and my homemade delicious Boozy Fruitcake.


            Try this bread, then let me know how it turned out. 


            Nothing says ‘Home’ like the smell of Baking!


            Ingredients:
            • All Purpose Flour - 3 cups 
            • Salt - 1 ½ teaspoons 
            • Dry Active Yeast – 1 ½ teaspoons 
            • Water – 1 ½ - 2 cups room temperature 

            Do ahead:
            • Mix the dry ingredients in a bowl. 
            • Start adding the water (½ cup at a time), use a wooden spoon or spatula to mix everything together.
            • Cover with a plastic wrap and let it sit for 17 ½ hours at room temperature. 

            Tips: 
            • Since we have to wait for almost 18 hours to bake the bread, timing is important. Calculate the hours so that when it is time to bake, it isn’t midnight. I find it best to mix the dough in evening so that I can bake it sometime during next day (around noon).
            • Make a Garlic bread by mixing ½ teaspoon Garlic powder in the dough.


            Just after mixing 


            After 17 ½ hours


            Directions:
            • Place the Dutch pot inside the oven with the lid on.
            • Now preheat the oven to 500 degrees F (Switch on the central air/ vent, helps to air out any strong fumes from the oven).
            • Once the preheating is done, transfer the dough (it will be sticky) on parchment paper using a big spatula.


            See how the yeast has worked! It’s amazing!


            Optional: At this point I like to stick a couple pieces of my favorite cheese in the dough. You can also sprinkle some flour on it.


            • Take out the Dutch pot from the oven and quickly and carefully, remove the lid and transfer the dough along with the parchment in it. Do not take out the Dutch pot before this step.


            • Place the lid back on and slide inside the oven.
            • Bake in Dutch pot (with the lid on) for 30 minutes. 
            • Reduce the oven temperature to 450 F, take off the lid and bake for 15 minutes more.
            • Switch off the oven and let the Dutch pot sit inside for 10-15 minutes. This will help to cool it off a bit and also bring a better crust on the bread.


            The cheesy bread will have a slightly different color.

            • Transfer the hot bread on a cooling rack.


            • Wait for a minute then cut into slices and enjoy!
            Tip: Use a good long serrated knife for cutting the slices.


            Dip the bread in herbed oil, spread butter or jam or dunk in soup and enjoy!


            Recommended Reading:


            This photo has been featured on LensCulture Portrait Awards 2019. LensCulture reviews competitions and resources for photographers and recommend the best ones. 

            Awards include an exhibition at Aperture Gallery in New York, International Photo Festival Projections, massive exposure to International Press and their global online audience of three million, publication in The Best of LensCulture - Volume 4, and much more!

            Monday, 21 May 2018

            Cute Round Loaf of Bread


            When you have deli and cheese sitting in the fridge, bake this hearty bread and make a delicious sandwich! Well, that is what I did. I wanted to have some homemade bread before starting the Keto (Low-carb) diet so I decided to bake this bread. You can also enjoy this with a bowl of soup or stew. We were so excited to see the hot bread straight from the oven that we couldn’t stop ourselves from having a nice thick slice with loads of butter.

            If you love baking but don’t know how to do it, let me be your guide. As a self taught baker there have been many hits and misses in my experiments but in that process I have discovered a few recipes which work for me every time. 

            If you do try this bread, please let me know. 

            Good luck and happy baking!


            Ingredients:
            • Active Dry Yeast - 2 teaspoons 
            • All-Purpose Flour - 2 cups, plus more for dusting
            • Salt – ½ teaspoon 
            • Sugar - 4 tablespoons 
            • Unsalted Butter - 4 tablespoons, softened


            Directions:
            • In an oven safe dish, pour ½ cup lukewarm water (the water should not be too hot or cold, it should just feel lukewarm on the inner side of your wrist), sprinkle in the Yeast, cover and set aside until foamy.


            (See the measuring cup? It’s the Yeast all foamy and ready to work its magic on the flour)

            • After 7-8 minutes add the All-Purpose Flour, Salt, Sugar and Unsalted Butter. Attach the dough hook and run for a few seconds or if kneading by hand, mix for about 30 seconds. 
            • Add the Yeast water and knead into a smooth and soft dough. 
            • Transfer to an oven safe dish and cover it.
            • Set the oven temperature to Warm (or the lowest you can find on the temperature knob, example: 170 degrees)
            • Place the dish in the oven (The dough should feel warm and cozy inside). Switch off the oven.
            • After an hour, take out the dough it should have doubled. 


            • Again set the oven temperature to Warm (or lowest) and punch down the dough.
            • To form a cute round loaf, I used a round baking pan of 6 inches. I greased it with butter and kept it aside.
            • Now clean a surface on your kitchen counter and dust it lightly with the All Purpose Flour. 
            • Turn all the dough onto this floured surface and knead 50 turns. Pull a part of the dough and fold it inside, press and push the dough a little with your palm, flattening it, then repeat the steps.
            • Shape the dough into a round loaf and place it in the greased baking pan.
            • Score the dough – Now this is a very important step and I should tell you I don’t have a proper scoring knife at home. Thankfully you can just use a sharp knife or a serrated bread knife to make cuts in your dough. Why we are doing this step? So that the dough can rise properly and through these cuts. If you choose not to do this, then the bread will just crack from wherever it pleases. To score, hold the knife firmly and make single slashes on the dough in a design you want.
            • Loosely cover it and let it rise in the warm oven for an hour until almost doubled. I usually place the baking pan in a big container and loosely cover it with a kitchen towel. It helps to give it a beautiful rise without any obstructions. Remember if you don’t cover your dough, it will develop a hard top layer.
            • Preheat the oven to 400 degrees. 
            • Bake till it is light golden in color, about 10 minutes. 
            • Once the baking part is complete, transfer the hot bread to a cooling rack.
            • After 5 minutes, run a sharp knife around the edge of the baking pan and using a kitchen towel carefully transfer it on the cooling rack.
            • Enjoy with butter or with soup/ stew or make a sandwich!


            Recommended Reading: