Featuring over 350 tried and tested recipes that can be prepared at home. From comfort food to restaurant style. Plus 110+ articles on Kitchen and Cooking Tips, Restaurant Reviews and more.
Showing posts with label Chole Bhature (Chickpea curry with fried bread). Show all posts

Tuesday, 26 March 2019

Bhature (Deep Fried Puffed Bread)


If you are planning to go to India, don’t forget to explore the local cuisines of all the different regions. You will be surprised to find so many variations of breads, curries and rice dishes. Today I am going to discuss one of my all time favorite deep fried Puffed Breads but that is not Luchi. Today’s dish is Bhature which is always paired with a hot spicy chick pea curry called Chole.


Being born and brought up in Northern India, I have been very lucky to get the best of two cultures and food. I am a Bengali who loves Punjabi food! In fact, I would gladly swap a plate of fish curry for Chole Bhature. This is still one of the dishes I always order at any Indian restaurant.

I have two recipes of Chole on my blog, you can pair this delicious bread with either of them:


I know I have written about Chole Bhature before but when I prepared it a couple days back, I realized that Bhature deserves an article of its own. You can easily get a readymade plate of Chole Bhature but it may not always appeal to you. I faced this problem a few months back while on our Chicago trip. Unfortunately, the Indian restaurant at Devon failed to impress this Chole Bhature fan. The Bhatura was too oily and not at all crispy. The Chole was way too bland. I think the best way to have an authentic plate of Chole Bhature is to prepare it at home.

Since Bhatura is always deep fried I don’t advise preparing it too often. So save this dish for some special days when you are really craving for it. Some people find deep frying stressful, but with a little practice you too will be able to fry perfect Bhaturas.

Remember: 
Add sufficient oil in a big wok otherwise it wont puff up.
Let the oil heat up thoroughly.
Do the ball test by adding a small ball of dough in the oil to see if the oil is hot enough.
Refer to my articles: How to Deep-Fry food with Confidence and

Bhatura dough does not need a lot of ingredients. I do add a little whole wheat flour in the All Purpose Flour to control the gluten. This makes rolling a lot easier. For leavening, I use yogurt and baking powder. Salt is added for flavor and you can also add a pinch of fennel or Kalonji to make it look restaurant bought. Knead the dough well and be careful while adding water because the yogurt will make it sticky. Once it looks smooth, cover and let it rest for at least an hour or overnight (max).


Ingredients:
  • All Purpose Flour – 1 ½ cup 
  • Whole Wheat Flour - ½ cup 
  • Yogurt – 3-4 tablespoons 
  • Baking Powder - ½ teaspoon 
  • Salt - ¼ teaspoon 
  • Fennel seeds/ Kalonji - ¼ teaspoon 
  • Water - ¼ cup (or as needed)

Knead the dough:
  • Take a big bowl. If using a stand mixer, attach the dough hook.
  • Combine all the above ingredients of the dough (except the water).
  • Start kneading. At first, the dough will be sticky and look dry. Be careful while adding water (add just a spoonful or two at a time if the dough is not coming together). 
  • Continue kneading until it all comes together.
  • If the dough doesn't seem to be losing its stickiness, sprinkle a little flour and continue kneading. 
  • Continue this process till the dough looks shiny and smooth. It should be wet to the touch with an elastic feel. At this time there should not be any lumps in it.
  • Test if the dough holds its shape. Shape the dough into a ball and let it drop to your work surface. 
  • Cover and let the dough rest for an hour. 


Tips:
  • If not using stand mixer, wash your hands before kneading. Kneading requires working the dough between your bare hands, so wash them and dry them well before you begin. 
  • Remove your rings and other jewelry that might get caught in the dough, and roll up your sleeves so they don't get sticky. 
  • Wear an apron.


Fry the Bhature:
  • Divide the dough into 5-6 equal portions. 
  • Make balls and roll out into medium sized circles using a rolling pin and board. 
  • Heat oil in a wok over medium high heat. 
  • Test the temperature of the oil by dropping a tiny ball of the dough into the oil. If there isn’t any bubbling, then the oil isn’t ready. If it’s furiously bubbling and there is smoke, that’s too hot. If the temperature is perfect, the ball will take a dip and immediately float to the surface of the oil and change color. 
  • At this perfect temperature, add one Bhatura at a time and fry gently by pressing down with the frying spoon or slotted spoon in a circular motion. 
  • Turn over when puffed up and fry the Bhatura till golden brown. 
  • Transfer the fried Bhatura on a paper towel or napkin to absorb the excess oil. 
  • Serve the Bhatura hot with Chole, Green Chilies and Onion dipped in Red Wine Vinegar. 

Friday, 17 August 2018

Amritsari Chole (Delicious Chick Pea gravy with Fresh Cheese)


Recipe Courtesy: Mamma


Is there anything more North Indian than a bowl of Chole? I can feel my mouth watering up by just looking at the photo. This enchanting spicy Chick Pea curry is my all time favorite but this time Debarshi and I went one step ahead. My mom had given me this recipe several weeks back and I thought this is worth giving a try. This Chole is totally different than your regular chick pea curry. Why? Because this is the special Amritsari Chole! This Chole is served in all the authentic restaurants of North India and with the addition of Paneer, it has become my all time favorite.

If you are a curry lover, you will love this Amritsari Chole. There is a ton of flavor and aroma which you will enjoy in every bite. It originated from the city of Amritsar (Punjab) known for the Golden Temple and hence the name. Traditionally served with soft Kulchas (a form of bread), this curry is famous for its distinct dark colored gravy and needless to say people love it! We served it at our recent get together party and everyone took seconds. I think this is the beauty of simple dishes, they are always so satisfying yet nostalgic. This Chole tastes great with Tandoori Roti, Jeera Rice or Naan however, we decided to serve it with Namkeen Puris because that is how we like it. Plus, if you are serving Bhaturas or Kulchas it’s best to cook them right before serving, something which is quite difficult while hosting a big dinner party.


(Same recipe without the Tea bag)

This curry tastes so authentic and heavenly that you will almost feel like you are actually in Amritsar, roaming its streets and eating at some local restaurant. It looks so inviting with its rich dark color which is developed by using tea bags while boiling the Chole. Yes, the main ingredient, the star of the show – Chole (Chick Pea). I have to tell you to use a good chick pea brand for making this dish. Do not use the canned chick peas because good ingredients bring better flavors in the dish.

I cooked the Chole with white sweet onion, but you can use whatever you have in your pantry. There is just one preparation step which you need to do. Soak the dried Chick Peas in enough water overnight or in boiling water for an hour, then cook them. I prefer to plan this ahead but if you are in a hurry you can opt for the latter method.

My favorite method of cooking the Chole is by putting it in a pressure cooker and boiling it with some baking soda. Believe me, this process cooks the Chole perfectly and they just melt in your mouth. Now if you do not have a pressure cooker, you can just boil it in a pan but it will take a longer time. You have to cook it till it softens so if you have a cooker definitely use it.

I have to say this curry is one of the easiest curries I have ever made. You will easily find the ingredients at Costco, Walmart or your local Indian store and please do not skip the oil. Mustard Oil brings that gourmet flavor in the dish which is impossible to inculcate with any other oil. We made our own Paneer at home but you can very well buy it readymade. Fry them lightly to get a beautiful golden color on them. Garnish the curry with some fresh chopped Cilantro and enjoy with your favorite carb accompaniment.


Ingredients (for boiling the Chick Peas): Serves 2
  • Dried Chick Peas – ½ cup 
  • Baking soda - a pinch
  • Bay Leaf – 1-2
  • Black Cardamom - 1
  • Green Cardamoms – 2-3
  • Cloves – 2-3
  • Turmeric Powder – ¼ teaspoon
  • Salt – ¼ teaspoon
  • Canola Oil – ½ teaspoon
  • Black Tea Bag – 1 (do not use any flavored teas or green teas)

Ingredients (for making the curry):
  • Mustard Oil - 2-3 tablespoons (for making the curry)
  • Onion – ½ big, finely chopped
  • Ginger - 1 inch
  • Garlic - 3-4 big cloves
  • Tomato - 1 medium
  • Dry Roasted Cumin Powder - 1 teaspoon
  • Black Salt – ¼ teaspoon
  • Salt – ¼ teaspoon
  • Turmeric Powder – ¼ teaspoon
  • Coriander Powder – ½ teaspoon
  • Red Chili Powder – ¼ teaspoon (optional)
  • Meat Masala – 1 teaspoon
  • Garam Masala – ½ teaspoon
  • Asafoetida – a pinch
  • Cilantro - a handful, chopped
  • Paneer – 2 cups, cut in small cubes
  • Canola Oil – 1 tablespoon (for frying the Paneer)


Do ahead:
  • If you have time, rinse and soak the dried Chick peas in enough water overnight. 
  • When in hurry you can soak them in boiling water for an hour, then cook them. 


Directions to boil the Chole:
  • Rinse and drain the Chick Peas then transfer them in a pressure cooker (Note: You can also use a pot but it will take way longer to cook). 
  • Add the Baking Soda, Bay Leaf, Black Cardamom, Green Cardamoms, 
  • Cloves, Turmeric Powder, Salt, Oil and Black Tea Bag in it.
  • Add 2-3 cups of water.
  • Pressure-cook the Chickpeas for 2-3 whistles on a medium heat. Allow the cooker to cool down completely, then open the lid.
  • The Chickpeas should be cooked well. Test by mashing a Chickpea with a spoon.


Tip: If you don't have a tea bag, just boil one tablespoon of black tea with one cup of water. Strain the tea in the pressure cooker. Add all the other ingredients and bring to a boil. It will also bring a rich dark color.


Let’s do some preparations:
  • Blend together the Garlic, Ginger and the Tomato. I used my Nutri Bullet (extractor blade) to make a puree.
  • Follow my directions in the article:  Make Cumin Powder at Home. The Cumin has to be dry roasted to bring that beautiful aroma and flavor in the dish.
  • Heat a non stick pan on medium heat. Add the canola oil in it.
  • After a few seconds, add the Paneer pieces in it. Arrange in a single layer. Fry for a minute then flip them. When the Paneer looks golden in color, transfer to a plate. 
  • Repeat the steps to fry all the Paneer pieces in batches.


Directions for making the curry:
  • Heat a large pan or wok on medium high heat. 
  • Add the Mustard oil and heat it for a minute. 
  • Swirl the oil around to coat the bottom. If it flows smoothly and quickly coats the bottom of the pan, it means the oil is hot enough to start cooking.
  • Reduce the heat to medium and add the Onions and sauté till the onions turn light brown.
  • Add the Garlic, Ginger and Tomato puree and sauté for 3-4 minutes.
  • Start adding the spices (Dry Roasted Cumin Powder, Black Salt, Salt, 
  • Turmeric Powder, Coriander Powder, Red Chili Powder, Meat Masala and Asafoetida) in the mixture.
  • Keep frying till the raw aroma goes away. The oil will start to leave the sides of this mixture.
  • Add the Chickpeas and fry for about 3-4 minutes to allow the Chickpeas to mix evenly with the spices mixture.
  • Add the stock (along with all the whole spices) in which the Chickpeas were boiled. 
  • Stir to mix and taste to check the Salt.
  • Transfer all the Paneer pieces in the wok and carefully mix them in the curry. Use a rubber spatula so that they don’t break.
  • Reduce the heat to low. Cover and stir occasionally for 10 minutes. The gravy will thicken and reduce.
  • Add Garam Masala and cover and cook for another 10 minutes.
  • Add the Cilantro, stir to mix. 
  • Serve hot with Onion slices, Bhaturas, Jeera Rice or Namkeen Puris.


Tip: Use the Food Chopper to chop the Onion and Cilantro.


(Same recipe without the Tea bag)


Recommended Reading:

Monday, 4 December 2017

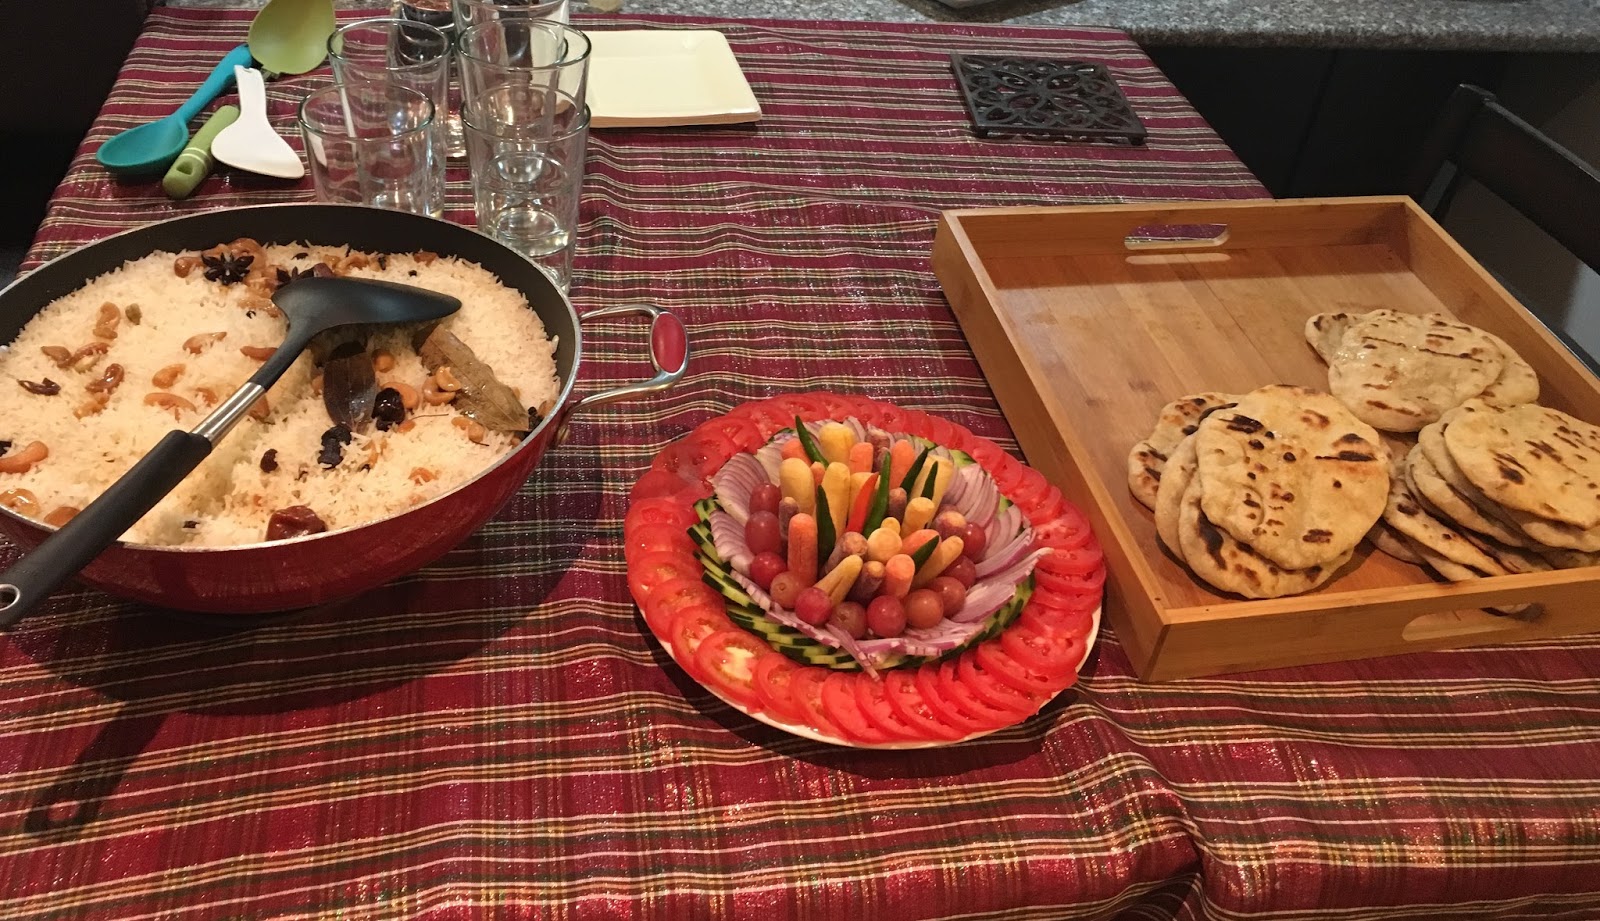
Indian Salad


Photo and recipe courtesy: Dr. Debarshi Chatterji

In India, we usually serve Salad as a side dish. They are not the usual appetizer or main course salads, rather they are served as an accompaniment to the main course. Indian main course varies from region to region, but mainly it consists of a soup (dal), a portion of sautéed vegetables (Sabji), a curry prepared with a protein (fish or mutton curry) with rice or flatbreads (roti). This is served with a side dish of freshly available sliced vegetables like tomato, cucumber, onion, carrot etc. Depending on personal preference, you may want to include some fruits or even sprinkle a few drops of lemon or lime on this salad. Although this salad goes great with any Indian main course, I love to serve this with mutton or chicken curries and crispy hot Parathas.


Ingredients:
  • Tomatoes – 3, medium
  • Cucumber – 1, firm
  • Onion – 1, medium, red 
  • Grapes or Olives – a handful (optional)
  • Carrots – baby carrots, a handful
  • Green Chilies – 6-7
  • Plate/ Platter to arrange the salad


Directions:
  • Always choose fresh vegetables. Wash them and let them dry a bit (or wipe them with a paper towel).
  • Choose a sharp knife and carefully start slicing the vegetables. For cucumber, you may choose to peel or leave the skin on. Make sure the slices are thin and even.
  • Start plating, arrange the tomato slices on the outer edge of the plate. Fill the inner circles with slices of cucumber, onion, carrots, grapes and green chilies.
  • Serve the salad with your main course and enjoy.


Recommended Reading:

Monday, 11 July 2016

Garam Masala


A few weeks ago I uploaded an article on ‘Make Cumin Powder at home’. The idea was to prepare freshly grounded spices at home which are more flavorful and aromatic. The whole spices are also economical to buy and convenient to store. I always store all my spices in zip lock bags or air tight containers away from heat and light and they last for a long time. It’s a good investment for months of flavorful food and health. 

Indian cooking is done using variety of spices but there are a few major spice mixes which can save your day as you can prepare a number of stir fries and curries with them. We have already used Panch Fhoron in the preparation of Alu Bhindi r torkari (Potatoes with Okra Stir Fry) and Alu Kumror Torkari (Potatoes with Pumpkin Stir Fry). Garam Masala is yet another very useful spice mix which creates a distinctive flavor and aroma in the dishes and is used in the preparation of different varieties of dishes like Biryani, curries etc.


The ingredients of Garam Masala are Cumin Seeds, Black and Green Cardamom, Black Pepper, Cloves, Cinnamon, Bay Leafs, Mace and Nutmeg. The best part about buying whole spices is, we can use them for preparing different varieties of Indian dishes. Whole spices like Cumin and Cardamoms are often used to tamper the oil before sautéing the vegetables or meat. Cloves and Bay leafs are used not only in savory dishes but also in desserts like Gajar ka Halwa (Carrot Pudding) or Payesh (Rice Pudding). Mace and Nutmeg are the main spices creating so many fragrances in the yummy biryani. 

Now you may ask me, why should we go for all this trouble of preparing Garam Masala at home when it is always available in the Indian stores. The answer is quality, you see, freshly grounded spices have their own strong aroma and flavor, something which the pre grounded spices start loosing after some time. I usually grind a small quantity of Garam Masala so that it is consumed within a few weeks and hence its deep and complex flavor is very distinctive once you add it in any dish.

Debarshi always keeps looking for kitchen gadgets and he has bought me a very useful gadget called Nutri bullet. It has a strong milling blade which helps me to grind even small quantity of spices whenever I want. I have always seen my mom preparing Garam Masala at home so as soon as we bought the Nutri Bullet I took the recipe from her and bought all the spices. If you do not have a Nutri Bullet, you can also use a Coffee Grinder or even a Mortar and Pestle.

Use Garam Masala to prepare yummy dishes like Pakoras, Chole, Butter Chicken, Biryani etc. I usually add a little Garam Masala in all the Curries and Kababs. I also use the whole spices for more flavor.

“Live life with a little Spice”

Ingredients:
  • Cumin Seeds - 2 Tablespoons 
  • Black Cardamom - 1 Tablespoon 
  • Green Cardamom - 1 Tablespoon 
  • Black Pepper - 1 Tablespoon 
  • Cloves - 1 Tablespoon 
  • Cinnamon - 1 Small Stick
  • Bay Leafs – 10 -15 Big Leaves 
  • Mace - ¼ Teaspoon 
  • Nutmeg - ¼ Teaspoon 
Directions:
  • Take a big bowl.
  • Mix all the spices (Cumin Seeds, Black Cardamom, Green Cardamom, Black Pepper, Cloves, Cinnamon, Bay Leafs, Mace and Nutmeg) in the bowl. 
  • Break the Bay Leafs into 2-3 pieces. 
  • Transfer the spices to your Nutri Bullet/ Spice Grinder/ Coffee Mill and grind until a fine powder is formed
  • Garam Masala is ready. Store it in an airtight container.
  • Always use a dry spoon to measure and use the masala.
  • Use in Pakoras, Chole, Biryani and Curries.


Awadhi Mutton Biryani

Recommended Reading: