Featuring over 350 tried and tested recipes that can be prepared at home. From comfort food to restaurant style. Plus 110+ articles on Kitchen and Cooking Tips, Restaurant Reviews and more.
Showing posts with label Black Forest Gateau. Show all posts

Friday, 30 November 2018

Boozy Christmas Fruitcake


Photo Courtesy: Dr. Debarshi Chatterji
Recipe Inspiration: Mary Berry


At my mom’s Christmas is always celebrated with a big round fruitcake and puff pastry stuffed with spiced potatoes. Earlier she used to bake a lot and mind you, our Indian homes don’t have convection ovens (because most of the cooking is done on stove top). So, she used to bake in a big pressure cooker lined with brown paper. All four of us (mom, dad, me and sis) had our own roles in the cake baking. So, someone will be chopping the nuts and someone else will be weighing the ingredients or mixing the batter. It was a tiresome work and it used to take hours for the cake to get ready. We used to be so excited at the thought of eating it that often we would stay awake for hours for it to finish baking. Oh! I don’t think my mom has ever baked anything as beautiful or delicious as that cake. 


Later, when I started working in Delhi, sometimes mom used to send me a care package. It would have tons of things along with a huge piece of that yummy fruitcake. I think, recently she has stopped baking it from scratch because of all that work. However, they still maintain that sweet tradition of having it on Christmas (be it bakery bought).

It was my first Christmas after coming to the U.S., Debarshi had gotten me varieties of baked goods. I was thoroughly enjoying them but somehow you know, I was still missing that fruitcake and then it happened...


My best friend (Vicki) got me a piece of fruitcake baked by her mom and immediately it brought back all those sweet memories. In the last five years I have baked her mom’s recipe quite a few times. This year, I thought, I am going to try an English recipe and who else is best at English baking than Mary Berry. Now I have improvised a couple of things according to easy availability and cost however, the cake tasted every bit as authentic and delicious as it should be. I think this fruitcake is going to be a part of our Christmas tradition now.


This cake is every bit rich, magnificent and full of delicious dried fruits which you can add according to your choice! The spices make it taste very Indian (or should I say very English?). 

Let’s start with soaking the fruits. The original recipe suggested just ¼ cup of brandy, however, I have used ½ and ¼ cups of rum which surprisingly didn’t taste strong at all. I would recommend not to use an expensive booze for soaking and feeding the cake. Also, please do not serve this to any kids. Some things are best kept aside for the grown ups only.


A little planning ahead goes a long way for this cake. Yes, you will still have to wait a couple of days to finally eat this cake (because of the soaking and feeding), however, the result will be every bit worth the wait. This cake is sooooo good, so make sure to savor every bite. I am telling you, it will be difficult to keep your hands off the cake and it will be gone before you know it. Please do not skip any step otherwise it wont turn up quite as boozy as it should be. It takes a while for the flavors to mature and the alcohol to infuse well. It should not strike your taste buds as loaded with alcohol but just feel like a hint. Now don’t be greedy and over feed the cake because it may make it soggy. There should be a mild touch of booze in the cake so that it tastes fruitier.

Now if you are one of those people who don’t like fruitcakes, then this cake will convert you. Believe me, this isn’t another one of those candy filled cakes. There is a lot of time, cost and effort in this cake along with organic and fresh ingredients. Still thinking of a reason? I will give you two - booze and sugar. If you love drinking and sweet treats, you will love this cake. If you would rather like a non-alcoholic cake, then I read somewhere that you can substitute the Rum with apple juice. Also, since there is almost no candied stuff in it, you can have it anytime! Yes, perfect to satisfy those fruitcake cravings during the summer months (when normally you wont find the candied cherries in the market). Bake this cake whenever you want and satisfy your heart.

This boozy Christmas cake is amazing! You will taste the delicious dried fruits with a hint of the spices. Yes, that is one of the best things about this cake. We usually have all these spices in our pantry and we need just a little for the cake. Please do not get confused with the ingredient - Mace. It does not mean pepper. Mace is an aromatic spice used widely in Indian and English cuisine. If you don’t have Mace at home, you should definitely buy a pack from the Indian store because it is also used in a variety of other dishes (like Kababs, Biryani and Pulao). 


Now you can very well use whatever nuts or dried fruits you like best. However, do not change the amount of the fruits which is 5 cups. I know, it is astonishingly high! That is why we have to bake it at a low temperature for a longer time so that nothing burns. This cake is moist, rich and so fruity! We are totally spoiled now! After having this delicious homemade cake, we cannot even think of buying a fruitcake from a bakery. 

I am not sure you will have any leftovers from this delicious cake to eat later. You can always save a piece by freezing it. Just transfer the piece of cake in a zip lock bag and tuck it away before it’s all gone. Even while feeding the cake, I would recommend refrigerating it so that its shelf life increases.

Now don’t wait, plan this fruitcake for this Christmas so that you can enjoy a big slice while listening to Christmas carols and decorating your shiny beautiful tree. I am so fond of dried fruits that I have already eaten quite a lot while preparing, baking and feeding the cake. Just don’t ask me to account for the Rum!


Ingredients:
  • Corn Syrup - 1 tablespoon, light or dark 
  • Dried Apricots - 1 ¼ cups 
  • Dried Cherries - 1 cup 
  • Golden Raisins -  ½ cup 
  • Dates - 1 cup 
  • Dried Figs - 1 ¼ cups 
  • Rum – about 1 cup
  • Lemon – 1, un-waxed, finely grated zest only
  • Orange – 1, un-waxed, finely grated zest only
  • Orange Extract - ½ teaspoon 
  • Brown Sugar – 1 ¾ cups 
  • All Purpose Flour – 1 ¼ cups 
  • Nutmeg - ½ + ¼ teaspoons 
  • Ground Cinnamon - ¼ teaspoon
  • Ground Mace - ¼ teaspoon
  • Ground Cloves - ¼ teaspoon 
  • Butter – 14 Oz (or 3 ½ sticks), softened, unsalted
  • Walnuts - 5 tablespoons, broken
  • Eggs – 5, large
  • Candied Peel of 1 Orange (Click for the recipe)

The original recipe suggested many things (like Black Treacle, All Spice, Mixed Spice etc.), some of which were not available easily and some were too expensive. While trying a new recipe, I always keep in mind the over all cost. I baked the cake using substitutions and it worked.

The original recipe also asked for currants, sultanas, raisins, glacé cherries, apricots and mixed peel. We went to Costco and got big packs of dried fruits. You can also vary the fruit if you like (like I did), but make sure the total weight remains the same as given in the recipe (5 cups).


Tips: 

  • ¾ cup is ¼ * 3 (for the sugar).
  • You can use the Mortar and Pestle to grind the spices.


Let’s do some preparations:
  • Chop all the dried fruits (Apricots, Cherries, Dates and Figs) and put them in a bowl along with the Golden Raisins. Dip the knife in water occasionally to cut the dried fruits smoothly.


  • Dip the dried fruits in ½ + ¼ cups of Rum in a large bowl.
  • Add the Orange Extract and mix everything well.
  • Cover the bowl and transfer to the fridge.


Tips: 
  • The original recipe asked for ¼ cups of Brandy for this. So, if you want you can reduce the amount. However, I should mention here that even though I used more amount of Rum, my cake didn’t taste too alcoholic.
  • Also, make sure to do this step at least 48 hours before you bake the cake so that the dried fruits become plump. 


Directions:
  • Lightly grease a 9-inch-deep round cake pan.
  • Cut a strip of baking parchment to cover the sides of the pan.
  • Put a circle of baking parchment into the base of the pan and lightly grease it.
  • Cut another piece of parchment big enough to cover the top of the pan. This will be placed on top of the cake so that the long bake does not dry it out.
  • Preheat the oven to 275 F.
  • Start the mixer on the lowest speed, beat the Butter.
  • Start adding the other ingredients one by one - Sugar, All Purpose Flour, mixed spices (Nutmeg, Ground Cinnamon, Ground Mace and Ground Cloves), Eggs, Corn Syrup, Lemon zest, Orange zest and chopped Candied Peel (leave out a few good pieces for decoration) and beat well.


  • Fold in the walnuts and soaked fruits.


  • Spoon the mixture into the prepared cake tin and spread out evenly with the back of a spoon. Decorate the top with the remaining candied peels (you can also use walnuts, almonds, apricots)


  • Cover the top of the cake loosely with a layer of parchment paper. Bake for 4 hours, or until the cake feels firm to the touch and a skewer inserted into the center comes out clean. Allow the cake to cool in the pan (on a cooling rack).
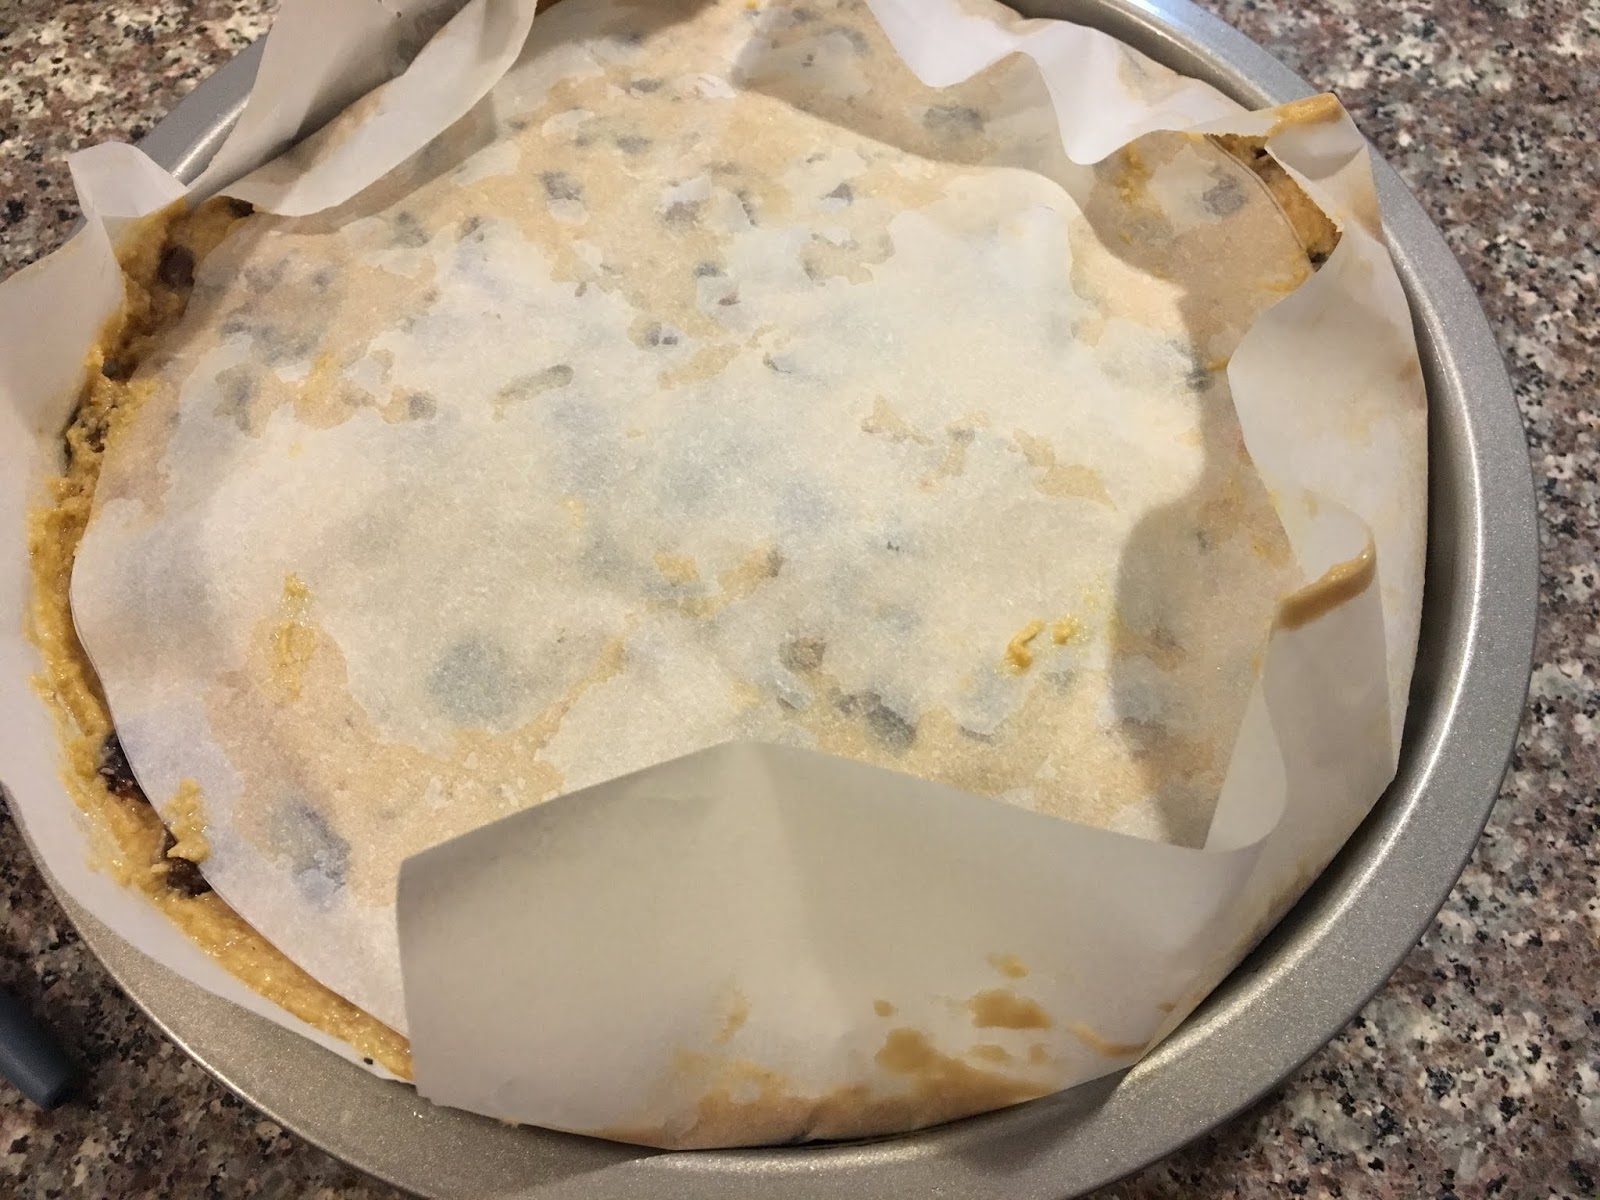


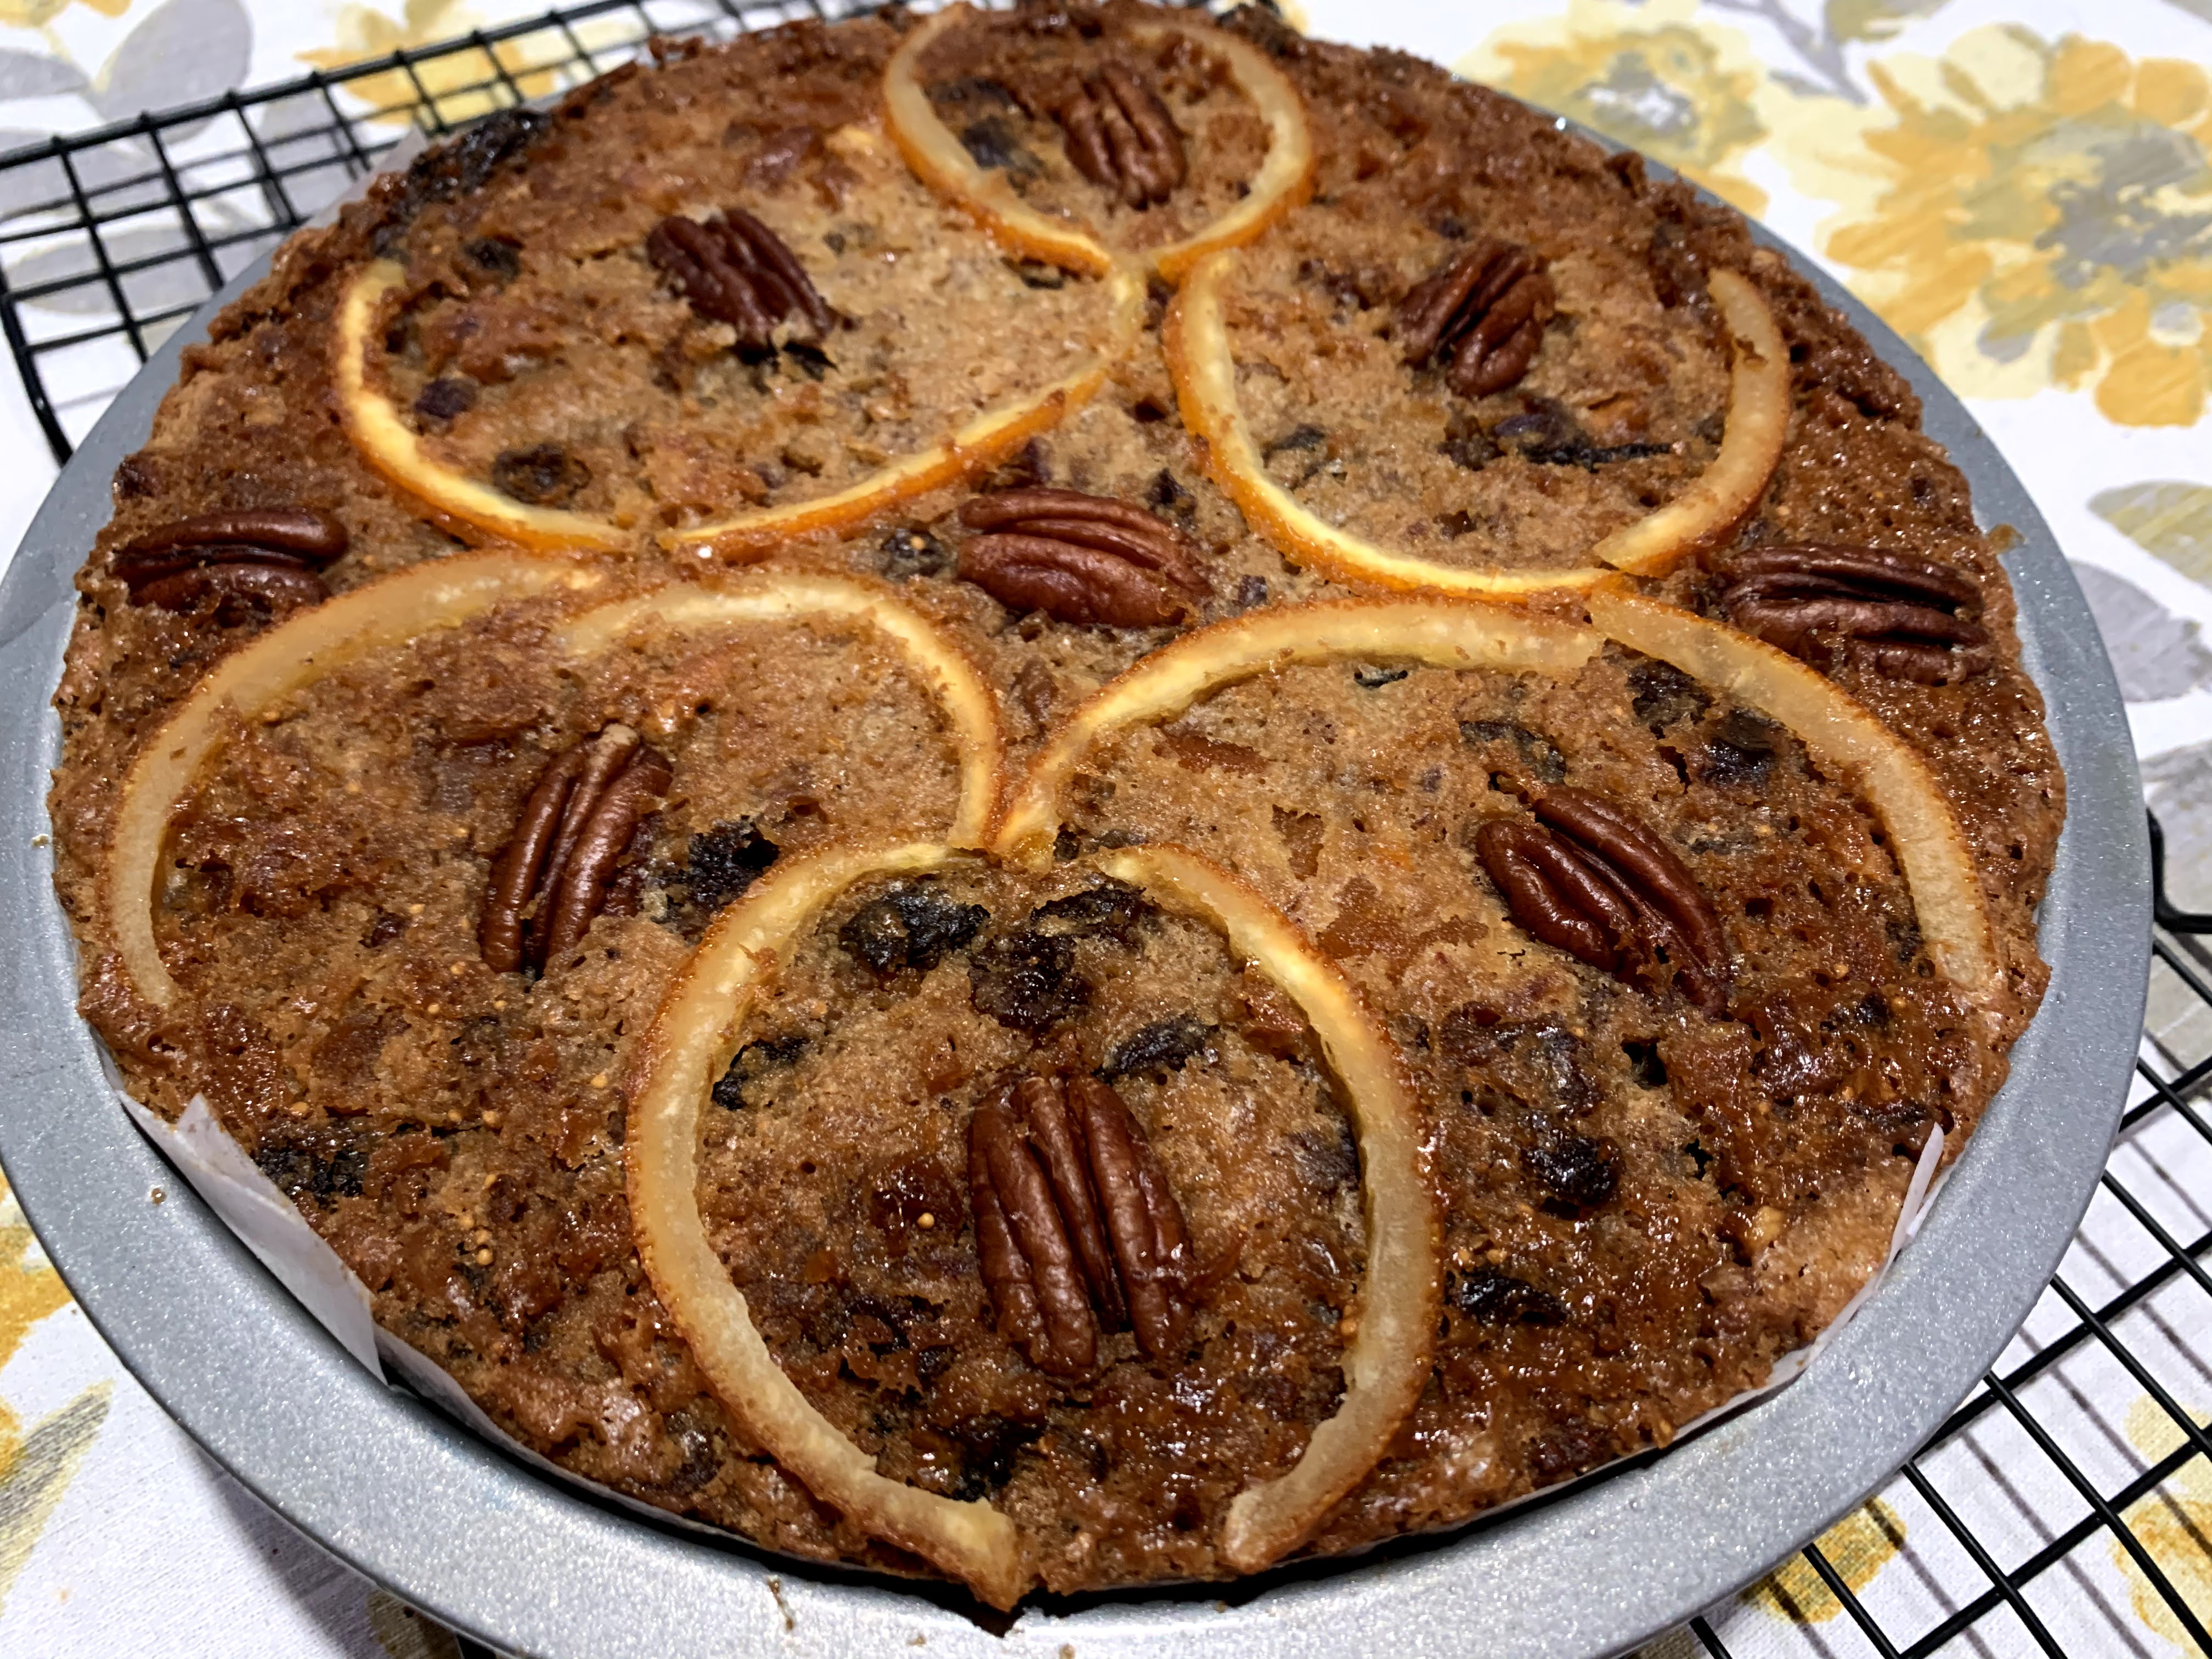


  • Feed the cake with a little splash of rum (do not take out the cake from the pan at this stage).
  • Repeat this step for at least 3 days. You can refrigerate the cake if you want.


Boozy Christmas Fruitcake is ready to be shared with friends and family.


You can also freeze the cake. Just put it in a zip-lock bag and transfer to the freezer.


Tips: 

  • Can't find a toothpick to test your cake? A skewer works just as well.
  • To grease your baking pan with ease, rub butter or oil around the baking pan using a piece of paper towel.
  • The recipe works well for two 6-inches cakes. Just bake them at the same temperature for 3 hours.
  • Not a fan of alcohol or serving to kids? Brush a little simple syrup or warm honey on the cake to bring that glazed look.


Thursday, 23 August 2018

Chocolate work and Piping


I think a Black Forest Gateau is fit for a festive celebration. First you get chocolate sponges loaded with cherry filling then to top it all plenty of whipped cream! Since I was baking this for Debarshi’s birthday, I wanted to do something special. Mary Berry’s recipe was for Christmas and it displayed some beautiful chocolate trees. I thought may be I can make some chocolate buttons, with each button featuring a character of ‘Happy Birthday Dr. D’. I decided to bake another chocolate sponge and make some petite cakes because I had plenty of cherry filling and whipped cream left. The idea was to decorate the petite cakes in a layer below the actual cake. The original recipe did ask for piped cream and chocolate dipped cherries and all that decoration really brought out the beauty of the cake.

I am sure this Black Forest Gateau is going to make appearance in our home every year. Needless to say it is a super decadent affair that pleases everyone.

I have to say in our home, Debarshi is the piping and decoration master. Since our homemade cakes are always lavish, it is rather nice to have him participating and taking over the decoration part. Gives me time to do other important stuffs. If you have someone in your home who is interested to do certain jobs on the cake, let them have a go! You never know they may surprise you.

Now the decoration of the Black Forest Gateau does look like a lot of job but it gets easier if you can undertake one step at a time. You see all these decorations are pretty easy but you have to give your undivided care and attention to each element.


Ingredients for the decoration:
  • White Chocolate – 1 cup (I used Ghirardelli white chocolate bar 4 Oz)
  • Plain Chocolate - 2 cups (I had a huge bag of Chocolate Chips at home with 51% cocoa so I just used that)
  • Fresh Cherries with Stalks – 24 (I got this from Costco)
  • Parchment paper


Directions to make the Chocolate dipped Cherries:
  • Start by melting the White and Plain chocolate in two separate bowls set over two pans of gently simmering water. If at any point you can see steam coming from the pan it means the water is too hot. Use a spatula to stir them.


  • Clear a shelve of your fridge so that you can quickly transfer everything inside and the chocolate can set.
  • As soon as the chocolates melt, transfer them to smaller bowls.
  • Lay a piece of parchment on a tray or chopping board and once again work in a cool kitchen otherwise the chocolate will start melting away immediately.
  • Dip 12 of the fresh cherries into the plain chocolate and place on the parchment. Transfer to the fridge.
  • Dip the remaining 12 fresh cherries into the white chocolate and place on the parchment. Transfer to the fridge.


Directions to make the Chocolate buttons and drizzled Cherries:
  • Using a small bottle cap or ring, draw several rounds on a piece of parchment. I wanted to write ‘Happy Birthday Dr. D’ so I drew 20 circles (it’s always good to have some extra). Turn over the parchment and you are now ready to fill them with chocolate.
  • Spoon the remaining melted plain chocolate into a disposable piping bag. Attach the large plain round nozzle on it. Read my article - Assemble a Piping / Pastry / Decorating Bag, to know more.
  • Fill the rounds with chocolate and carefully transfer the sheet to the fridge.
  • Now change the piping nozzle to small tip. 


  • Take out the chocolate dipped cherries and drizzle the plain chocolate over the white chocolate dipped cherries using the smaller tip. 
  • Fill another piping bag with the melted white chocolate (if it started hardening, put it back on the pan and melt it till smooth). Attach a small tip to it and drizzle the plain chocolate coated cherries with the white chocolate.


  • Put them back in the fridge and take out the chocolate buttons. Use the white chocolate to write one character on each of the buttons.


  • Now is the time to get creative, use the remaining chocolate to draw varieties of shapes for your cake. Debarshi drew this butterfly and several stars using both the chocolates. He also drizzled them over the petite cakes which really brought out the look.


  • Now place everything back in the fridge so that they can set and harden up.

Directions to pipe the Cream:
  • Fill the remaining whipped cream into a clean piping bag and attach the star nozzle on it. 
  • Pipe the cream all around the top edge and bottom of the cake.


Put everything together:
  • If the whipped cream starts melting put it back in the fridge.
  • Place the chocolate dipped cherries in the center of the cake. 
  • Stick the chocolate buttons in the front and center.
  • Stick all the other decorations all around the cake and place the tall butterflies on the top and center.


Tip:
  • If the chocolate starts to harden while you are piping, seal the tip with a little tape, place the piping bag in a bowl and microwave for a few seconds.


Black Forest Gateau is ready! Don’t forget to share and enjoy.


Recommended Reading:

Assemble the Black Forest Gateau


Now we have arrived at the stage where everything will start coming together, yes, we will be assembling this beautiful cake.

At this time, I have my kid friendly (non alcoholic) Cherry filling and whipped cream ready. My cake layers have been baked and they have cooled down completely. I have my cake tools ready: Offset spatula, Bench scraper, Turntable and Cake cardboard. And remember you can always use any paper plate or even a platter to set up the cake. Refer to my article on: ‘Apply the Crumb Coat’ to read everything about them and the significance of crumb coat.


Typically, Black Forest Gateau consists of several layers of chocolate sponge cake sandwiched with whipped cream and cherries. It is decorated with additional whipped cream, cherries and chocolate. I baked two chocolate layers and one vanilla fruitcake layer. 
  • Let’s start by taking the turntable and putting a little whipped cream on it. 


  • Place the cardboard on the turntable. This will help stick the cardboard on the turntable and it will not slide away while you are assembling the cake.


  • Start by spreading a thin layer of whipped cream on your cake board. This will help to stick the cake to the board and remember to work in a cool kitchen. Your whipped cream will start melting away if you have been cooking in the kitchen or if it is hot.
  • Place your first Chocolate layer on the board (make sure to remove the parchment from all the layers before assembling them together). 
  • Start by dividing the cherry mixture into three portions. 
  • Spread one portion of the cherry mix over the first chocolate sponge. 


  • Now we have already divided the whipped cream in half (remember, we set aside one half for the sides and top of the cake).
  • Divide the other half of the cream into three portions and spread one portion over the cherry mix. Use your offset spatula to smoothly spread the cream over the cherry filling.
  • Top with another chocolate sponge layer and repeat the steps. 
  • Top with the final Vanilla fruitcake layer and repeat the steps.
  • Spread half of the reserved whipped cream around the sides and top of the cake.


  • Use the bench scrapper to smooth the cream. Mary Berry did both the crumb and final layers together and decorated straight away but hey! I am no Mary Berry so I completed the crumb coat and transferred the cake to the fridge for an hour to harden up. 
  • After an hour, take out the cake and using your offset spatula and bench scrapper, apply another thin layer of whipped cream all over the cake smoothing the edges and sides. Once it looks smooth, transfer it back to the fridge. Now let’s make some decorations: Chocolate work and piping


Recommended Reading:

Whip the Cream for Black Forest Gateau


I read somewhere that a Black Forest cake should not be too sweet. It is meant for adults with deep rich flavors and alcohol. Well I decided to skip the booze to make it kid friendly but I didn’t want to make it sweet. So, I followed the original recipe which does not ask for any icing sugar while making the whipped cream which simply means that the cream will have its milky sweetness and not the overpowering sweetness of sugar.

Ingredients for the whipped cream:
  • Heavy Whipping Cream – 3.5 cups

Please see my article: ‘Allahabadi Fruit Cream’ to know how to whip cream step by step. 

  • We wont be using any sugar or vanilla extract to whip cream for this cake. 
  • We need to whip the cream to ‘The soft tip stage’. 
  • Then divide the cream in half, setting aside one half for the sides and top of the cake.


Now everything is ready, let’s Assemble the Cake:


Recommended Reading:

Wednesday, 22 August 2018

Prepare the Cherry filling


This was the first time I prepared a Cherry filling. Now if you remember, traditionally Black Forest Gateau is prepared with rich dark chocolate cake layers soaked in Kirsch syrup or liqueur and is therefore, rightly called the cake fit for the festivals or as I call it ‘Treat for the Grown Ups’. However, I think it would have been an act of unkindness on the kids if they were not allowed to indulge in a slice of this delicious cake. Therefore, we decided, no alcohol. Good decision! Now the only problem was, how to make the filling?

So, I looked at the recipe and it asked for, ‘Black Cherries in Kirsch’ which is prepared by dipping fresh pitted cherries in Kirsch and sugar till they absorb all the goodness of the alcohol and grow fat. Then they are drained and used for this recipe. Now Kirsch can be substituted with apple juice, black cherry, raspberry or black currant juice or syrup and any one of these would have been appropriate for the cake. I was still pondering about what to buy, when Debarshi suddenly spotted a pack of dried cherries at Costco and immediately it occurred to him that I can make the filling using these dried cherries.

Ingredients for the Cherry filling:
  • Dried Cherries – 2 cups
  • Corn Flour – 2 heaped tablespoons


Make ahead:
  • Dip the dried cherries in equal amount of water (2 cups) in a medium bowl.
  • Cover and refrigerate for 2 days. This will help the cherries to absorb water and they will become soft.
  • Check the packet to see if the cherries have sugar, normally dried fruits have some sugar added in them.
  • Make sure to complete this step before baking the cake layers. The dried fruits need time to soak properly.

Notes: 
  • If you are baking the Black Forest Gateau, I would recommend to do the above steps before starting on the cake layers. 
  • A certain amount of Sugar is very important because we don’t want the filling to be too tart.


Directions to prepare the Cherry filling:
  • We are going to make a thick sauce to go with the cherries.
  • Strain the cherries and reserve the juice.
  • Roughly chop the cherries.
  • Take a big pot and add the corn flour in it.
  • Add 2-3 spoons of cherry juice in it. 
  • Using a rubber spatula, mix the corn flour and the juice together. Form a paste and do this step before the heat is turned on. Make it absolutely smooth.
  • Now add the rest of the juice and turn the heat on. Keep it on medium because we don’t want it to burn. It will start getting thick quickly so keep an eye on it at all times.
  • Stir all the time until it comes to a boil and gets thick. Then reduce the heat to low and keep stirring. It will develop a shine and upon dipping the spatula, it will coat it.
  • Remove from heat and add the chopped cherries in it. Stir so that they are completely coated in that sauce.
  • Turn it into a bowl and leave to cool. 
  • Refrigerate until quite firm.


Now we are going to Whip the Cream and assemble the cake.


Recommended Reading:

Tuesday, 21 August 2018

Bake the Chocolate sponges and Vanilla Fruit cake layers


The original recipe of Black Forest Gateau had four thin layers of chocolate sponges cut out of two thick sponges. I decided not to cut the sponges in halves because I wanted nice thick layers. I assembled the two layers and asked Debarshi if he was happy with the cake and he said he wanted something different. He asked me if it was possible to make another layer, a fruitcake layer. So, I baked a vanilla fruitcake layer filled with dried cherries. It turned out beautifully dense and absolutely delectable.

I started on the cake layers a day earlier because I wanted to do a grand decoration on the cake. The cake was to be coated in whipped cream topping and I wanted to add chocolate buttons and piping work to make it beautiful.


I believe that a kitchen which is being used regularly is always in a mess, even if you clean and arrange it a hundred times. This cake will also leave a mess of cocoa powder, flour and sugar but if you can just wait for half an hour, you will get two delicious, decadent and rich cake layers of Chocolate and a dense fruit packed layer of vanilla.

Now this may be my self taught baking knowledge talking, but I found baking the chocolate sponges very technical. Well it is a fancy cake and I was baking it for the first time so there were parts where I failed but I have to tell you, I did face a few challenges in the beginning but the rest came pretty easy.

My first two layers didn’t bake very good. They didn’t rise at all and so I had to re do them. The second time I followed the instructions step by step and sure enough I had missed a very small but important step. As I started assembling the cake, my confidence came back and the more we decorated the better it looked.

If you’re a Black Forest Gateau fan, I sure hope you will like this cake and if you’re not, I hope this recipe will convert you. Believe me the ones at the grocery stores do not do justice to this amazing cake.

If you have Netflix, I recommend watching Season 3 - Episode 1 of ‘Great British Baking Show Master class’. If you have any doubts after reading my directions, maybe Mary Berry’s video will help you.

All the best!


Ingredients for the Chocolate cake:
  • Eggs – 6, large 
  • Sugar - ¾ cup 
  • All Purpose Flour – 10 tablespoons + 2 teaspoons, sifted
  • Salt – ¼ teaspoon
  • Baking Powder – 1 teaspoon
  • Cocoa Powder – ½ cup, sifted

Notes: 
  • The original recipe asked for Caster Sugar, which I couldn’t find anywhere so I used white granulated sugar. I grinded the sugar slightly in my Nutri Bullet (milling blade) to have finer granules but if you do this step, be very careful because you can easily get sugar powder. 
  • The original recipe also asked for Self-Raising Flour, which is basically just all purpose flour mixed with baking powder and salt. I had all these ingredients at home so instead of buying Self Raising Flour, I used my pantry items.


Others:

  • Round pans – 3 of 9 inches each
  • Non stick spray or butter to grease the pans


Let’s do some preparations:
  • Let’s cut the Parchment Paper. Place the Pan on the Parchment paper and draw a circle on the outer edge of the pan. Cut the circle and repeat twice for the other two pans.
  • Spray the pans with nonstick spray. Line the bottoms with the parchment paper rounds and spray them as well.
  • Measure all the ingredients.


Directions to bake the Chocolate sponges (stand mixer recommended):
  • Preheat the oven to 350 F. 
  • Break the Eggs in the mixer bowl. 
  • Add to that the Sugar. 
  • Attach the Whisk.
  • Whisk the Eggs and the Sugar till the mixture turns pale and reach ribbon stage which means when you lift the whisk the impression goes back quickly (the mixture should be thick enough to leave a trail when the whisk is lifted out of the bowl).


  • The mixture will rise to almost the highest marker of the mixer bowl.
  • Mix the Flour and Cocoa Powder together and sift them in small batches into the batter.
  • Fold it in gently (with a rubber spatula) so as not to knock out any air to ensure the sponge stays light and airy as possible. Make sure to scrape the bottom of the bowl because unmixed flour will collect there.
  • Keep mixing the dry products into the batter till you have a smooth finish. Then divide the mixture equally into two of the prepared tins and do this very carefully. Do not drop the batter from a height. Keep it slow and near the pan.
  • Bake for 22-25 minutes or until the sponges are well risen and beginning to shrink away from the sides of the tin. Use a tooth pick to check if the cake has baked through, insert it in the center of the cake and if it comes clean, it is done.
  • Take out the cakes from the oven and leave them in their tins for about 10 minutes before turning out and leaving them to cool on a wire rack.


Tips: 
  • My first attempt at baking these sponges went wrong at the dry products mixing phase. I accidentally dropped the entire flour into the egg mix. It immediately knocked out a lot of air. When I mixed it and baked it the layers came very thin and crumbly. So, I re-did the layers. This time I sifted small quantities of flour and cocoa into the egg mix and kept mixing it in the batter continuously. It helped me incorporate almost all the flour into it smoothly and the layers rose much better.
  • If you can see small flour pockets in your sponge that means the flour has not been mixed well in the wet mix.


Ingredients for the Vanilla Fruitcake:
Dry Products:
  • All Purpose Flour - ¾ cup and 2 tablespoons 
  • Sugar - ¾ cup
  • Baking Soda - ¾ teaspoon
  • Baking Powder - ¾ teaspoon
  • Salt – ½ teaspoon
  • Dried Cherries – ¼ cup


Wet Products:
  • Water - ½ cup 
  • Milk – ½ cup
  • Vegetable Oil – ¼ cup 
  • Egg - 1 Large 
  • Vanilla Extract - 1 teaspoon


Let’s do some preparations:
  • Half an hour prior baking the cake, take out the egg from the fridge and keep it on your kitchen counter. We are doing this to bring the egg to the room temperature. This helps it to mix evenly with the other ingredients and also prevents any over mixing of the batter. 
  • Cut the dried cherries into 3-4 pieces and coat them in a little flour.


Let’s bake the Cake:
  • Take a large bowl and sift all the dry products (All Purpose Flour, Sugar, Baking Powder, Baking Soda and Salt).
  • Preheat the oven to 350°F.
  • If using a stand mixer, attach the beater, add all the dry products in the bowl and start the mixer on the lowest speed.
  • Now we will start adding the wet products one by one. Add the Egg, Milk, Vegetable Oil and the Vanilla Extract. Mix for about two minutes on medium speed. 
  • Lower the speed and heat the half cup of water in the microwave on high for one minute. It should be boiling.
  • Add the boiling water into the prepared batter, make sure the speed is at its lowest.
  • The resultant batter will be thin, pour it into the prepared pan. Sprinkle the cherry pieces on the batter evenly.
  • Place the pan on the bottom rack of the oven.
  • Bake the cake for about 20-25 minutes and keep an eye on the color. I use a tooth pick to check if the center has been cooked. Very carefully insert the toothpick into the center and pull it out. If the toothpick comes out clean, the cake is ready, otherwise, cook for a couple more minutes and don’t forget to use the timer every time.
  • Wait for 10 minutes, then remove the cake from the pan (run a short knife around the edges to release the cake) and invert it on the cooling rack. This ensures the cake does not have a soggy bottom.
  • Peel the parchment paper.


Tip: If the cake is getting too dark, scrunch a piece of foil with your fingers and cover the top of the cake with it.

Now our cake layers are ready, let’s start working on the Cherry filling.


Recommended Reading: