Featuring over 350 tried and tested recipes that can be prepared at home. From comfort food to restaurant style. Plus 110+ articles on Kitchen and Cooking Tips, Restaurant Reviews and more.
Showing posts with label Mortar and Pestle. Show all posts

Friday, 30 November 2018

Boozy Christmas Fruitcake


Photo Courtesy: Dr. Debarshi Chatterji
Recipe Inspiration: Mary Berry


At my mom’s Christmas is always celebrated with a big round fruitcake and puff pastry stuffed with spiced potatoes. Earlier she used to bake a lot and mind you, our Indian homes don’t have convection ovens (because most of the cooking is done on stove top). So, she used to bake in a big pressure cooker lined with brown paper. All four of us (mom, dad, me and sis) had our own roles in the cake baking. So, someone will be chopping the nuts and someone else will be weighing the ingredients or mixing the batter. It was a tiresome work and it used to take hours for the cake to get ready. We used to be so excited at the thought of eating it that often we would stay awake for hours for it to finish baking. Oh! I don’t think my mom has ever baked anything as beautiful or delicious as that cake. 


Later, when I started working in Delhi, sometimes mom used to send me a care package. It would have tons of things along with a huge piece of that yummy fruitcake. I think, recently she has stopped baking it from scratch because of all that work. However, they still maintain that sweet tradition of having it on Christmas (be it bakery bought).

It was my first Christmas after coming to the U.S., Debarshi had gotten me varieties of baked goods. I was thoroughly enjoying them but somehow you know, I was still missing that fruitcake and then it happened...


My best friend (Vicki) got me a piece of fruitcake baked by her mom and immediately it brought back all those sweet memories. In the last five years I have baked her mom’s recipe quite a few times. This year, I thought, I am going to try an English recipe and who else is best at English baking than Mary Berry. Now I have improvised a couple of things according to easy availability and cost however, the cake tasted every bit as authentic and delicious as it should be. I think this fruitcake is going to be a part of our Christmas tradition now.


This cake is every bit rich, magnificent and full of delicious dried fruits which you can add according to your choice! The spices make it taste very Indian (or should I say very English?). 

Let’s start with soaking the fruits. The original recipe suggested just ¼ cup of brandy, however, I have used ½ and ¼ cups of rum which surprisingly didn’t taste strong at all. I would recommend not to use an expensive booze for soaking and feeding the cake. Also, please do not serve this to any kids. Some things are best kept aside for the grown ups only.


A little planning ahead goes a long way for this cake. Yes, you will still have to wait a couple of days to finally eat this cake (because of the soaking and feeding), however, the result will be every bit worth the wait. This cake is sooooo good, so make sure to savor every bite. I am telling you, it will be difficult to keep your hands off the cake and it will be gone before you know it. Please do not skip any step otherwise it wont turn up quite as boozy as it should be. It takes a while for the flavors to mature and the alcohol to infuse well. It should not strike your taste buds as loaded with alcohol but just feel like a hint. Now don’t be greedy and over feed the cake because it may make it soggy. There should be a mild touch of booze in the cake so that it tastes fruitier.

Now if you are one of those people who don’t like fruitcakes, then this cake will convert you. Believe me, this isn’t another one of those candy filled cakes. There is a lot of time, cost and effort in this cake along with organic and fresh ingredients. Still thinking of a reason? I will give you two - booze and sugar. If you love drinking and sweet treats, you will love this cake. If you would rather like a non-alcoholic cake, then I read somewhere that you can substitute the Rum with apple juice. Also, since there is almost no candied stuff in it, you can have it anytime! Yes, perfect to satisfy those fruitcake cravings during the summer months (when normally you wont find the candied cherries in the market). Bake this cake whenever you want and satisfy your heart.

This boozy Christmas cake is amazing! You will taste the delicious dried fruits with a hint of the spices. Yes, that is one of the best things about this cake. We usually have all these spices in our pantry and we need just a little for the cake. Please do not get confused with the ingredient - Mace. It does not mean pepper. Mace is an aromatic spice used widely in Indian and English cuisine. If you don’t have Mace at home, you should definitely buy a pack from the Indian store because it is also used in a variety of other dishes (like Kababs, Biryani and Pulao). 


Now you can very well use whatever nuts or dried fruits you like best. However, do not change the amount of the fruits which is 5 cups. I know, it is astonishingly high! That is why we have to bake it at a low temperature for a longer time so that nothing burns. This cake is moist, rich and so fruity! We are totally spoiled now! After having this delicious homemade cake, we cannot even think of buying a fruitcake from a bakery. 

I am not sure you will have any leftovers from this delicious cake to eat later. You can always save a piece by freezing it. Just transfer the piece of cake in a zip lock bag and tuck it away before it’s all gone. Even while feeding the cake, I would recommend refrigerating it so that its shelf life increases.

Now don’t wait, plan this fruitcake for this Christmas so that you can enjoy a big slice while listening to Christmas carols and decorating your shiny beautiful tree. I am so fond of dried fruits that I have already eaten quite a lot while preparing, baking and feeding the cake. Just don’t ask me to account for the Rum!


Ingredients:
  • Corn Syrup - 1 tablespoon, light or dark 
  • Dried Apricots - 1 ¼ cups 
  • Dried Cherries - 1 cup 
  • Golden Raisins -  ½ cup 
  • Dates - 1 cup 
  • Dried Figs - 1 ¼ cups 
  • Rum – about 1 cup
  • Lemon – 1, un-waxed, finely grated zest only
  • Orange – 1, un-waxed, finely grated zest only
  • Orange Extract - ½ teaspoon 
  • Brown Sugar – 1 ¾ cups 
  • All Purpose Flour – 1 ¼ cups 
  • Nutmeg - ½ + ¼ teaspoons 
  • Ground Cinnamon - ¼ teaspoon
  • Ground Mace - ¼ teaspoon
  • Ground Cloves - ¼ teaspoon 
  • Butter – 14 Oz (or 3 ½ sticks), softened, unsalted
  • Walnuts - 5 tablespoons, broken
  • Eggs – 5, large
  • Candied Peel of 1 Orange (Click for the recipe)

The original recipe suggested many things (like Black Treacle, All Spice, Mixed Spice etc.), some of which were not available easily and some were too expensive. While trying a new recipe, I always keep in mind the over all cost. I baked the cake using substitutions and it worked.

The original recipe also asked for currants, sultanas, raisins, glacé cherries, apricots and mixed peel. We went to Costco and got big packs of dried fruits. You can also vary the fruit if you like (like I did), but make sure the total weight remains the same as given in the recipe (5 cups).


Tips: 

  • ¾ cup is ¼ * 3 (for the sugar).
  • You can use the Mortar and Pestle to grind the spices.


Let’s do some preparations:
  • Chop all the dried fruits (Apricots, Cherries, Dates and Figs) and put them in a bowl along with the Golden Raisins. Dip the knife in water occasionally to cut the dried fruits smoothly.


  • Dip the dried fruits in ½ + ¼ cups of Rum in a large bowl.
  • Add the Orange Extract and mix everything well.
  • Cover the bowl and transfer to the fridge.


Tips: 
  • The original recipe asked for ¼ cups of Brandy for this. So, if you want you can reduce the amount. However, I should mention here that even though I used more amount of Rum, my cake didn’t taste too alcoholic.
  • Also, make sure to do this step at least 48 hours before you bake the cake so that the dried fruits become plump. 


Directions:
  • Lightly grease a 9-inch-deep round cake pan.
  • Cut a strip of baking parchment to cover the sides of the pan.
  • Put a circle of baking parchment into the base of the pan and lightly grease it.
  • Cut another piece of parchment big enough to cover the top of the pan. This will be placed on top of the cake so that the long bake does not dry it out.
  • Preheat the oven to 275 F.
  • Start the mixer on the lowest speed, beat the Butter.
  • Start adding the other ingredients one by one - Sugar, All Purpose Flour, mixed spices (Nutmeg, Ground Cinnamon, Ground Mace and Ground Cloves), Eggs, Corn Syrup, Lemon zest, Orange zest and chopped Candied Peel (leave out a few good pieces for decoration) and beat well.


  • Fold in the walnuts and soaked fruits.


  • Spoon the mixture into the prepared cake tin and spread out evenly with the back of a spoon. Decorate the top with the remaining candied peels (you can also use walnuts, almonds, apricots)


  • Cover the top of the cake loosely with a layer of parchment paper. Bake for 4 hours, or until the cake feels firm to the touch and a skewer inserted into the center comes out clean. Allow the cake to cool in the pan (on a cooling rack).
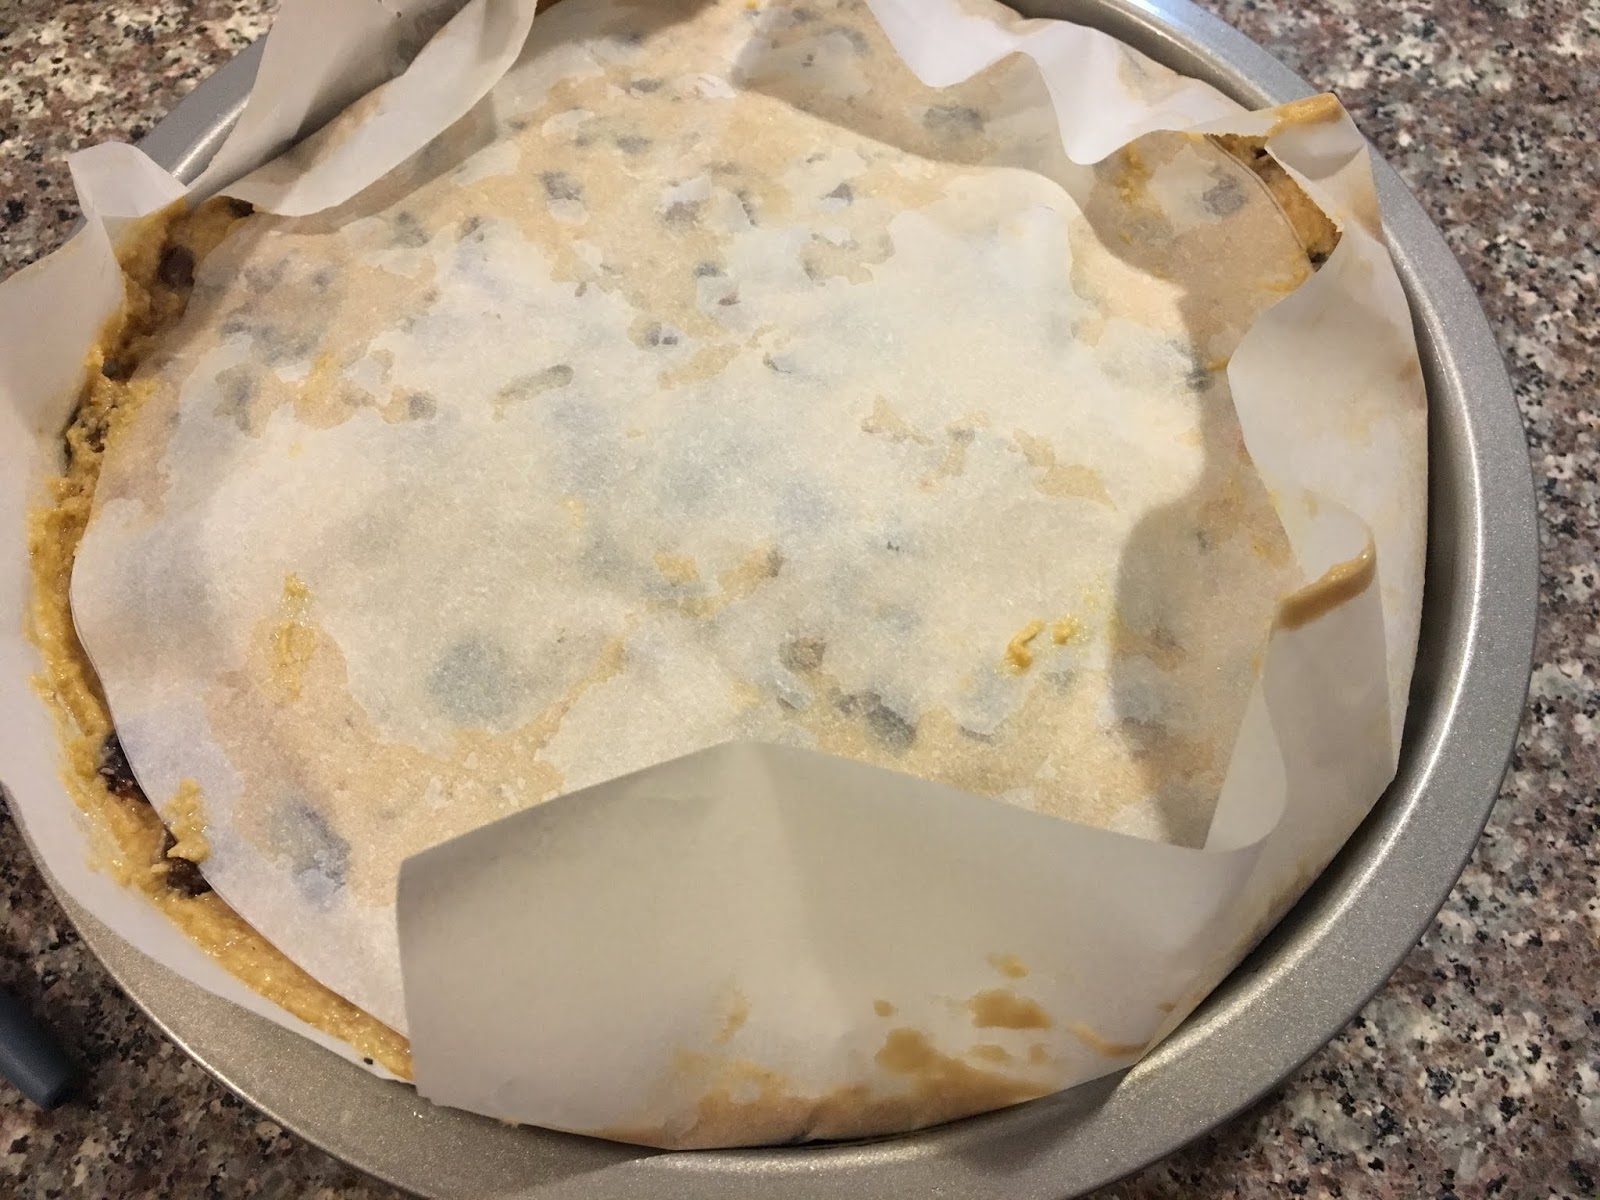


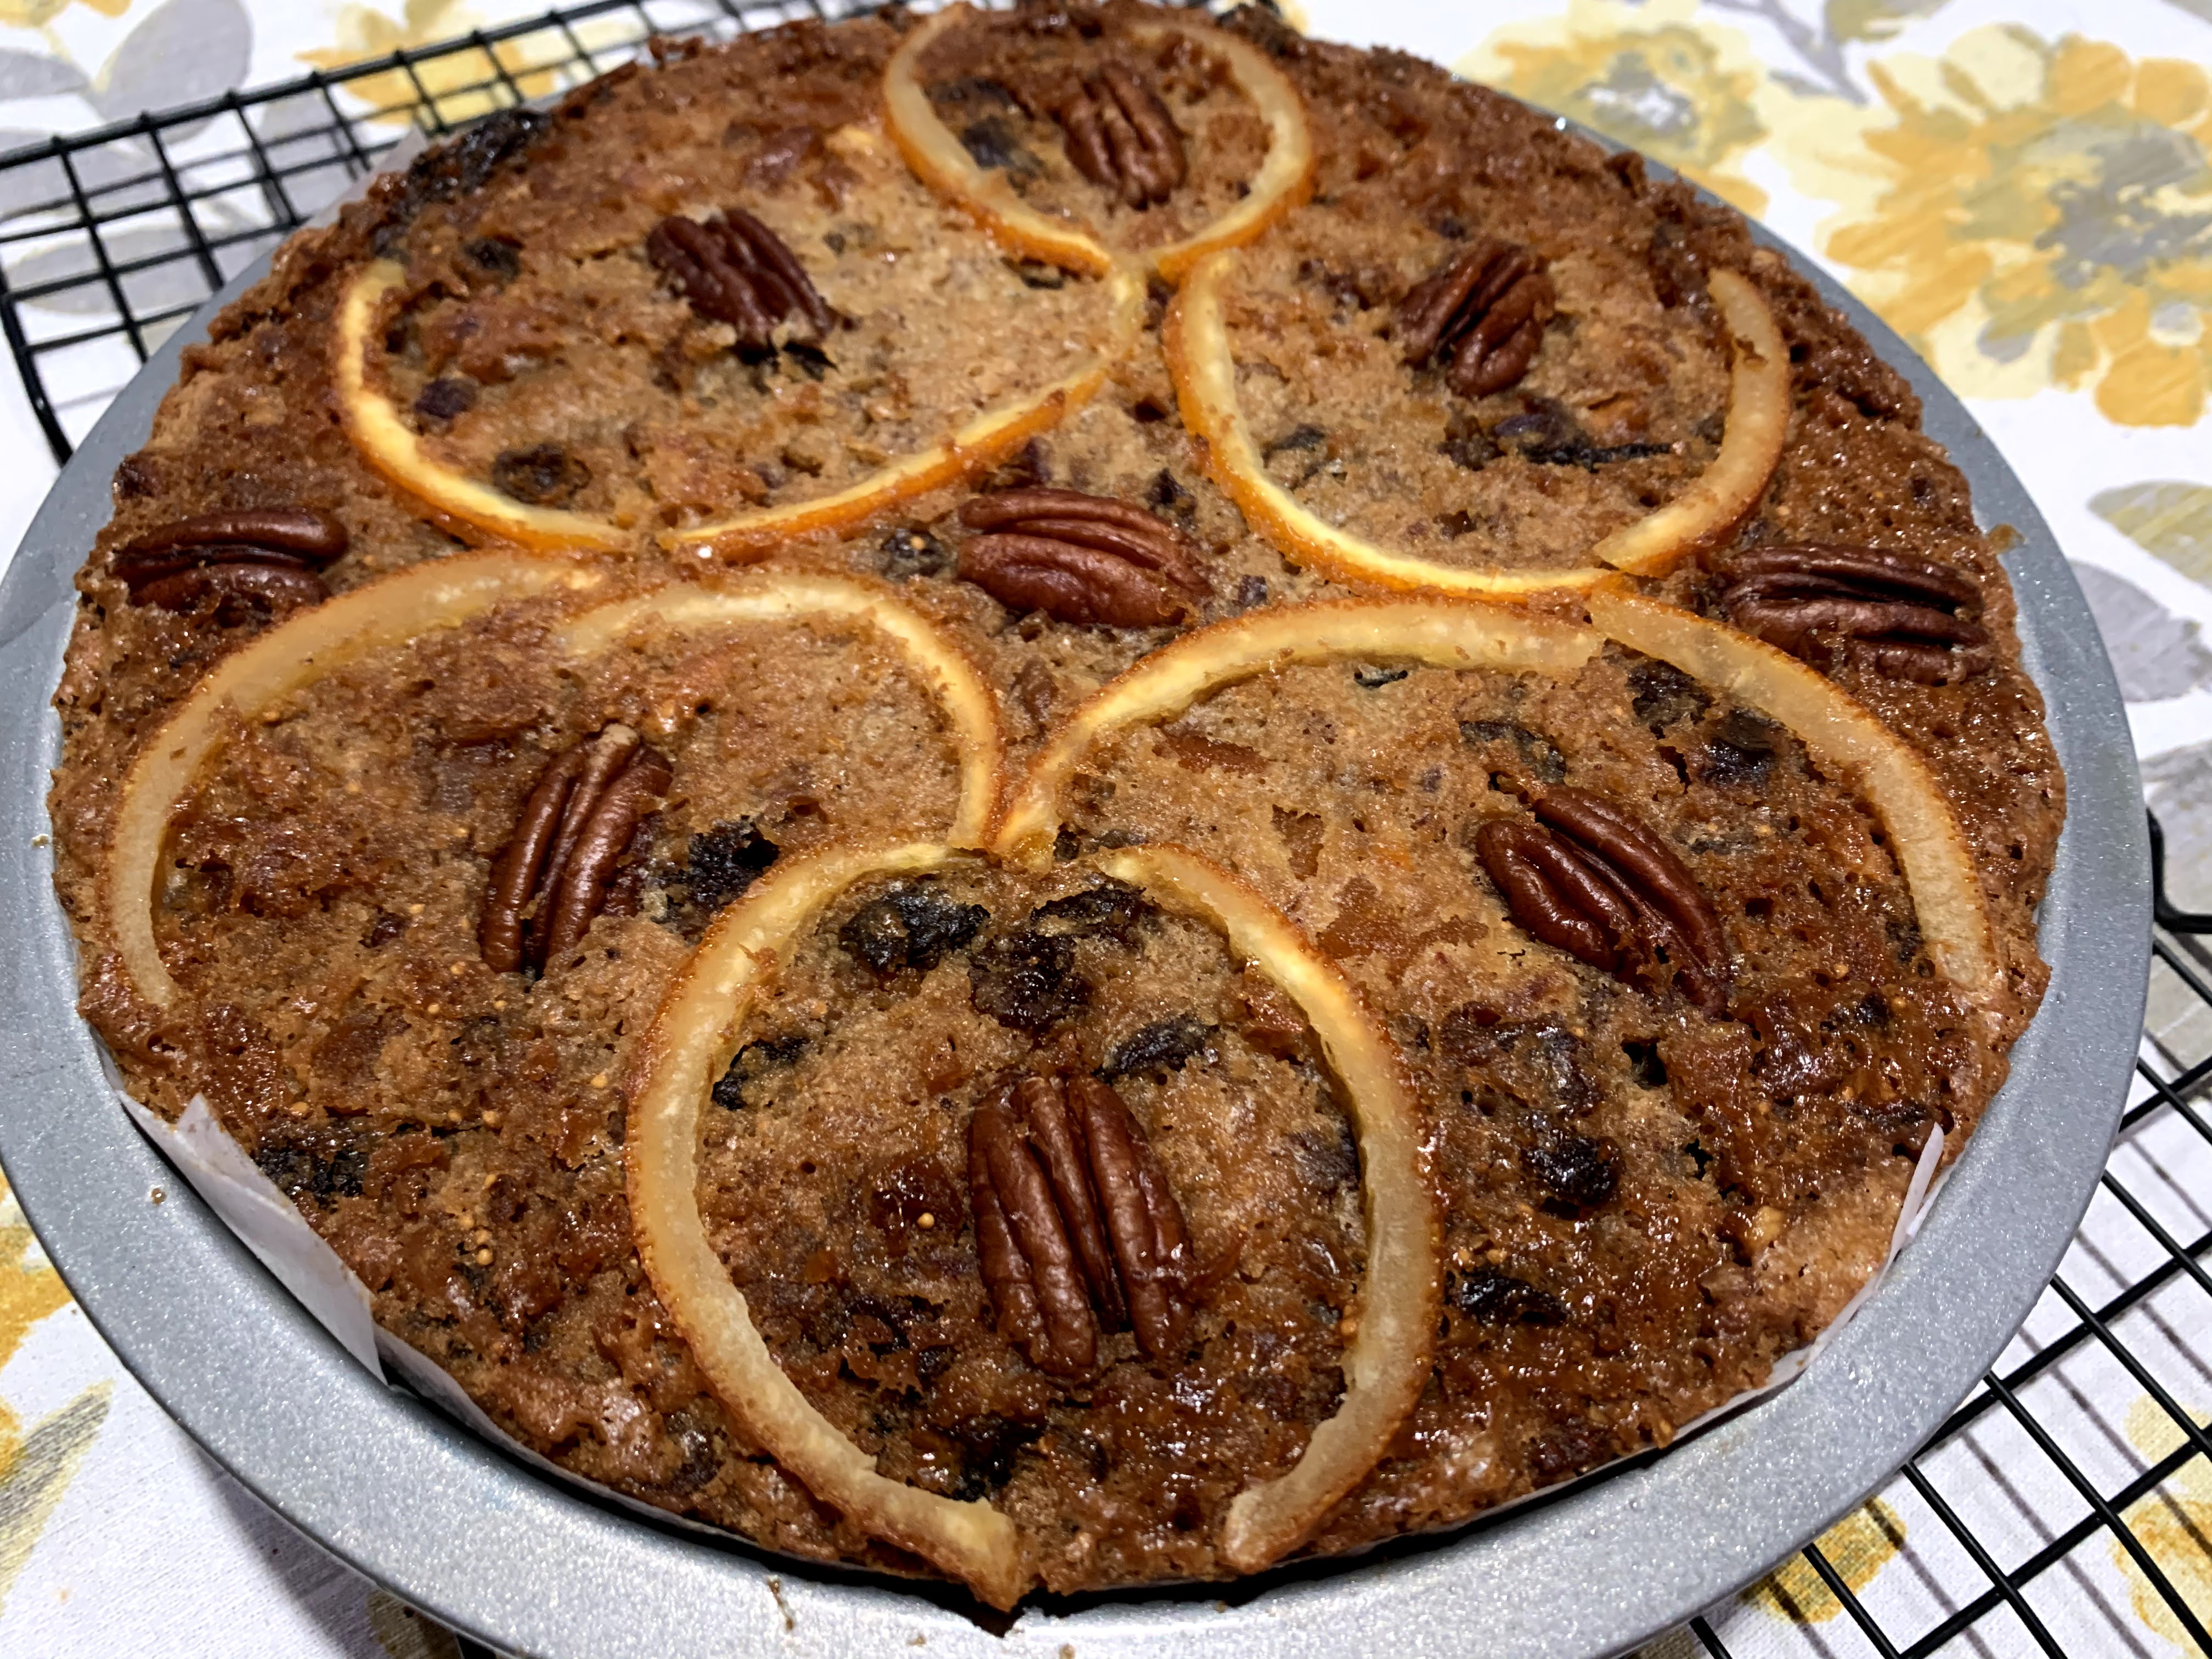


  • Feed the cake with a little splash of rum (do not take out the cake from the pan at this stage).
  • Repeat this step for at least 3 days. You can refrigerate the cake if you want.


Boozy Christmas Fruitcake is ready to be shared with friends and family.


You can also freeze the cake. Just put it in a zip-lock bag and transfer to the freezer.


Tips: 

  • Can't find a toothpick to test your cake? A skewer works just as well.
  • To grease your baking pan with ease, rub butter or oil around the baking pan using a piece of paper towel.
  • The recipe works well for two 6-inches cakes. Just bake them at the same temperature for 3 hours.
  • Not a fan of alcohol or serving to kids? Brush a little simple syrup or warm honey on the cake to bring that glazed look.


Tuesday, 30 October 2018

Gobindobhog Chal diye Patali Gurer Payesh (Bengali Rice Pudding with Date Palm Jaggery)


For those of my friends who know about this and intentionally clicked the title, ‘Welcome Back Payesh Lovers!’. If you don’t have an idea what the title means, read on. 

Rice Pudding also known as Payesh in Bengali is one of the most decadent desserts you will ever taste. When prepared properly it is very creamy and even a small portion will leave you satisfied. It is quite heavy and it often becomes a challenge to save room for this delicious dessert after enjoying a multi course Bengali feast. Hence, hats off to all those Payesh lovers who manage to finish a bowl of this creamy dessert after finishing their entire meal.

Patali Gur is a form of Jaggery prepared from Date Palm. It can be rightly called a delicacy which is found only during winter months. Since it is mainly produced in West Bengal, we in Northern India have always depended on our relatives and certain Bengali shop keepers for this particular jaggery. 

I understand that here in U.S, jaggery is not a common pantry item. However, in India, a box of jaggery is a must have in every kitchen. Jaggery is used for making varieties of desserts. A piece of jaggery with some warm milk and fresh roti (stove top cooked flatbread) is often served as the final course in many homes. During winter months normal jaggery is replaced by Patali Gur and everyone wants to get seconds. Why?

Patali Gur adds a beautiful rustic earthy flavor to the dish. Be it your regular milk and roti or a special dessert like Payesh, it adds its own unique taste. In fact, its flavor is so different that you can immediately tell the difference. For comparison try a spoon of Payesh cooked with sugar and then with Patali Gur. 

Aside from Payesh, Patali Gur is also used in a variety of sweets like Sandesh. It not only lends a beautiful flavor but also brings a caramel color in the sweets. You do not need to add any additional flavoring because the Gur itself will have enough flavor of its own.

I think it will be correct to say that the taste of Patali Gur grows on you. With every spoonful, your taste buds get more and more immersed in its flavor. By the time you finish the bowl, your eyes will already be scanning everywhere in hope to get seconds. I guess this is the reason why everyone tries to conserve their stock of Patali Gur.

Growing up, I was more into savory dishes. Now I can’t help but feel miserable about all those times when I was offered something as divine as Patali Gur and I refused to take it. Believe me, unless you have a sweet tooth and living away from your country it will be very difficult for you to understand my situation. Patali Gur like many other exotic Indian ingredients is not exported in huge quantities and hence it is quite expensive. 

Now as I have told you before, preparing Payesh is not difficult. In fact, I will say it is one of the easiest desserts you will ever learn. However, the catch is, Time! You need a lot of time to prepare a thick creamy Payesh. You need patience and it demands constant attention. You can never leave a pot of simmering milk and do something else. If the bottom starts sticking, then the whole batch is ruined. Hence, an even low temperature should be maintained at all time. Stir it occasionally and it will be ready in its own time. Many people use a heavy pot to prevent the milk from burning. I use a big non stick pot and once the milk comes to a boil, I turn down the heat to low where it remains for let’s say, 3-4 hours. 

Let’s talk about the rice now – Gobindobhog. You can very well use basmati (which I have done in my previous article) for making Payesh. However, this particular rice has its own significance. Gobindobhog is a short grain, white and aromatic rice. It is sticky in texture which turns out really well when added in Payesh. It makes the pudding creamier. It is a specialty of the Burdwan district of West Bengal (India). You can also use it in other dishes. The photo above shows the same rice served in main course. I will say it tastes amazing with Jharna ghee (a type of clarified butter).

This time when Debarshi and I visited our parents (in India), we were lucky to have some Patali Gur. His mom saved some for us and although it wasn’t a fresh batch, we loved it all the same. I even prepared a batch of Payesh for Debarshi’s birthday and shared it with friends. Although the initial method for preparing the Payesh remains the same, a few steps change in the later stages. 

It is important to add the Patali Gur right before you switch off the heat. Add the crushed jaggery and immediately cover the pot. The jaggery will take its own time to melt and mix with the milk. Wait for 15-20 minutes, then stir. Since Payesh is usually served cold, I don’t think there is any hurry to mix the jaggery at this stage. Make sure to have the jaggery at room temperature otherwise it will take longer to melt. 

I am not sure if you can find Patali Gur online or in selected stores in bigger cities. If you do, please give this recipe a try. Post in the comments section how it turned out.


Ingredients:
  • Gobindobhog Rice – 1/3 cup
  • Whole Milk - 1 gallon
  • Patali Gur – 1 cup, broken in small pieces
  • Ghee (Clarified Butter) – 1 tablespoon
  • Green Cardamom - 8 pods, crushed or powdered, skins removed
  • Raisins – ¼ cup (or ½ cup)
  • Almonds or Pecans – ¼ cup, sliced or broken into small pieces
  • Bay leaf – 2, small


Let’s do some preparations first:
  • Wash the rice. 
  • Drain it well then transfer to a small bowl. 
  • Add the Ghee and Bay leaves to the rice and mix. Keep this aside.


Directions:
  • Heat a big pan or wok over medium high heat. Slowly and carefully pour the milk into it.
  • Keep the heat on medium for the first 10-15 minutes, stirring occasionally then turn it down to medium low.
  • Keep boiling the milk till it is reduced to 2/3 of its original volume (Tip: This simply means that the milk will be more than half but less than its original volume). Keep stirring occasionally.
  • Now add the rice along with the bay leaves and ghee to the milk. Stir to mix.
  • Allow it to cook for 15-20 minutes, stirring occasionally then mash a grain of rice to check if it’s slightly tender. If it isn’t keep cooking and stirring.
  • After 10-15 minutes, add the crushed Green Cardamom, Raisins and sliced Almonds. Keep stirring and cooking. Any thick milk should be cleaned off the sides and mixed in the Payesh itself so keep stirring and scraping the bottom and sides of the pan. 
  • Check after 10-15 minutes, the rice should be cooked well by now. The addition of the nuts will slightly deepen the color of the milk. The Payesh should have a thick consistency now (the milk at this time is almost reduced to half of its original volume).

  • Switch off the heat.
  • Add the Patali Gur in the Payesh and cover immediately.

  • Let it melt. Wait for 15-20 minutes, then stir. 
  • Serve the Payesh cold.


Tips:
  • Use mortar pestle to crush the cardamom pods.
  • Use a big wok or pot to boil the milk. It should be properly washed before adding the milk and use a clean wooden or rubber spatula to stir the milk.
  • Do not use reduce calorie (1% or 2%) milk.
  • Payesh is a task of patience. The milk should be allowed to boil and reduce on a low heat. After you add the nuts the color of the milk will darken a bit.
  • Patali Gur will bring a beautiful caramel color in the Payesh. Do not be confused when this happens. 
  • The Payesh can be kept in the fridge for 4-5 days. You can also put it in a zip lock bag and freeze it. Enjoy whenever you want.


Recommended Reading:

Tuesday, 17 October 2017

Chaler Payesh (Bengali style Rice Pudding)


Photo courtesy: Dr. Debarshi Chatterji


I think I have learnt at least a hundred recipes since I got married. When I think of my life and my eating habits 4-5 years back, I can’t stop smiling. Pressure cooker was my best friend and everyday I used to cook a quick bland curry with some rice or roti and never worry about the taste. Desserts were always store bought unless I was visiting my parents when my mom would prepare something special for me. Never thought that I would prepare something from scratch and it would actually taste good! However, with time and patience I have learned and mastered some of the most amazing recipes and I intend to share all of them with you. 

The feeling of being away from home strikes us most when we are craving for something special and that consists mostly of the foods prepared by our moms and I am sure that we all share the same feeling. The style of cooking that we grow up with, in a way becomes a part of our DNA. Don’t you agree? I guess, that’s why we have the phrase, ‘from mom’s kitchen.’ A dish prepared by her just feels special and makes us feel so warm and loved. When our mom’s cook (or used to cook, for those who have faced the ultimate loss) for us, every bite is like reliving childhood and reminds us of all those happy memories we shared as a family. I usually satisfy my cravings by taking the recipe from my mom and recreating it as best as I can. Debarshi however, makes special requests whenever he misses his mom’s cooking and that is how I learnt this amazing recipe.


Chaler Payesh or Bengali style rice pudding is a traditional Bengali must have dessert for all special occasions like birthdays, Durga Poojo and Lokhi Poojo. In fact, in many families including mine, we have separate utensils for preparing Payesh. This helps in two ways, first, since it is offered as a prosad using a different utensil ensures purity in preparation, second, a dedicated pan for dessert preparation means no hints of oil, onion or garlic. However, this is totally optional and you can very well use a regular pan or wok, just make sure to wash it a few times thoroughly to remove any hint of food previously cooked in it. 

So, what are the rules for preparing this mouthwatering dessert? Well, only one and that is, be patient. Preparing Payesh is pretty much straight forward, boil the milk, add the rice, sugar and nuts and it’s ready! but hold on, this may sound quick but it isn’t. The biggest factor to consider while making Payesh is time. Payesh is cooked over low heat which gradually thickens the milk without burning. Now you cannot proceed with the recipe until the milk reduces to almost two third of its original volume and you have to stir occasionally which means you have to be around the gas oven all the time so what do I do? I use that time to cook and prepare other dishes (remember I always prepare Payesh on special occasions which means I have a lot of other cooking to do as well). That way, my time is utilized in other things while the milk thickens and develops a beautiful heavy texture. When the time comes, I add the rice, nuts and sugar and it’s ready! 


My final tip, don’t be overwhelmed by the time required to prepare this dessert, follow the recipe as it is. Small steps like crushing the cardamoms, slicing the almonds and using ghee are important and should not be skipped because they play an important role in the flavor of this delish dessert. Give it ample time and attention and you will be able to enjoy and share a beautiful bowl of this decadent pudding.


Ingredients:
  • Basmati Rice – 1/3 cup
  • Whole Milk - 1 gallon
  • Sugar – 9 tablespoons
  • Ghee (Clarified Butter) – 1 tablespoon
  • Green Cardamom - 8 pods, crushed or powdered, skins removed
  • Raisins – ¼ cup (or ½ cup)
  • Almonds or Pecans – ¼ cup, sliced or broken into small pieces
  • Bay leaf – 2, small


Let’s do some preparations first:
  • Wash the rice. 
  • Drain it well then transfer to a small bowl. 
  • Add the Ghee and bay leaves to the rice and mix. Keep this aside.


Directions:
  • Heat a big pan or wok over medium high heat. Slowly and carefully pour the milk into it.
  • Keep the heat on medium for the first 10-15 minutes, stirring occasionally then turn it down to medium low.
  • Keep boiling the milk till it is reduced to 2/3 of its original volume (Tip: This simply means that the milk will be more than half but less than its original volume). Stir, stir, stir.
  • Now add the rice along with the bay leaves and ghee to the milk. Stir to mix.
  • Allow it to cook for 15-20 minutes, stirring occasionally then mash a grain of rice to check if it’s slightly tender. If it isn’t keep cooking and stirring.
  • Add sugar when the rice is slightly tender.
  • After 10-15 minutes, add the crushed Green Cardamom, Raisins and sliced Almonds. Keep stirring and cooking. Any thick milk should be cleaned off the sides and mixed in the Payesh itself so keep stirring and scraping the bottom and sides of the pan. 
  • Check after 10-15 minutes, the rice should be cooked well by now but it should not be mushy and should hold its shape. The addition of the nuts will slightly deepen the color of the milk. The Payesh should have a thick consistency now (the milk at this time is almost reduced to half of its original volume).
  • Remove from heat and cool before serving. 


Tips:
  • Use mortar pestle to crush the cardamom pods.
  • Use a big wok or pot to boil the milk. It should be properly washed before adding the milk and use a clean wooden or rubber spatula to stir the milk.
  • Do not use reduce calorie (1% or 2%) milk.
  • Payesh is a task of patience. The milk should be allowed to boil and reduce on a low heat. After you add the nuts the color of the milk will darken a bit.


Recommended Reading:

Monday, 9 October 2017

One Pot Chicken Tikka Masala


Photo Courtesy: Dr. Debarshi Chatterji

Craving for some succulent chicken? How about a creamy delicious bowl of hot Chicken Tikka Masala? Imagine the smoky aroma of the tandoor with the delightful flavors of heavy cream, ghee and mild tomato sauce yum! This dish is a must have on the list of many foodies and I wont be surprised to know if you have tried preparing this dish at home. After all that’s what we do, try to recreate our favorite recipes. What stopped you? Was it the extra calories? Or the grilling/ broiling part? What if I tell you that I have discovered a low calorie recipe of Chicken Tikka Masala? A one pot recipe which will be prepared with very less oil and still taste amazing! Have guests coming over for dinner? No worries, just change the low calorie ingredients with the real stuff, grill the Chicken to infuse the charred aroma and serve your guests a bowl of mouth watering Tikka Masala.


These days Debarshi and I are doing some diet control (Durga Poojo is coming and we want to loose some weight) and that means we have to cut back on all these delicious, decadent dishes. Let me tell you, it is quite difficult to prepare a low calorie delicious Tikka Masala and I faced this challenge while looking for the perfect recipe. Nevertheless, after much research and improvisations, I created the perfect low calorie recipe and today I am going to share it with you.

Traditionally Chicken Tikka Masala is prepared by first marinating the chicken in yogurt, ginger, garlic and spices and then grilling it in the tandoor (clay oven). However, I decided to prepare this as a one pot dish so you don’t have to worry about going outside and firing up the grill (no need for the broiler as well). There is just one step which you need to do as a part of the preparation which is, marinate the chicken before hand. This will help the chicken pieces to absorb all the wonderful flavor and aroma of the spices and the yogurt will get a lot of time to tenderize the meat. Personally I love one pot dishes, they are quick to cook and there is less to wash. 


Needless to say, good ingredients bring more flavor in the food so make sure you are using good quality chicken and vegetables. Also, I would recommend to go for an extra mile and prepare the Garam Masala from scratch for this recipe as it will play a vital role in the overall taste of the dish.

Before serving this to guests, keep in mind their palate. If they do not like hot dishes, skip the Black Pepper and the Crushed Red Pepper. However, for those who love bold flavors in their food, this dish could be a marvelous new addition in their menu.

Serve it with plain roti (for a low calorie dinner) or Naan / Pulao (for a dinner fit to be served to royals).


Ingredients (this recipe serves two):
  • Garlic – 3 cloves (of elephant garlic, otherwise 5-6 small cloves), finely grated
  • Ginger - 1 inch, peeled and finely grated 
  • Turmeric - 1 teaspoon
  • Kashmiri Mirch - 1 teaspoon 
  • Garam Masala - 1 teaspoon 
  • Chicken Tikka Masala – 2-3 teaspoons 
  • Coriander powder – 1 teaspoon
  • Cumin Powder - 1 teaspoon
  • Plain Yogurt – ½ and ¼ cups (use no fat)
  • Salt – to taste (about ½ teaspoon)
  • Black Pepper Powder – ½ teaspoon 
  • Chicken - 1 pound (skinless, boneless breasts or any type of pieces you like, cut into bite size cubes)
  • Oil – 1 and ½ tablespoons 
  • Red Onion – ½ of a big onion, thinly sliced
  • Tomato Ketchup - 2 tablespoons 
  • Cardamom Pods - 3, crushed (remove skins)
  • Crushed Red Pepper - 1 tablespoon 
  • Tomato - 1 big, cut into medium size cubes
  • Milk - ½ cup (I used 2%)
  • Cilantro – a handful, washed and cut for garnish


Let’s do some preparations:
  • Combine the Garlic, Ginger, Turmeric, Kashmiri Mirch, Garam Masala, Chicken Tikka Masala, Coriander powder and Cumin Powder in a small bowl. 
  • Divide the mixture into two parts.
  • Take a big bowl (do not use a metal container) and whisk the Plain Yogurt, Salt and Black Pepper Powder. 
  • Add one part of the spice mixture in the yogurt.
  • Make sure the Chicken has been properly thawed. Wash it and pat it dry.
  • Transfer it to the bowl and turn the chicken pieces to coat the marinade properly.
  • If you are cooking straightaway, you can keep it outside, otherwise it is best to cover it with a plastic wrap and refrigerate. 
  • Take the Tomatoes and put them in a small pan. Fill it with water just enough to cover the tomatoes. Cover and boil it over high heat for 2-3 minutes, then turn off the heat and let it cool.


Photo shows: Onion thinly sliced

Directions:
  • Heat a wok over high heat. 
  • Add Oil in it, wait a few seconds then add the Onion slices.
  • Stir till the Onion turns golden then add the Cardamom powder.
  • Stir to mix then add the Crushed Red Pepper.
  • Reduce the heat to medium high and cook for about 30 seconds then add the Tomato Ketchup.
  • Stir to mix, it will darken quickly (you may want to turn on the vent at this time). Reduce the heat to medium. When the onion softens, add the remaining half of the spice mixture and cook, stirring often, until the bottom of the pot begins to brown.
  • Now add the tomatoes with all the juice. Stir to mix.
  • When it starts to boil, reduce the heat to low and continue to stir and scrap the browned bits from the bottom of the pot, until the sauce thickens.
  • Add the chicken with the yogurt mix and increase the heat to high (Tip: Use splatter screen).
  • Stir and cook till the yogurt reduces to just a little bit of thick gravy. When it starts sticking on the bottom again, turn down the heat to low and add the Milk.
  • Cover and cook for 10 minutes.
  • Garnish with chopped cilantro and serve with rice or roti.


When serving Chicken Tikka Masala in a party:
  • Substitute the Oil with Ghee to make it more flavorful (remember flavor comes with calories).
  • Substitute the Milk with Heavy Cream
  • Like it mild? Skip the Crushed Red Pepper and Black Pepper. Also keep in mind the taste and preference of the guests you will be serving. 
  • Use Mortar Pestle to crush the Cardamoms 
  • Go for an extra mile by grilling/ broiling the Chicken pieces. Refer to my article on Tandoori Chicken
  • Use food chopper to mince the garlic, ginger and cilantro


Recommended reading:

Recommended reading for Low Carb (Keto) diet: