Featuring over 350 tried and tested recipes that can be prepared at home. From comfort food to restaurant style. Plus 110+ articles on Kitchen and Cooking Tips, Restaurant Reviews and more.
Showing posts with label Boozy Christmas Fruitcake. Show all posts

Monday, 25 February 2019

Mary Berry’s Victoria Sandwich Cake


I am always interested in easy recipes. Yes, baking a huge multi tiered cake for a special occasion is always fun. However, I believe there should be a couple of easy recipes which you can bake within a short time. This Victoria Sandwich cake is one of those easy bakes you will want to prepare time and again. I got this recipe from Mary Berry's BBC website. This is a traditional and classic recipe and makes for a tasty tea-time treat.

I don’t think I will ever go back to just buying a cake from the bakery. All of my homemade cakes taste so fresh. They may not always be a show stopper but they taste so much more! Plus, I get to lick the bowl and Debarshi and I get to sweetly offer each other the last slice. The biggest happiness is, sharing it with your friends and loved ones.


Victoria Sandwich is one of those homey cakes which can be prepared very easily and within a short time. If you have friends coming over for tea or just want to bake a quick dessert nothing goes better than Victoria Sandwich. I am sure other flavors of tart jam will also go very well (like Strawberry, Apricot or Blackberry) making it versatile. Just make sure to use the best quality of jam or preserve because it will enhance the overall flavor. I used Bonne Maman.


A fun fact about the cake – here I have converted all the measurements into cups but originally it was in ounces. ½ cup = 4 oz. Do you see it now? Everything weighs the same! Flour, butter and sugar are each of 4 oz. I guess all the old recipes follow this same weighing technique, after all it is so easy to remember!

Again, why this cake? because it uses my favorite method – all in one. This means that all the ingredients of the cake will be added together, mixed until smooth and then baked. Easy Peasy! I used my stand mixer to mix the batter. If you would rather prefer creaming the butter and sugar first, you can always do that. However, the result (in this case) will be the same.


I am sure I saw this cake in the bakery shops during our London trip. However, due to its simple decoration I must have skipped it. Little did I know that I was judging the book by its cover! This soft well risen cake dusted with sugar looks like a delicious holiday treat!

Another thing I didn’t know about this cake was, it was named after the Queen herself. Yes, I am talking about Queen Victoria who used to enjoy this cake with her afternoon tea. Well, don’t we feel royal. It was originally baked in the shape of a long loaf, filled and cut into fingers or ‘Sandwiches’. With time its shape changed from loaf to round and the recipe got improvised as well. You may see me below cutting this cake on my birthday party but mind you, this cake is not meant for elaborate celebrations. This is a small everyday cake meant to accompany tea or in my case – Coffee.


When I baked and filled this cake I had no idea that I was actually following the original recipe! It so happened that I was going to pick Strawberry Jam when Debarshi said, let’s take Raspberry. Later I read that traditionally this cake was only filled with Raspberry Jam and dusted with sugar on top and I thought, Wow! Nailed it the very first time.

Victoria Sandwich is a dense cake and hence many recipes suggest serving/ layering it with whipped cream or buttercream. I chose to bake the original simple version because it goes very well with a cup of hot tea or coffee. Plus, because it does not have any cream in it, it stays better. I think I will continue to fill it only with raspberry jam because this cake tastes so good just like that. It does not have any additional flavoring in it which is great because the buttery, tender sponge cakes with the thick layer of jam is very indulging on its own. Debarshi and I shared a piece with our morning coffee and it tasted so good that we both got seconds.


The original recipe asks for Self Raising Flour which as it happens I never have in my pantry! Self raising flour is actually all purpose flour (1 cup) with baking powder (1 ½ teaspoons) and salt (½ teaspoon). So, instead of going to the market in the snow storm (Kansas City is having a lot of snow this year!) I went with the all purpose flour and adjusted the quantity of baking powder and added salt.

When serving in tea parties, you can bake several batches of small cakes and fill them up with different flavors of jams and preserves. Fill some with whipped cream and others with buttercream. It will seem that you have baked varieties of cakes whereas technically you have only baked one. You can also fill/ top/ serve the cake with some fresh fruits. Hopefully your friends will also love this cake as much as mine did.

Try this cake and post in the comments section your feedback. Any ideas and suggestions are welcome.

Ingredients:
  • Eggs – 2, large 
  • Butter - 4 Oz (or 1 stick), Unsalted, softened, plus a little extra to grease the tins
  • White Sugar – 112.5 grams, plus a little extra for dusting the finished cake
  • Self-Raising Flour – 112.5 grams 
  • Baking Powder – 1 teaspoon
  • 2 X 6 inch pans -  greased and lined (please use butter and parchment paper)

To make self raising flour at home you need:
  • All-Purpose Flour - 1 cup (120g) 
  • Baking Powder - 1 ½ teaspoons 
  • Salt - ¼ teaspoon 

Sift together all three ingredients then measure before adding in the cake, you only need 112.5 grams.

For The Filling and Topping:
  • Raspberry Jam or Preserve – 2 tablespoons (I recommend Bonne Maman)
  • A little icing sugar, for sprinkling
  • Whipped Cream – 1 cup (optional)


Directions:
  • Measure all the ingredients and keep them aside. Make sure the butter and eggs are at room temperature.
  • Grease the baking pans. Use butter for better coating. Line the bottom of the tins with a circle of parchment paper and grease them as well.
  • Preheat the oven to 350 F. 
  • Break the Eggs into a large mixing bowl, add the Sugar, Salt, Flour, Baking Powder and Butter. Mix everything together until well combined. 
  • Tip: Be careful not to over-mix – as soon as everything is blended you should stop. The finished mixture should be of a soft ‘dropping’ consistency. Don’t worry if the batter appears curdled.  It has no bearing on the cake (just look at the batter in my video). 
  • Divide the mixture evenly between the tins. Use a spatula to remove all of the mixture from the bowl and gently smooth the surface of the cakes.
  • Bake in the pre-heated oven for about 20 minutes or until well risen.  Don’t be tempted to open the door while they’re cooking. Use a skewer to check if the center has been cooked through. The cakes are done when they’re golden-brown and coming away from the edge of the tins. Press them gently to check – they should be springy to the touch. 


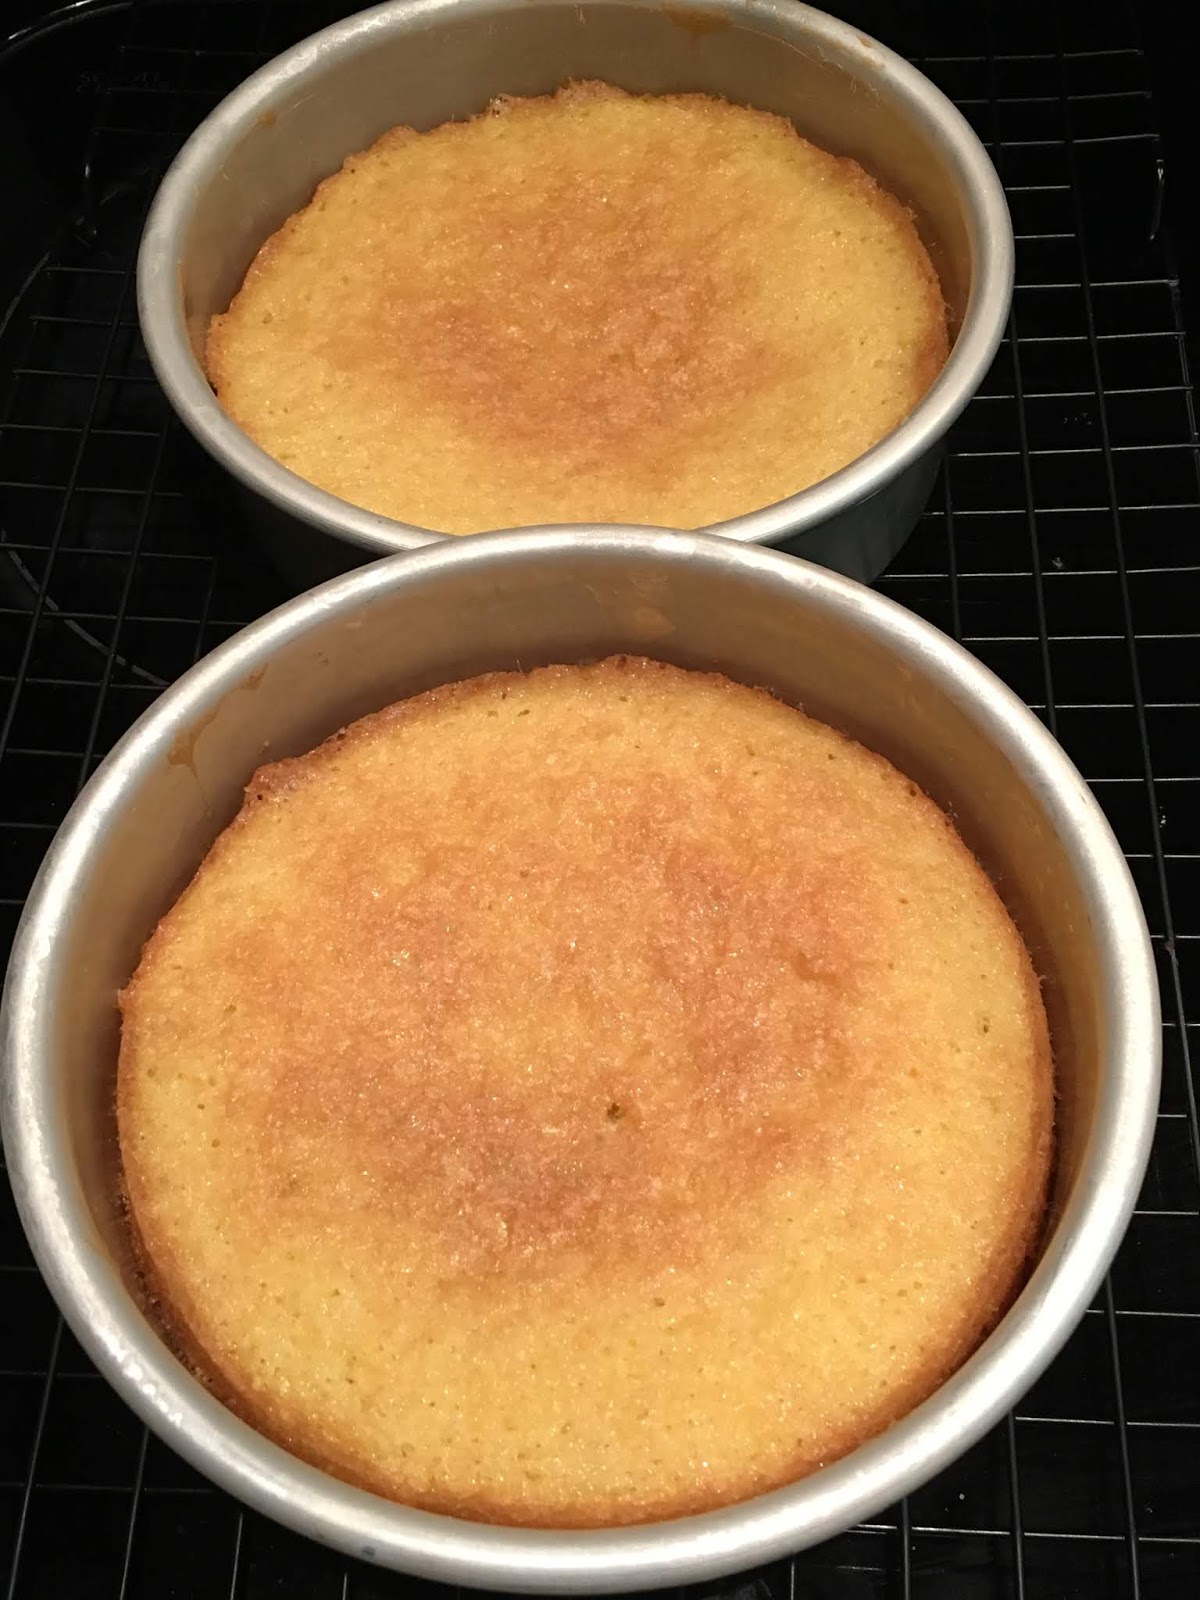
  • Remove them from the oven and set aside to cool in the tins for 5-10 minutes. Then run a palette or rounded butter knife around the inside edge of the tin and carefully turn the cakes out onto a cooling rack.
  • When completely cold, choose the sponge with the best top. Sandwich the cakes together with the jam (use an offset spatula to spread the jam). Sprinkle with icing sugar to serve. You can also decorate with whipped cream and strawberries.
  • Enjoy this delicious Victoria Sandwich cake with Tea or coffee.


Some more easy recipes you may like:

Thursday, 10 January 2019

No Knead Dutch Oven Artisan Bread


When I look back on my baking adventures, I cannot help but smile. I have been very lucky to be blessed by a husband who is a foodie. Even my friends, love my baked goods. Needless to say it has taken many failed attempts to be where I am today.


I started my baking adventures with a ready to bake cookie mix. Later one of my friends showed me how to bake bread rolls from scratch. I have been baking ever since and have learned quite a few delicious recipes. Be it cookies, cakes, pies or muffins, I love baking them all (and that too right from scratch). I also keep searching and experimenting with different types of bread recipes. I am still a novice but recently I discovered a fool proof recipe which bakes beautiful crusty bread without any labor.


Now usually when we think about Breads, the first thing which comes to our mind is kneading. Kneading helps to develop the gluten which then helps to make the bread firm on the outside but open and light textured on the inside. This kneading part is the most crucial part of bread baking. Without the correct amount of kneading and gluten formation, the bread will not rise properly, neither will it have that chewy texture. Well, what if I tell you that you can bake a beautiful loaf of bread without worrying about the kneading part. I think most people don’t attempt to bake breads at home because of all the time and effort that goes in it. However, any homemade good is free from preservatives and that is one of the reasons I focus on homemade food.


Paul Hollywood says in the British baking show; a slower rise gives more flavor to the bread. Now when we are adding hot/ lukewarm water in the flour, the yeast rushes to work. With the active Yeast and kneading we develop the gluten. But what will happen if we add room temperature water to the flour? Naturally the yeast will take more time to develop which will make the dough more flavorful. You must be thinking what will happen with the gluten? Do we still have to knead the dough before popping it in the oven?


No! That is why this recipe is called No Knead Bread. All you have to do is mix four ingredients – Flour, Salt, Yeast and Water. Cover and let it sit at room temperature for almost 18 hours. Straightaway transfer that mix in the Dutch Oven, bake and voila! Delicious crusty homemade bread. This recipe is so simple yet so flawless that it will win you over. Perfect for the busy ladies or mommies as well as for your date nights. The time you are actually working on the bread is so short that you can easily fit it between your other tasks. After all, who doesn’t like homemade bread baked from scratch?


You know what I realized after reading this recipe? I wasn’t paying any attention to the steaming part of bread baking. Unless the dough gets enough steam it will not form a crust. Yes, we can always spray some water on the bread while it is baking. I have also used other methods (ice/ water in a tray) to create that perfect amount of steam. The breads used to turn out good but honestly, considering all that time and effort, those breads just don’t stand before this crusty bread. Specially after knowing that we don’t have to do any of these steps to create the proper amount of steam. So, what is the secret?


Dutch Oven! When we bake the bread in the Dutch Oven (or Dutch Pot) with the lid on, it creates steam inside the pot. This steam is the water we mixed earlier in the dough. Since the lid seals, the moisture in the dough has nowhere to go but to convert to steam. This keeps the crust softer for a long time and helps to expand the bread in the initial stages of baking. It also creates a nice glossy crust on the bread. Just remember to follow the directions step by step. When preheating the oven, make sure to place the Dutch oven inside. This sort of transforms it into a small version of a professional steam injected oven. The Dutch oven distributes the heat and steam more evenly in the bread thus hardening the crust.


There is just one catch with this bread. You can’t plan it at the last minute. Since the dough has to sit at room temperature for almost 18 hours, you have to plan this ahead. You will feel a bit skeptical the first time, because the mixed dough will look like a sticky mess. Plus, the waiting time will make you question the recipe. But take my word, the resultant bread will be absolutely gorgeous.


Last but not the least, please use fresh ingredients. Yeast will not work if it has expired. So, pay close attention while adding the ingredients. Do not skip the parchment paper because it not only prevents the dough from sticking on the bottom of the pan but also helps to lift it out once the baking is done.


Some of the online recipes may suggest to shape the dough in a ball before baking it but I have never done that and I don’t think there is any need. You don’t even have to touch the sticky dough. Just push it out using a large rubber spatula on the parchment paper. Then transfer the parchment in the Dutch oven and do this carefully because the oven is hot! I have a big 5 quart Dutch Oven and the dough spreads out a bit. So, if you have a smaller one, you may consider using it so that the bread ends up taller.


Photo Courtesy: Dr. Debarshi Chatterji


I think, this bread checks all the boxes of my expectations –


First, the Salty taste, which is just yum! You can of course add some garlic or cheese for more flavor (like I do sometimes).
Second, the texture. The bread will have a hard crust on the outside and a light, soft middle. You will see the air pockets showing how the yeast worked. Always use a good serrated knife to cut the slices.
Third, the overall method. My god, it cannot get any easier than this and this bread has endless possibilities. You can:

Dunk it in a soup
Spread jam, soft cheese or butter on it
Top it with tomato, basil and olive oil
Make an egg in a hole
French Toast
Make a Sandwich
Or eat it just like that

The best part is, this bread not only tastes store bought but looks as well. This bread has become a staple at our home. I baked this delicious bread on Thanksgiving and we absolutely loved it. We even enjoyed it the next morning with some butter, coffee and my homemade delicious Boozy Fruitcake.


Try this bread, then let me know how it turned out. 


Nothing says ‘Home’ like the smell of Baking!


Ingredients:
  • All Purpose Flour - 3 cups 
  • Salt - 1 ½ teaspoons 
  • Dry Active Yeast – 1 ½ teaspoons 
  • Water – 1 ½ - 2 cups room temperature 

Do ahead:
  • Mix the dry ingredients in a bowl. 
  • Start adding the water (½ cup at a time), use a wooden spoon or spatula to mix everything together.
  • Cover with a plastic wrap and let it sit for 17 ½ hours at room temperature. 

Tips: 
  • Since we have to wait for almost 18 hours to bake the bread, timing is important. Calculate the hours so that when it is time to bake, it isn’t midnight. I find it best to mix the dough in evening so that I can bake it sometime during next day (around noon).
  • Make a Garlic bread by mixing ½ teaspoon Garlic powder in the dough.


Just after mixing 


After 17 ½ hours


Directions:
  • Place the Dutch pot inside the oven with the lid on.
  • Now preheat the oven to 500 degrees F (Switch on the central air/ vent, helps to air out any strong fumes from the oven).
  • Once the preheating is done, transfer the dough (it will be sticky) on parchment paper using a big spatula.


See how the yeast has worked! It’s amazing!


Optional: At this point I like to stick a couple pieces of my favorite cheese in the dough. You can also sprinkle some flour on it.


  • Take out the Dutch pot from the oven and quickly and carefully, remove the lid and transfer the dough along with the parchment in it. Do not take out the Dutch pot before this step.


  • Place the lid back on and slide inside the oven.
  • Bake in Dutch pot (with the lid on) for 30 minutes. 
  • Reduce the oven temperature to 450 F, take off the lid and bake for 15 minutes more.
  • Switch off the oven and let the Dutch pot sit inside for 10-15 minutes. This will help to cool it off a bit and also bring a better crust on the bread.


The cheesy bread will have a slightly different color.

  • Transfer the hot bread on a cooling rack.


  • Wait for a minute then cut into slices and enjoy!
Tip: Use a good long serrated knife for cutting the slices.


Dip the bread in herbed oil, spread butter or jam or dunk in soup and enjoy!


Recommended Reading:


This photo has been featured on LensCulture Portrait Awards 2019. LensCulture reviews competitions and resources for photographers and recommend the best ones. 

Awards include an exhibition at Aperture Gallery in New York, International Photo Festival Projections, massive exposure to International Press and their global online audience of three million, publication in The Best of LensCulture - Volume 4, and much more!

Friday, 30 November 2018

Candied Orange Peel


Photo Courtesy: Dr. Debarshi Chatterji
Recipe Courtesy: Mary Berry


A slice of home baked fruitcake has always been my favorite and what else can bring such beautiful flavor in it than Candied Peels. Store bought candied peels have loads of sugar on them and more often than not, we end up eating the entire box! Ever wonder how we gain so much extra weight during holidays? Readymade Candied Peels also have preservatives. So, I decided to make my own homemade Candied Orange Peel. It’s just enough for the fruitcake and absolutely delicious. It takes some time to cook but you can easily do some other housework while this is cooking. It is really easy to make soft and delicious candied peels and with this recipe, you will never go back to the readymade ones. You can also use the same recipe to make candied Lemon peels.

I love adding natural citrusy scents in my cakes and what else is better than an orange? By making the candied peels at home you will ensure to have organic, fresh and delicious treats with no chemicals at all. I think a good recipe makes all the difference. I have tried making candied peels at home before and something must have gone wrong because they turned up rock hard. This recipe yields beautiful candied peels and why not? It’s after all Mary’s recipe. 

You can use the Candied Peels:
  • To garnish Pies, cakes or cupcakes and even cocktails.
  • As an ingredient in cookies, muffins and cakes.
  • As a topping over ice creams.
  • To make Orangettes (a beautiful dessert prepared by dipping the candied orange peels in chocolate).

Always make sure to use best quality ingredients for cooking. In India we often see waxed fruits in the market. Of course such fruits cannot be used for making candied peels. So, I would recommend buying organic fruits especially for this step. Also wash them thoroughly before using them. Remember good stuff bring the best flavors.


Ingredients:
  • Orange or Lemon – 1, un-waxed  
  • Granulated Sugar - 14 tablespoons 
  • Icing Sugar - 7 tablespoons  

Directions:
  • Cut the Orange into 8 wedges.

  • Cut out the flesh, leaving a 5 millimeter thickness of peel and pith. 
  • Cut each wedge into 4 strips.

  • Pour 20 tablespoons of water into a small pan
  • Add the Granulated Sugar and heat over medium heat, stirring until the sugar has dissolved. 
  • Add the Orange peel and reduce the heat to low. Cook uncovered for 30-45 minutes, until the orange peel is soft and translucent. 

  • Drain in a strainer and leave to cool. 
  • Spread the peel out on a baking sheet lined with parchment and sprinkle with icing sugar. 

  • Place in the oven on the lowest setting (170 F) for 1 hour until dry.


Tips: 

  • You can follow the same steps to make Candied Lemon Peel.
  • If you don't want to feed the cake with Rum or Brandy, save this simple syrup. You can use it later to brush on the cake to bring a sweet glazed look.

Use these beautiful and delicious homemade Candied Orange Peels to make your fruitcake even more scrumptious!


Recommended Reading:

Boozy Christmas Fruitcake


Photo Courtesy: Dr. Debarshi Chatterji
Recipe Inspiration: Mary Berry


At my mom’s Christmas is always celebrated with a big round fruitcake and puff pastry stuffed with spiced potatoes. Earlier she used to bake a lot and mind you, our Indian homes don’t have convection ovens (because most of the cooking is done on stove top). So, she used to bake in a big pressure cooker lined with brown paper. All four of us (mom, dad, me and sis) had our own roles in the cake baking. So, someone will be chopping the nuts and someone else will be weighing the ingredients or mixing the batter. It was a tiresome work and it used to take hours for the cake to get ready. We used to be so excited at the thought of eating it that often we would stay awake for hours for it to finish baking. Oh! I don’t think my mom has ever baked anything as beautiful or delicious as that cake. 


Later, when I started working in Delhi, sometimes mom used to send me a care package. It would have tons of things along with a huge piece of that yummy fruitcake. I think, recently she has stopped baking it from scratch because of all that work. However, they still maintain that sweet tradition of having it on Christmas (be it bakery bought).

It was my first Christmas after coming to the U.S., Debarshi had gotten me varieties of baked goods. I was thoroughly enjoying them but somehow you know, I was still missing that fruitcake and then it happened...


My best friend (Vicki) got me a piece of fruitcake baked by her mom and immediately it brought back all those sweet memories. In the last five years I have baked her mom’s recipe quite a few times. This year, I thought, I am going to try an English recipe and who else is best at English baking than Mary Berry. Now I have improvised a couple of things according to easy availability and cost however, the cake tasted every bit as authentic and delicious as it should be. I think this fruitcake is going to be a part of our Christmas tradition now.


This cake is every bit rich, magnificent and full of delicious dried fruits which you can add according to your choice! The spices make it taste very Indian (or should I say very English?). 

Let’s start with soaking the fruits. The original recipe suggested just ¼ cup of brandy, however, I have used ½ and ¼ cups of rum which surprisingly didn’t taste strong at all. I would recommend not to use an expensive booze for soaking and feeding the cake. Also, please do not serve this to any kids. Some things are best kept aside for the grown ups only.


A little planning ahead goes a long way for this cake. Yes, you will still have to wait a couple of days to finally eat this cake (because of the soaking and feeding), however, the result will be every bit worth the wait. This cake is sooooo good, so make sure to savor every bite. I am telling you, it will be difficult to keep your hands off the cake and it will be gone before you know it. Please do not skip any step otherwise it wont turn up quite as boozy as it should be. It takes a while for the flavors to mature and the alcohol to infuse well. It should not strike your taste buds as loaded with alcohol but just feel like a hint. Now don’t be greedy and over feed the cake because it may make it soggy. There should be a mild touch of booze in the cake so that it tastes fruitier.

Now if you are one of those people who don’t like fruitcakes, then this cake will convert you. Believe me, this isn’t another one of those candy filled cakes. There is a lot of time, cost and effort in this cake along with organic and fresh ingredients. Still thinking of a reason? I will give you two - booze and sugar. If you love drinking and sweet treats, you will love this cake. If you would rather like a non-alcoholic cake, then I read somewhere that you can substitute the Rum with apple juice. Also, since there is almost no candied stuff in it, you can have it anytime! Yes, perfect to satisfy those fruitcake cravings during the summer months (when normally you wont find the candied cherries in the market). Bake this cake whenever you want and satisfy your heart.

This boozy Christmas cake is amazing! You will taste the delicious dried fruits with a hint of the spices. Yes, that is one of the best things about this cake. We usually have all these spices in our pantry and we need just a little for the cake. Please do not get confused with the ingredient - Mace. It does not mean pepper. Mace is an aromatic spice used widely in Indian and English cuisine. If you don’t have Mace at home, you should definitely buy a pack from the Indian store because it is also used in a variety of other dishes (like Kababs, Biryani and Pulao). 


Now you can very well use whatever nuts or dried fruits you like best. However, do not change the amount of the fruits which is 5 cups. I know, it is astonishingly high! That is why we have to bake it at a low temperature for a longer time so that nothing burns. This cake is moist, rich and so fruity! We are totally spoiled now! After having this delicious homemade cake, we cannot even think of buying a fruitcake from a bakery. 

I am not sure you will have any leftovers from this delicious cake to eat later. You can always save a piece by freezing it. Just transfer the piece of cake in a zip lock bag and tuck it away before it’s all gone. Even while feeding the cake, I would recommend refrigerating it so that its shelf life increases.

Now don’t wait, plan this fruitcake for this Christmas so that you can enjoy a big slice while listening to Christmas carols and decorating your shiny beautiful tree. I am so fond of dried fruits that I have already eaten quite a lot while preparing, baking and feeding the cake. Just don’t ask me to account for the Rum!


Ingredients:
  • Corn Syrup - 1 tablespoon, light or dark 
  • Dried Apricots - 1 ¼ cups 
  • Dried Cherries - 1 cup 
  • Golden Raisins -  ½ cup 
  • Dates - 1 cup 
  • Dried Figs - 1 ¼ cups 
  • Rum – about 1 cup
  • Lemon – 1, un-waxed, finely grated zest only
  • Orange – 1, un-waxed, finely grated zest only
  • Orange Extract - ½ teaspoon 
  • Brown Sugar – 1 ¾ cups 
  • All Purpose Flour – 1 ¼ cups 
  • Nutmeg - ½ + ¼ teaspoons 
  • Ground Cinnamon - ¼ teaspoon
  • Ground Mace - ¼ teaspoon
  • Ground Cloves - ¼ teaspoon 
  • Butter – 14 Oz (or 3 ½ sticks), softened, unsalted
  • Walnuts - 5 tablespoons, broken
  • Eggs – 5, large
  • Candied Peel of 1 Orange (Click for the recipe)

The original recipe suggested many things (like Black Treacle, All Spice, Mixed Spice etc.), some of which were not available easily and some were too expensive. While trying a new recipe, I always keep in mind the over all cost. I baked the cake using substitutions and it worked.

The original recipe also asked for currants, sultanas, raisins, glacé cherries, apricots and mixed peel. We went to Costco and got big packs of dried fruits. You can also vary the fruit if you like (like I did), but make sure the total weight remains the same as given in the recipe (5 cups).


Tips: 

  • ¾ cup is ¼ * 3 (for the sugar).
  • You can use the Mortar and Pestle to grind the spices.


Let’s do some preparations:
  • Chop all the dried fruits (Apricots, Cherries, Dates and Figs) and put them in a bowl along with the Golden Raisins. Dip the knife in water occasionally to cut the dried fruits smoothly.


  • Dip the dried fruits in ½ + ¼ cups of Rum in a large bowl.
  • Add the Orange Extract and mix everything well.
  • Cover the bowl and transfer to the fridge.


Tips: 
  • The original recipe asked for ¼ cups of Brandy for this. So, if you want you can reduce the amount. However, I should mention here that even though I used more amount of Rum, my cake didn’t taste too alcoholic.
  • Also, make sure to do this step at least 48 hours before you bake the cake so that the dried fruits become plump. 


Directions:
  • Lightly grease a 9-inch-deep round cake pan.
  • Cut a strip of baking parchment to cover the sides of the pan.
  • Put a circle of baking parchment into the base of the pan and lightly grease it.
  • Cut another piece of parchment big enough to cover the top of the pan. This will be placed on top of the cake so that the long bake does not dry it out.
  • Preheat the oven to 275 F.
  • Start the mixer on the lowest speed, beat the Butter.
  • Start adding the other ingredients one by one - Sugar, All Purpose Flour, mixed spices (Nutmeg, Ground Cinnamon, Ground Mace and Ground Cloves), Eggs, Corn Syrup, Lemon zest, Orange zest and chopped Candied Peel (leave out a few good pieces for decoration) and beat well.


  • Fold in the walnuts and soaked fruits.


  • Spoon the mixture into the prepared cake tin and spread out evenly with the back of a spoon. Decorate the top with the remaining candied peels (you can also use walnuts, almonds, apricots)


  • Cover the top of the cake loosely with a layer of parchment paper. Bake for 4 hours, or until the cake feels firm to the touch and a skewer inserted into the center comes out clean. Allow the cake to cool in the pan (on a cooling rack).


  • Feed the cake with a little splash of rum (do not take out the cake from the pan at this stage).
  • Repeat this step for at least 3 days. You can refrigerate the cake if you want.


Boozy Christmas Fruitcake is ready to be shared with friends and family.


You can also freeze the cake. Just put it in a zip-lock bag and transfer to the freezer.


Tips: 

  • Can't find a toothpick to test your cake? A skewer works just as well.
  • To grease your baking pan with ease, rub butter or oil around the baking pan using a piece of paper towel.
  • The recipe works well for two 6-inches cakes. Just bake them at the same temperature for 3 hours.
  • Not a fan of alcohol or serving to kids? Brush a little simple syrup or warm honey on the cake to bring that glazed look.