Featuring over 350 tried and tested recipes that can be prepared at home. From comfort food to restaurant style. Plus 110+ articles on Kitchen and Cooking Tips, Restaurant Reviews and more.
Showing posts with label Dhania Chutney (Cilantro Chutney). Show all posts

Thursday, 11 July 2019

Spinach Dip


I am always happy to share simple and quick recipes. Today I have a delish and luscious Spinach dip for you. I prepared this on a movie night with just a few ingredients I had in my fridge. It turned out so good that it was all gone before I could click some more photos. Well, that’s what happens when the food is too good!

This cool and creamy dip is perfect to serve at game nights and movie nights. Major crowd pleaser too. I prepared it a couple days back for my book club friends and it was gone within minutes! This is so quick and easy that you will want to make this again and again. The fresh spinach adds a beautiful flavor while the Parmesan adds a delicious sharpness and saltiness in the dip. The cream cheese and heavy cream makes it melt in your mouth silky! I have seen several spinach dip recipes online but the special ingredient which adds a beautiful aroma in this dip is the garlic. Do not skip it! Trust me, one clove is not enough to overpower the entire dip, it does however, lends a delicious taste making the dip homemade and special.

Prepare ahead:
Prepare this delicious Spinach dip ahead of time, keep it in the fridge and when your guests are there, serve it! This yummy dip can be kept refrigerated for up to three days but I would recommend you to prepare this fresh so that it tastes as good as it looks. Preparing this dip doesn’t require any elaborate list of ingredients or instructions. 

Can I freeze it?
I have never frozen this dip so recommending it is difficult. However, the best part about this dip is, it is not prepared with yogurt (which when frozen may break down and make the dip runny). Since, we are using cheese and cream, freezing it should be ok. If you are keeping it refrigerated, then I would recommend consuming it within 2-3 days. Although it tastes great right out of the fridge, I like to microwave it for 10-15 seconds just to slightly melt the cheese. When refrigerating, make sure to use a clean plastic/ glass container and cover it with plastic wrap.

How long can you leave it out?
Since homemade dips don’t have any added preservatives in them, leaving them out for a long time wont work. Remember, the cheese, cream and spinach are all perishable items. When you are preparing the dip for a large number of people make sure to divide it into 2-3 portions. That way, you can easily refill whenever the dip is all used up. And everyone will be getting fresh dip even after several hours (I do this every-time we are hosting a game viewing party). Make sure not to let the dip sit at room temperature longer than 3-4 hours.

What can I serve with it?
  • Hawaiian/ French/ Sourdough Bread
  • Snacks
  • Chips
  • Crackers
  • Baguette
  • Tortilla chips
  • Crudités (assorted Veggies like Celery Sticks, Carrot Sticks, Cucumber Sticks, Bell Pepper Strips, Broccoli, Cauliflower, Fennel and Asparagus Spears)
  • Sausage
  • Crostini
  • Pretzels
  • As a spread on sandwiches

So give this dip a try and then post on my Instagram #lifewithoutalu with the photo and your comments/ input.


Ingredients:
  • Spinach – 1 small pack
  • Butter - 1 ½ - 2 tablespoons, unsalted 
  • Onion – ¼ cup, finely chopped 
  • Paprika/ Red Chili Powder – ½ teaspoon 
  • Cream Cheese - 8 ounces 
  • Heavy Cream – ¾ cup (or more) 
  • Salt – to taste (about ¼ teaspoon)
  • Freshly Ground Black Pepper – ½ teaspoon 
  • Parmigiano Reggiano - 1/3 cup, grated
  • Garlic - 1 big clove, crushed


Directions:
  • Wash the spinach well.
  • Squeeze as much liquid out of the spinach as possible with a clean dishtowel or paper towels. 
  • Melt butter in a big pan over medium-high heat. 
  • Sauté the Onion with the Garlic until soft, 3–5 minutes. Add ¼ teaspoon of Salt. Mix well.
  • Stir in Paprika and cook until fragrant, about 30 seconds. 
  • Add the Spinach, Cream Cheese, Heavy Cream and Black Pepper and cook, stirring often, until everything is warmed through and slightly reduced, 8–10 minutes; the spinach will wilt in the meantime.


  • Mix ½ cup of the Parmigiano Reggiano. Taste to adjust the Salt.
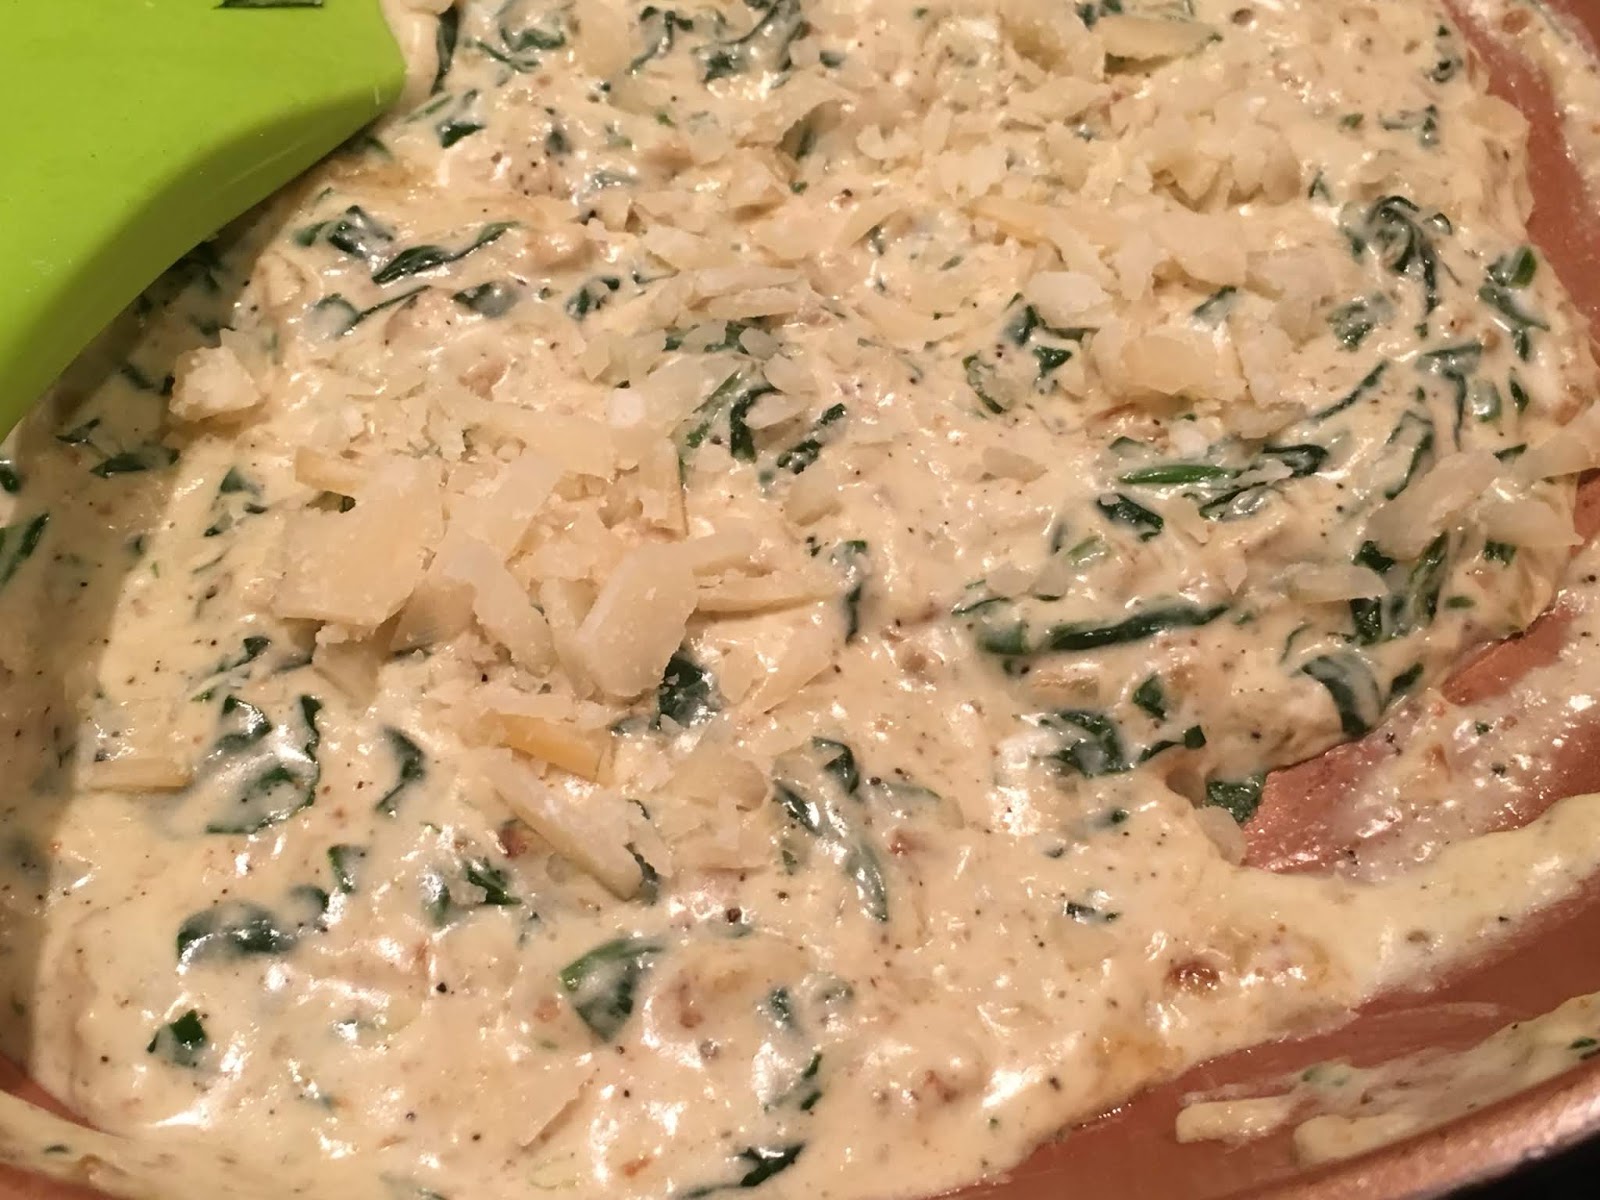


  • Transfer to a serving bowl and garnish with the remaining Parmesan cheese. Serve immediately with snacks/ chips.


With the football season coming in, it is always best to have a couple of different types of dips at hand. Try these dip recipes as well:

Wednesday, 15 May 2019

Indian Spiced Tzatziki Sauce (Cucumber Raita)


Well how to put this, umm... I wanted to try something new for dinner and I thought Kababs with Tzatziki Sauce will taste great. However, Debarshi was in no mood to try something new so I decided to give the Tzatziki Sauce Indian flavors. I did the same with the Kababs and voila! Delicious dinner ready in an hour! and this includes the preparation and cooking time.

What is Tzatziki Sauce?
Tzatziki is a greek dip prepared with cucumber and yogurt. Along with these two ingredients, it also uses lemon juice, garlic and fresh dill. It is usually served with chicken and fish, grilled/ raw vegetables, pita bread/ chips, crackers and gyro. 

What is Raita?
Raita is a condiment spiced with Indian spices like Chaat Masala, Cumin Powder etc. It is served as a dip with Parathas and main course. Because of the wide use of spices in Indian cuisine certain dishes are quite hot on the palate. Raita contains yogurt which helps to cool down the heat. It can be prepared with almost anything! In fact, one of my all time favorite brunch is Alu Paratha with Boondi Raita. My mom often prepares Cucumber/ Alu Raita at home and even now whenever I visit her, she prepares it especially for me. 


Similarities between Cucumber Raita and Tzatziki Sauce:
  • Both Cucumber Raita and Tzatziki Sauce use cucumber and yogurt along with a few ingredients (like Black Pepper) which add and elevate the flavors. 
  • Herbs like mint and cilantro are also sometimes added in Raita. Tzatziki Sauce uses Dill but I have seen Mint and Parsley also being used in many recipes. 
  • Both Cucumber Raita and Tzatziki Sauce take very less time to prepare and hence can be added at the very last minute to your menu. 
  • Both of these go very well with spiced/ toasted/ grilled foods and can be served as either a dip or a condiment.


Differences between Cucumber Raita and Tzatziki Sauce:
  • Raita is usually spiced with Cumin and Chaat masala. Tzatziki Sauce on the other hand uses Garlic and Lemon Juice. 
  • Some people like adding a slight hint of sweetness in Raita with sugar or honey which makes it perfectly delicate, cool and creamy to go with spicy foods. Tzatziki Sauce does not have any added sweetness. 
  • Tzatziki sauce uses greek yogurt whereas Raita is a little thinner in consistency and is prepared with plain yogurt and a little water. 
  • Tzatziki also uses lemon juice making it tangier than raita. Raita recipes use Amchur and Chaat Masala but not lemon juice.


In our home, Debarshi is not too fond of yogurt but I just love it! If I can, I would prepare fresh raita everyday. It is just the sort of cool and creamy dip that goes great with everything. Now this sauce/ raita may be easy and quick to prepare but its flavors will blow you away. So, give it a try and post in the comments!


Ingredients:
  • Plain Greek Yogurt - 1 cup, 
  • Cucumber – ½ cup, peeled and deseeded, finely diced
  • Garlic - 2 cloves, grated
  • Fennel Seeds - 1 tablespoon 
  • Lemon Juice - 1 tablespoon freshly squeezed 
  • Chaat Masala – ½ teaspoon
  • Black Pepper - ¼ teaspoon, freshly ground
  • Olive Oil - 2 tablespoons 


Directions:
  • Take a bowl and whisk the yogurt with the Chaat Masala, Fennel Seeds and Black Pepper.
  • Add the Garlic and Cucumber. Mix to combine.
  • Stir in the Lemon Juice. Combine thoroughly. Cover tightly and refrigerate for an hour so that the flavors develop.
  • When ready to serve, stir the Tzatziki sauce to refresh and transfer to a serving bowl and drizzle with Olive Oil. 
  • Serve with warm pita bread and your favorite vegetables and enjoy!


Serve this Indian Spiced Tzatziki Sauce (Cucumber Raita) with:


Other Chutneys, Condiments and Dips you may like:


Before we move on to the travel part, I would like to thank everyone for showing interest in my travels and requesting information. Today I am going to take you to a place which is almost like stepping into a luxurious dream, in a different era. You don’t have to be Julius Caesar to experience this, just take a stroll inside the hotel - Caesars Palace in Las Vegas.

Make sure to enter from the Forum shops entrance otherwise by the time you will finish exploring the main hotel and casino, you will be too tired to go to the extension shopping wing. Keep in mind that this is known as the ‘Shopping wonder of the world’ and features specialty and designer stores, fine restaurants and attractions.


The mall has spiral staircase with a touch of today – spiral escalators. 


Here we are at the Fountain of the Gods. To tell you the truth, for me the main attraction of the forum shops was not the shops but the fountains and the artificial ceiling. 

After you have finished exploring the forum shops, it is time to move towards the hotel. You will come to a hallway between the casino and forum shops.


Keep walking a little further and you will see Cleopatra’s Barge.


This is a live music venue and bar. If you want to feel like one of the royal families during Julius Caesar’s time, then this is the place for you. This luxurious floating barge is colored in red and gold and is the exact copy of the boat which was used to transport royalty on the Nile river.


I think Caesars palace is one of those places which will fill you with awe and wonder. Do take your time to explore the hotel and forum shops. I will be back with more travel info in my next article.

Thursday, 16 August 2018

Alu Cutlet (Crispy Shallow Fried Potato Patties)


Recipe courtesy: Mamma


Alu Cutlet is a popular North Indian snack. The rules for this appetizer are, it should be deliciously spiced, crisply fried and served hot. It is best enjoyed in the evening with a cup of tea and two types of mouth watering green and brown chutneys. The green chutney is prepared with cilantro and the brown one with tamarind. The Cutlets are garnished with green chilies and onions and if you don’t want the hassle of making the chutneys at home, you can just grab a readymade chutney bottle or go for my all time favorite condiment - Ketchup.

When Debarshi and I plan a party at our home, we always think of North Indian dishes. Something which can be different but packed with flavors. Last time we served Alu ki Tikiya Chaat with Phulki as an appetizer. This time, we decided to change the menu a bit and prepared a Cutlet Chaat, the main emphasis being the Cutlet which can also be enjoyed just with the chutneys. We served it on a bed of Matar and garnished it with something extra. Yes, Alu Bhujia! We got a packet from the local Indian store and it gave the Chaat a beautiful crunch and texture. 

Now making these Cutlets is very easy. Boil the potatoes, mix the spices, and ta da! It is ready! However, as we discovered, because of whatever reason, our potatoes became very sticky. So, we decided to fry the mixture and it worked wonders! Frying not only controlled all the extra moisture but also enhanced the flavors. So I would definitely recommend doing this step. 

In the original recipe, my mom suggested to dry roast some Gram Flour (Besan) and mix it up with the filling. I did a trial run and for me it was a no go so I decided to use all purpose flour instead. But hey! If you like the rustic flavor of Besan then go for it. Debarshi suggested to dip the Cutlets in beaten eggs and coat them with breadcrumbs so that they turn out crisp and we decided to go for shallow frying because it is way easier than deep frying a heavy patty plus it is comparatively healthier. We changed the oil after every one or two batches because we didn’t want any burnt breadcrumbs (from the previous batches) to stick on the fresh patties.

Alu Cutlet should be crispy on the outside and soft and spicy on the inside. The leftover patties can be enjoyed on their own or with a hot Paratha or hey! If you don’t feel like cooking, make a burger with them, squeeze some chutney on the Patti and you will get an Indian version of Mc Donald’s Alu Burger.

Bon Appetit!


Ingredients:
  • Potatoes - 2, cut into halves, washed, boiled and drained
  • Meat Masala – 2 teaspoons
  • Ginger – about 1 teaspoon, grated (or ½ teaspoon powder)
  • Garlic – about 1 teaspoon, grated (or ½ teaspoon powder)
  • Turmeric Powder – ½ teaspoon
  • Red Chili Powder – ½ teaspoon
  • Coriander Powder – ½ teaspoon
  • Salt - to taste (about ½ teaspoon)
  • Cilantro – a handful, washed and chopped
  • Oil – to fry (about 1 cup)
  • All Purpose Flour – about 2-3 tablespoons, or as required
  • Eggs – 2, lightly beaten in a soup bowl
  • Breadcrumbs – 1-2 cup, in a soup bowl

Tip: Instead of mixing All Purpose Flour, you can mix Besan (Gram Flour) – ¼ to ½ cup, for a more rustic flavor. Dry roast the Besan and cool it before adding in the potato mix.

Serve the Cutlets with:
  • Plain non-fat Yogurt – 1 cup, whipped
  • Chutney – Hot Mango or Tamarind, ½ cup
  • Onion – ½ cup, chopped finely
  • Green Chili – 4-5, chopped finely
  • Masala – Recipe in the Phulki article
  • Matar – Recipe in the Phulki article
  • Alu Bhujia – found at any Indian store


Let’s do some preparations first:
  • Drain the potatoes as soon as they are properly cooked otherwise they will absorb extra moisture. 
  • Let the potatoes cool down completely. 
  • Peel them, then mash them up with a potato masher.


  • Mix the spices (Meat Masala, Ginger, Garlic, Turmeric Powder, Red Chili Powder, Coriander Powder and Salt) in it. Also add the Cilantro. Mix well.
  • Mix a tablespoon of Flour in it. If the mixture feels sticky, add some more flour. You will see the texture changing. The flour will start absorbing the extra moisture. Do not add any water in the mixture at any point. It should be dry enough to roll into a Patti and should hold its shape.
  • Heat a non stick wok over medium high heat and add 2 tablespoons of oil in it.
  • Transfer the whole mixture to the wok and start frying it. You will see the moisture evaporating. 
  • Keep frying till it looks fried and not at all sticky. Take a little mix in your hands and try to roll it. If it rolls smoothly without sticking on your hand, it is ready.
  • Remove from heat and let it cool down.


Note: Sometimes the mixture sticks at the bottom and sides of the wok. Remove it with a soft spatula or transfer the mix to another bowl and dip the empty wok in normal tap water so that the filling loosens up and can be cleaned easily.

Directions to make the Cutlets:
  • Start rolling the balls. This recipe will yield 8-10 patties.
  • Pat to flatten them and press the sides to smooth them so that they don’t crack. 
  • Coat the first Patti in the Egg then coat carefully in Breadcrumbs. Transfer to a plate. Repeat with the other patties.
  • Heat a skillet over medium heat. Add 3-4 tablespoons of Oil in it.
  • After a few seconds, start adding the patties in it in a single layer. Do not over crowd the skillet, add only 4-5 patties at a time. Fry for 3 minutes then carefully turn each patty over with a spatula and cook the other side until they look reddish golden in color. 


  • Transfer them on a paper towel.
  • Serve them with Yogurt, Matar, Onion, Cilantro and Tamarind Chutneys, Masala and Alu Bhujia.


Tips:
  • Keep changing the oil (used to fry the Cutlets) after every one or two batches because the breadcrumbs will get brown and float in the oil and they will stick on the fresh patties.
  • Use the leftover Alu Cutlets to prepare delicious sandwiches or burgers. Use Cilantro Chutney or ketchup with onion rings to add more flavor.
  • Check my article on Meethi Chutney Matar Phulki for the recipe of Matar and Masala.
  • Once you drain the potatoes and peel them, you can leave them in the colander on your kitchen counter for a while. This will dry them up automatically.
  • Different potatoes develop different textures when boiled. Increase or decrease the amount of flour accordingly. The purpose of adding the flour is to reduce the stickiness of the mashed potatoes.
  • I used russet potatoes.
  • When serving to guests, fry the Cutlets before hand and keep them warm and crisp by placing them in an oven safe dish lined with aluminum foil. Heat the oven to the lowest temperature (170 degrees F) and place the Cutlets inside the oven. When ready to serve, they will be just as warm and crisp as if they have been freshly fried.


Recommended Reading:

Monday, 12 February 2018

Palak ke Pakore (Gram flour and Spinach Fritters)


Super Bowl is incomplete without finger foods and every year I try to prepare something new. Last year I prepared a Creamy Cream Cheese Dip to go with the delicious sausages and this year I decided to prepare a North Indian snack. I had a huge bag of Spinach in my fridge and I thought how about I prepare some Spinach and Gram Flour fritters? This combination tastes amazing and it can be easily prepared within 10-15 minutes. I fried them crisp which developed that beautiful crunch in the leaves. Now you don’t have to buy the powdered spices, you can always use whatever you have available in your pantry. Serve the fritters hot with some Chaat masala and you got yourself a delicious homemade finger food! If you are preparing these for guests, you can fry them beforehand and keep them warm and toasty in the oven. Serve them with Cilantro chutney or ketchup.


Ingredients:
  • Spinach – 2 cups, thoroughly washed
  • Besan (Gram Flour) – 1 cup 
  • Onion Powder – ¼ teaspoon
  • Ginger Powder – ¼ teaspoon
  • Red Chili Powder – ¼ teaspoon
  • Fennel Powder – ¼ teaspoon
  • Coriander Powder – ¼ teaspoon
  • Cumin Powder – ¼ teaspoon
  • Asafoetida – a pinch
  • Water – ½ cup plus a little more (for the batter)
  • Salt – to taste (about ¼ teaspoon)
  • Oil – 2-3 cups (for frying)


Let’s prepare the batter:
  • Mix together the batter ingredients (Besan, Onion Powder, Ginger Powder, Red Chili Powder, Fennel Powder, Coriander Powder, Cumin Powder, Asafoetida and Salt) and gradually add the water in it. 
  • To ensure that there are no lumps in the batter I whisk it continuously while adding water.
  • Wash the Spinach thoroughly in a colander and keep it aside.


Directions to fry the Fritters:
  • Heat the oil in a wok over medium high heat.
  • Keep an oven safe dish on the kitchen counter and line it with a paper towel.
  • Test the temperature of the oil by dropping just a little bit of the batter into the oil. If there isn’t any bubbling, then the oil isn’t ready. If it’s furiously bubbling and there is smoke, that’s too hot. If the temperature is perfect the batter ball will take a dip and immediately float to the surface of the oil and change color.
  • At this perfect temperature, start dropping a couple of spinach leaves into the batter. Coat them up with a spoon, then drop them carefully into the oil. You can add a couple spoonfuls of leaves at a time making sure not to over crowd the wok. Keep an eye on the color and temperature of the fritters.
  • Keep frying the fritters till they are light golden brown in color. 
  • Remove from the wok using a spider spoon and place them on the plate.
  • Dust some Chaat Masala on them and serve hot with ketchup or Cilantro chutney.


Tips:
  • One question which may baffle a newbie cook is the measurement of pinch. Traditionally it is the amount of salt or pepper you can hold between your forefinger and thumb. Now if you want to be more accurate then you may use a measuring spoon and it will be approximately 1/8 teaspoon.
  • If you don’t have the powdered spices, use 2-3 tablespoons of chopped Onion and 1 teaspoon of Ginger. If using Green Chili, two should be enough, chop them up as well.
  • Prepare the Masala given in the Meethi Chutney Matar Phulki article and dust it on these Pakoras for an extra flavor.
  • Skip the green chilies or the red chili powder if you don’t want the fritters taste hot. Always remember to improvise the recipe as per your palate.
  • Keeping the heat on medium ensures a longer frying time and helps cook the batter evenly. You should of course turn it up a bit if the fritters are looking greasy or taking forever to cook. Now if the fritters are changing color quickly you may want to turn down the heat a bit.
  • Try to use the back burner to deep fry the fritters. Always be careful when dealing with hot oil.


Recommended Reading:

Tuesday, 11 July 2017

Mamma’s Alu Sandwiches (Indian style Potato and Cheese Sandwiches)


Photo Courtesy: Dr. Debarshi Chatterji
Recipe Courtesy: Mamma (Sumita Moitra)

Sandwich is one of the easiest and quickest meal options in most of the families. In India, Sandwiches are prepared not with Delis (cooked meat, salads and pickles) but with a filling of mashed vegetables or ground meat, fried onions and spices. They taste entirely different than the sandwiches I have had in the U.S as there is no dressing or pickles in them.  The filling is first fried and then filled in the sandwiches which brings an enhanced flavor. Agreed they are not to be consumed if you want to loose weight but they do taste awesome and are an excellent weekend brunch option. 

Growing up, I have had these numerous times and I love them. My mom used to prepare this as a quick snack and because of its yummy taste we used to eat it without any tantrums. Its filling and appetizing and I am sure a great meal option for the kids who want something new on their plate every other day. I have tried this quite a few times since my India trip. It’s easy to prepare, uses just a few ingredients and since I do not have a sandwich maker I have improvised the recipe so that it can be prepared on a skillet.

This is also a very good recipe for your vegetarian friends as it does not have any meat! I prepared this as a brunch on Diwali (Indian festival of lights) and Debarshi clicked this awesome photo. So, here you go, drooling zone starts here.


Ingredients:
  • Potatoes – 3, medium size, boiled, peeled and mashed
  • Asafoetida – about ¼ teaspoon
  • Red Onion – ½ medium, finely chopped + ½, cut into thin slices
  • Ginger - 1 tablespoon, chopped 
  • Green Chili - 1 tablespoon, chopped 
  • Turmeric – ½ teaspoon
  • Ground Black Pepper – ½ teaspoon
  • Garam masala – ½ teaspoon
  • Bread – about 6-8 slices
  • Red Chili Powder – ½ teaspoon
  • Salt – about ½ teaspoon (or as per taste)
  • Mango Power -1 teaspoon
  • Cilantro – a handful, chopped
  • Oil – 2-3 tablespoons (for frying the potato filling) + 2-3 tablespoons (for toasting the breads) 
  • Cheese – about 2 cups (shredded or cut into thin slices)
  • Cucumber – 1, peeled and thinly sliced


Directions to prepare the filling:
  • Heat a wok over medium high heat.
  • Add Oil (2-3 tablespoons) in it and once it heats up a bit, add the Asafoetida, Onions, Ginger and Green Chilies in it. 
  • Fry well till the Onions are golden in color.
  • Add the mashed Potatoes and mix well.
  • Let’s start adding the spices –Turmeric, Black Pepper, Garam Masala, Red Chili Powder, Salt and Mango Power. Mix well. 
  • Keep frying till the mixture changes color to golden brown.
  • Add the Cilantro, mix well and turn off the heat.


Directions to prepare the Sandwich:
  • Take a big skillet and heat it on medium high heat.
  • Take 2 slices of Bread and place them on the skillet so that they start toasting.
  • After a couple of seconds, turn them over and apply a little oil on them using a brush.
  • Turn them over again and apply oil on this side as well.
  • When both the sides look a little toasted, turn down the heat to medium and sprinkle some cheese on one of them.
  • Add a generous amount of the Potato filling on the bread, do not press it, the cheese will melt and hold the filling together with the bread.
  • Top it with 3-4 Cucumber and Onion slices.
  • Sprinkle some Cheese on it and place the second toasted bread on top of it and press gently with the spatula.
  • The cheese will start melting and it will hold the bread and the filling together. 
  • Wait for a few minutes, then turn the sandwich carefully so that the other side gets toasted properly.
  • Indian Potato and Cheese Sandwich is ready; you can slice it in halves or diagonally. 
  • Serve the Sandwich with Cilantro Chutney or Ketchup.


Tips:
  • If you are using a non stick skillet, always use a smooth spatula to turn the sandwiches on it. I use a ceramic skillet for this recipe and a tong to hold and turn the sandwiches easily without the fear of scratching the surface of the skillet. 
  • I usually use two skillets to prepare the sandwiches, I keep the heat on medium or medium low to easily manage my time.
  • You can choose any Bread of your choice like Oatmeal or Multi Grains although this tastes great with White bread.
  • You can serve it as a snack with a cup of hot Tea.
  • You may choose any cheese you like. I have prepared this with the 5 Cheese mix and Medium Cheddar and it tastes great with both.
  • I always boil the potatoes in my pressure cooker. Two whistles on medium heat and they are perfectly boiled and ready for the next step.

Got a Panini Press? Use it! Debarshi got me this a year back and making sandwiches in this Griddle Gourmet by Cuisinart is so easy and fun!


Recommended Reading: