Featuring over 350 tried and tested recipes that can be prepared at home. From comfort food to restaurant style. Plus 110+ articles on Kitchen and Cooking Tips, Restaurant Reviews and more.
Showing posts with label Doi Mach (Bengali Recipe: Succulent Fried Fish in Yogurt Gravy). Show all posts

Wednesday, 28 August 2019

Bhapa Ilish


If you love Ilish then it wont take anything more to impress you. Just a bowl of Bhapa Ilish with steamed rice and you will be singing the cook’s praises for a long time. For a Bengali, food is an integral part of life and fish dishes go right at the top of the pyramid (pyramid of all the favorite food items listed). Personally I was a bit surprised to learn that it doesn’t take much to prepare this heavenly curry. The steaks of Ilish are dipped in a paste of yogurt, salt, turmeric, mustard powder and oil, then cooked in the microwave for 10-15 minutes and that’s it! 

I think every cuisine and culture has something which is so special that if you have to name one dish from your cuisine you will no doubt mention it. For Bengalis it is Bhapa Ilish. If you are familiar with the French À La Russe service style, then this will seem very interesting to you that Bengali cuisine is very much like that where food is served in courses rather than all at once. I think it is because of the myriad of dishes both savory and sweet. Well, because we have so many dishes to flaunt and so much to eat, serving a multi course menu makes more sense. 

As for me, I am a through and through Bengali in serving my dishes. I love to cook multiple courses for a single lunch or dinner. Of course, for just two people it doesn’t make much sense but if we have guests/ friends coming over, I love serving meals in the À La Russe style. 

An expert (like Debarshi’s mom) would do the preparations and keep everything ready then start cooking the Ilish right when everyone is sitting down for lunch. It was actually quite exciting. We all started with our first course (Saag Bhaja, ghee and rice), then the second course (Chochori, Dal and rice) when the microwave started beeping announcing that Ilish was ready! Then his mom brought the bake ware on the table, took off the cling wrap and served hot Ilish right on our plates. It was an absolutely ecstatic experience for me. Me! Who takes half an hour to finish a piece of Ilish. I enjoyed the show thoroughly. And the fish was simply marvelous. 

Now if you don’t like extra fishy smell or excessive bones then you may find it a little difficult to enjoy Ilish. However, I will say, take your time and sort the bones properly. So what if I have to sit for another half an hour on the dining table alone and sort the bones out? I still enjoyed the fish very much.

Make sure you are cleaning the fish very well so that all the scales and blood clears out. Also, do not use any oil other than mustard to prepare this because it just wont bring that authentic flavor in the fish. Also make sure you are preparing just the number of pieces you will be able to consume in that one meal. Keeping the leftover in the fridge may affect the flavor. 

Try this dish then post how it turned out. Got any suggestions or ideas? Post them away!


Ingredients:
  • Ilish – 7 big/ medium pieces 
  • Salt – about 1 teaspoon
  • Turmeric Powder – 1 teaspoon
  • Green Chili - 6-7 slit
  • Mustard Powder – 4 teaspoons
  • Mustard Oil – 1 teaspoon + 2-3 tablespoons
  • Coconut Paste – 1/3 cup
  • Yogurt – ½ cup


Tip: For the Coconut paste, you can use shredded coconut. Allow it to soak in ¼ cup warm water for 5-10 minutes then run it in Nutri bullet to make a smooth paste.

Directions:
  • Wash the fish steaks. Make sure the fish is clean, there are no scales or blood on it.
  • Allow it to drain the water then season with Salt (about ½ teaspoon) and Turmeric powder (about ½ teaspoon).
  • Mix the Mustard Powder, Mustard Oil (1 teaspoon), Turmeric Powder (½ teaspoon), Green Chili and make a paste with ½ cup of Water. 
  • Mix the Yogurt with ¼ cup of water.
  • In a microwave safe baking tray, add the whisked yogurt and water mix, 1/3 cup of coconut paste along with 2-3 tablespoons of Mustard Oil. Mix everything together. Add the mustard paste as well and mix, taste to adjust Salt.
  • Cover the baking tray with a cling wrap. Poke some holes in the wrap carefully using a tooth pick.
  • Microwave on high for 10 minutes.
  • Let it sit in the microwave for 5 minutes.
  • Check if the fish has cooked through by pressing it with a finger or spoon. Cooked fish will press down easily.
  • Cook for 2 more minutes then serve hot with steamed rice.


Love Bengali fish recipes? Try these as well:

Monday, 15 July 2019

Shorshe Diye Bata Mach (Bengali recipe: Fish in Mustard Gravy)


I am a Bengali who has recently acquired the taste of fish. And I am a cook who has recently started cooking fish. In our home, fish and mutton used to be Debarshi’s specialty. However, now I have also started trying them on my own because sometimes it’s great to surprise Debarshi with his favorite curries. If you cannot connect to this emotion, just think about your favorite dish – Sushi, Hamburger, Chinese (or whatever it is). Now think, you have no idea coming home that you will be served your favorite dish for dinner! Isn’t it amazing when that happens! So yeah! I am on an adventure only this time it involves fish.

One thing you have to know is, there are many different varieties of fish in the market and they are all cooked in various ways. Frying the fish alone is a daring task because of the long lingering fishy smell. So make sure to switch on the central air or open your windows/ doors so that the fishy smell can get out.


The few fish recipes I have on my blog are cooked with either shrimp or salmon. Today we are going to discuss a totally different type of fish – Bata Mach (Bata = Labeo Bata and Mach = fish). This is a small game fish, quite popular for its taste. This fish is found throughout India (West Bengal, Odisha, Tripura etc.) and Bangladesh in ponds, rivers and rivulets. In fact, it is one of the few fishes which are found in my hometown – Allahabad. I am sure growing up; I must have been offered a bowl of fried Bata Mach dipped in a delicious mustard gravy. However, I have always had a low tolerance of mustard’s rich flavor. Even now, I take very less gravy and mix it with a lot of rice to sweeten the overall taste. However, when Debarshi’s mom cooked this dish, it was so awesome that I asked her to prepare it again so that I can take detailed notes.


In India we have quite a few options to easily make/buy mustard paste, however, here in (USA) smaller cities, you may not always find a lot of options. I don’t prefer buying groceries from amazon especially when it comes to spices. So, I try to find readymade mustard powder at my local Indian stores. The alternative is, to use seeds. Debarshi used to make a paste of mustard seeds and water using our Nutri bullet (extractor blade). He would then strain the paste and mix other ingredients in it. This time the extractor blade broke (well, it was about time) so I used the milling blade to grind the mustard seeds to a fine powder and then soaked it in water. This trick turned out so much better and this is what I will recommend.

Making a fish curry is a daunting task even if you have all the gadgets. I want to salute our mothers and grand mothers who used to do so much extra labor to cook these authentic dishes. A few decades back when food processors, Nutri bullet, food chopper, mixer and grinders weren’t as common as they are today, everything was done manually. I am sure everyone of my generation remembers a Shil Nora stacked in the corner of the kitchen. I am just thankful to science and all the advancement in technology, otherwise a lazy person like me would never have dared to step in the kitchen and cook a fish curry!

So, give this a try sometime and then post in the comments how it turned out. You can also post on my Instagram #lifewithoutalu with your photos and comments.


Ingredients:
  • Bata Fish – 1 pack (24)
  • Mustard Paste - 3 tablespoons
  • Salt – to taste (about 1 teaspoon)
  • Turmeric Powder – 1 teaspoon 
  • Mustard Oil – 3 tablespoons
  • Green chili -3-4
  • Garlic – 3-4
  • Tomato – 1 medium
  • Cilantro – a handful, washed and chopped


Tips:
  • Use only mustard oil to cook this otherwise it wont develop the same authentic flavor.
  • You can use readymade mustard powder/ paste or if you have seeds, grind them to a fine powder in your grinder/ Nutri bullet and soak it in water. Strain before using to discard the seed skins.


Directions:
  • Check to see if the fish pieces are thoroughly clean. 
  • Season the fish with a little Salt (¼ teaspoon) and Turmeric Powder (about ½ teaspoon) and keep it aside for an hour.

  • Next we need the Mustard paste, you can use readymade mustard powder or grind the seeds in the grinder then soak it in water to make the paste. Mix ¼ teaspoon each of Salt and Turmeric powder along with a teaspoon of Mustard Oil. Let it soak.
  • Make a paste of Green chili, Garlic and Tomato.
  • Now, take a big non-stick pan and heat it over medium high heat.
  • Add 2 tablespoons of Mustard oil in it. When it begins to smoke, reduce the heat to medium low so that it cools off (this is done to remove the pungent taste and smell of the Mustard Oil).
  • Increase the heat to medium and carefully add a few fish pieces. Do not over crowd the skillet and fry in a single layer.


Tips: 
  • Make sure the oil is properly heated before adding the fish. This will not only remove the pungent flavor and aroma from the oil but also prevent the fish from sticking on the pan. 
  • If the oil jumps too much add a pinch of Turmeric powder in the oil and mix it properly.
  • Allow the fish to fry up before turning it. Do not disturb the fish before one side is fully done otherwise it will stick on the pan.
  • Use a splatter screen to cover the skillet. It blocks the oil from sputtering all over the gas oven. (A splatter screen is a fine mesh with a handle and you can see through the mesh and fry the fish). 
  • Turn on the central air and vents.


  • When the fish looks golden and fried, transfer it to a plate and keep it aside. 
  • Now reduce the heat to low and add the Green chili, Garlic and Tomato paste in it.
  • Increase the heat to medium and fry the paste well.


  • When the paste looks fried and reddish in color (and the oil starts to separate), add the mustard paste. Mix well.
  • Reduce the heat to medium low and fry the mixture till oil separates.
  • Now adjust the Salt.
  • Add about 1 ½ cups of Water and bring to a boil.
  • Add the fried fish, reduce the heat to low and cook till the gravy thickens.
  • Sprinkle chopped Cilantro and serve with hot steamed rice.


Love Bengali food? Try these dishes as well:

Tuesday, 6 November 2018

Make Homemade Ghee from Spoiled Cream


If you have been following my blog, you must have read the word ‘Ghee’ several times in the list of ingredients. I love adding a dollop of ghee in whatever I am cooking. I think it adds a beautiful fragrance and gourmet flavor in the dish. Ghee is not only used in our everyday dishes (like Dal, Parathas and Curries) but also for the connoisseur’s items (like Biryani and Kababs). Apart from this, Ghee is widely used in the preparation of Bhog (meals offered to Gods) and is also added in Charanamrit (a thin beverage offered to Gods prepared with Milk, Sugar, Honey, Ghee and Yogurt). Ghee is also used in rustic dishes (like Litti Chokha – a dough ball prepared with roasted chick pea flour, served with cooked mashed eggplant dish and topped with lots of Ghee to make it moist) and comfort foods (like Khichuri and Dal). Ghee also rules the dessert market (Payesh and Halwa). But enough about where it is used, let me tell you how it is made:


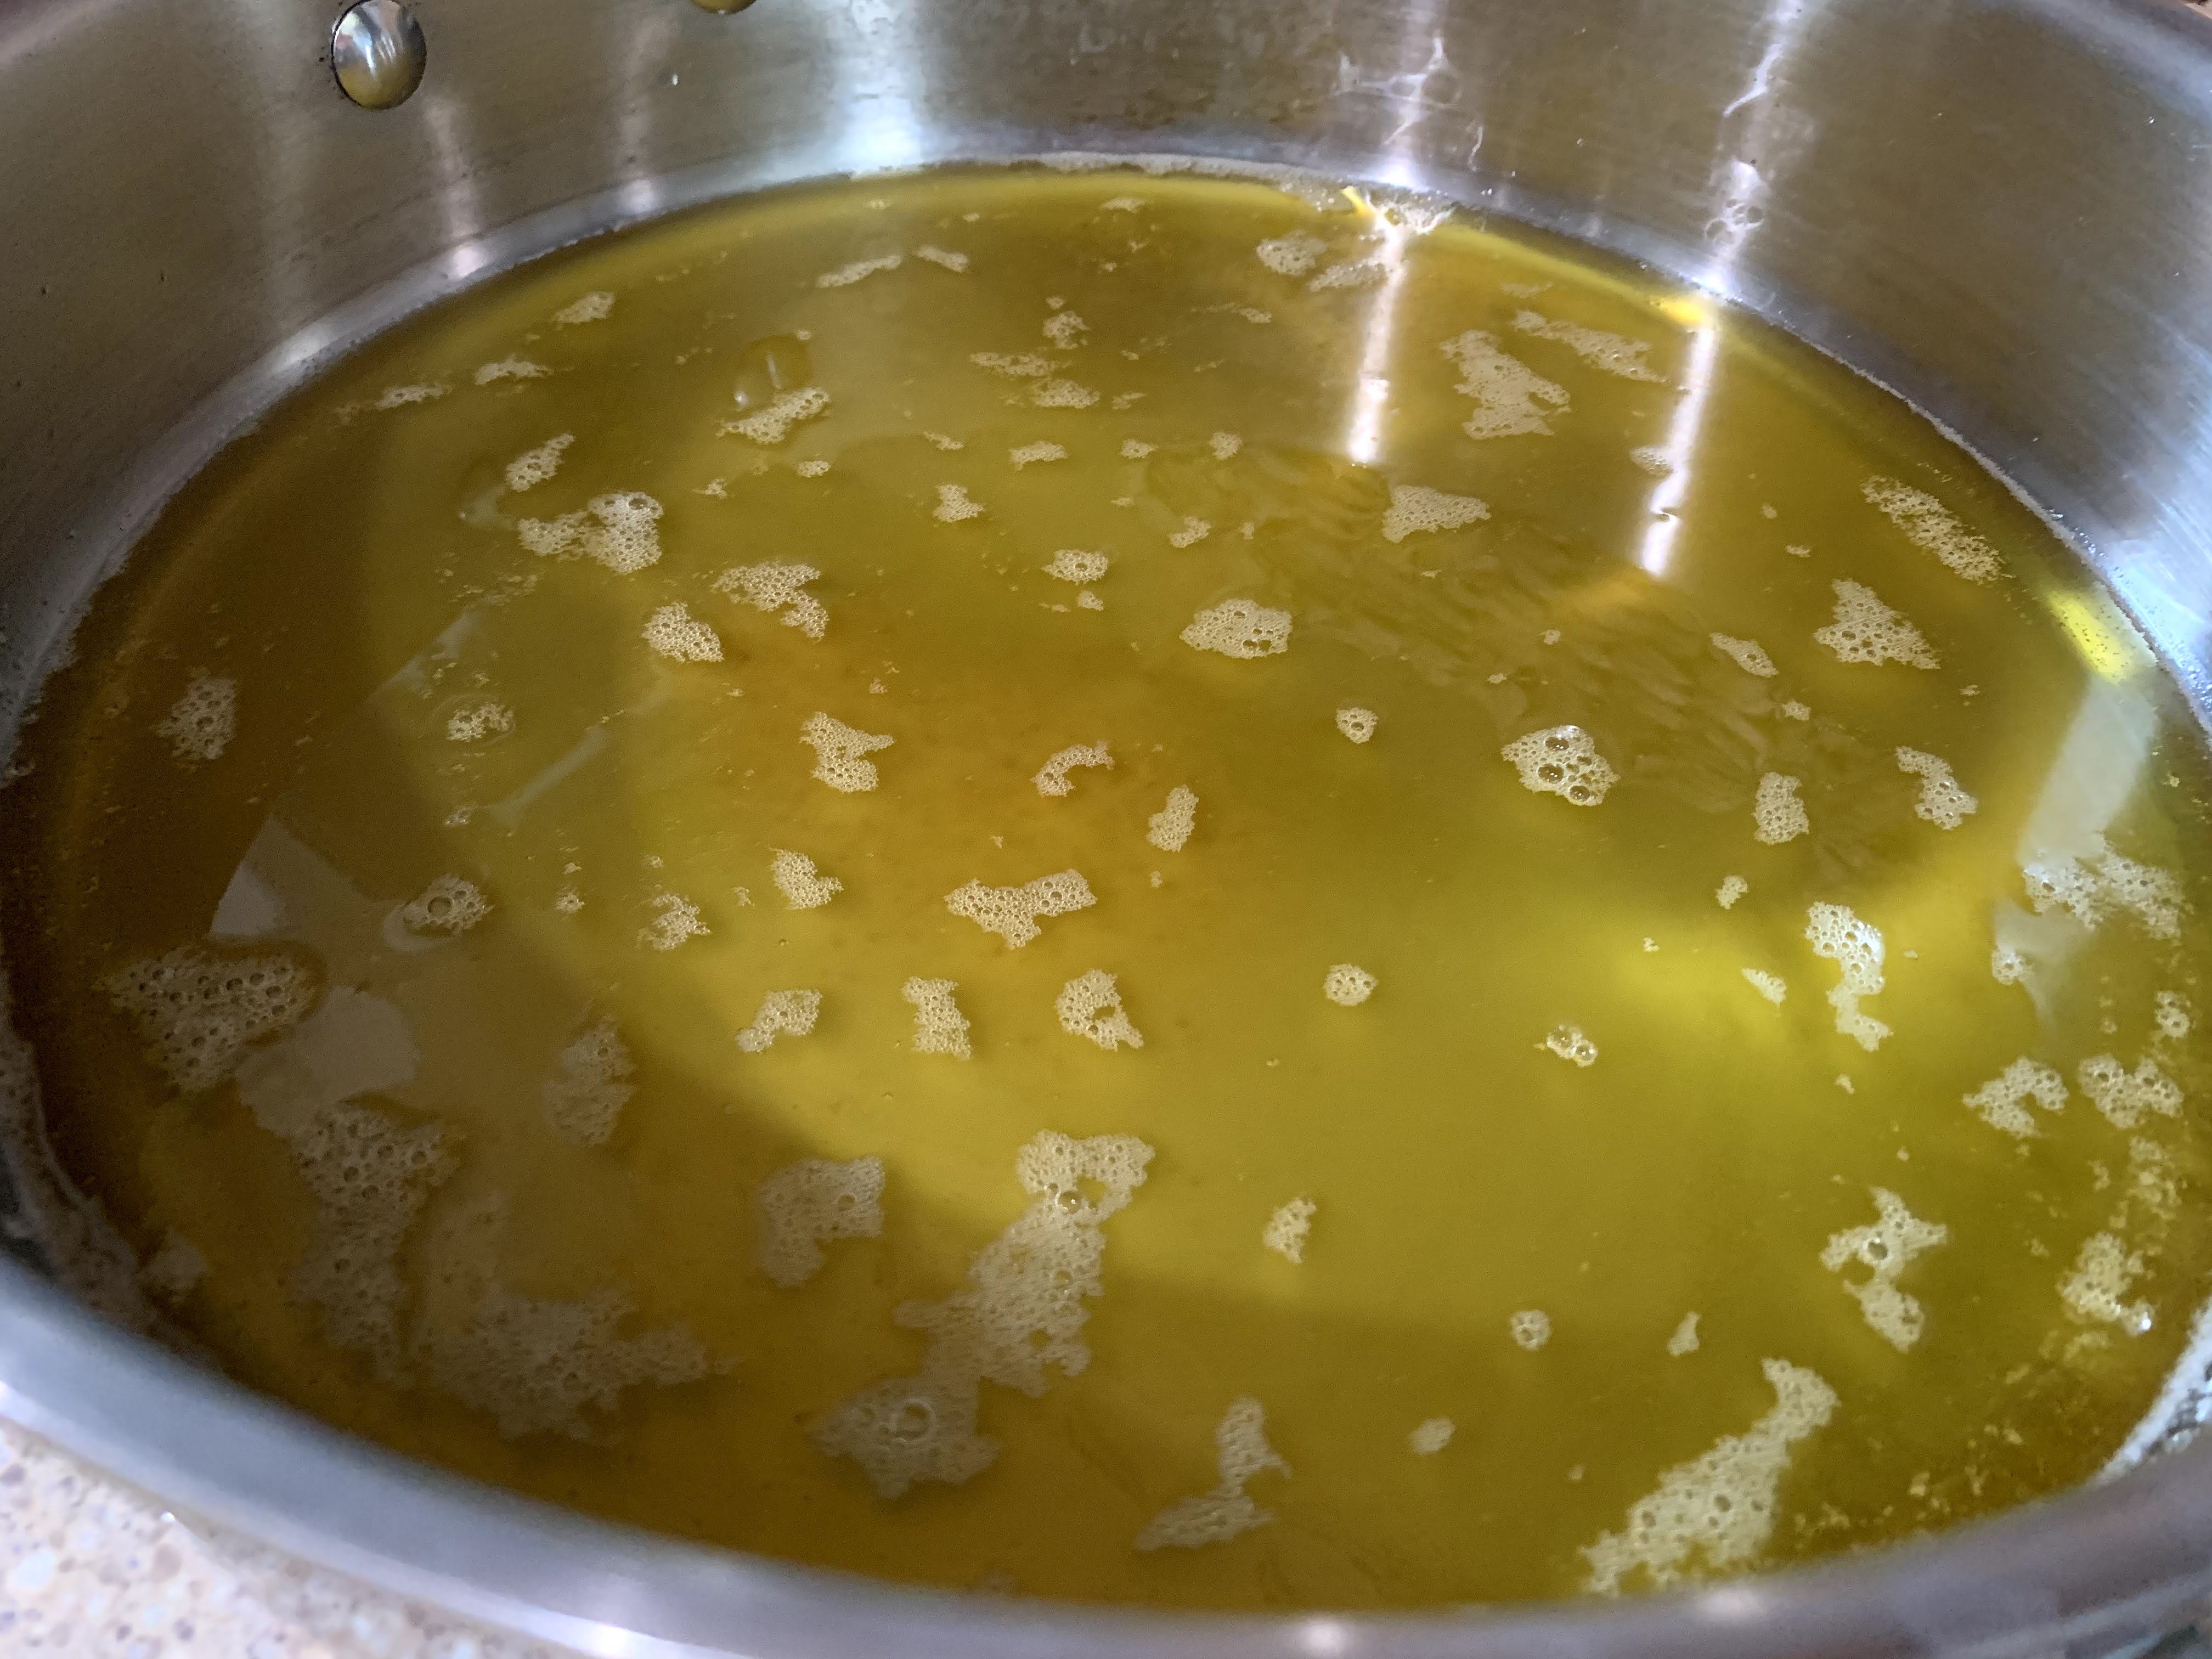
Ghee is made by boiling cream till the milk solids separate. Once you strain the milk solids you will be left with a beautiful golden colored clear liquid fat. This is Ghee! I did find several methods online to prepare Ghee at home but I am going to share with you the simplest method which I have seen my mom follow all these years.

Growing up I used to wait for days for mom to collect all the heavy cream. She used to boil the fresh milk everyday and once it would cool down she would scrape the top layer of the thick cream and keep it aside in a bowl. This cream was kept refrigerated and everyday a fresh layer of cream was added on top of it. Then after a week or so (or whenever enough cream had been accumulated) would be the day to make the Ghee. Mind you this is a smelly process. My mom used to warn everyone in advance to plan our day. Then she would start boiling the cream, stirring it often. I think this is the most difficult stage of the whole process. The initial smell of the boiling thick spoiled cream is not easy to bear. But if you can surpass it somehow you will be rewarded with a sweet buttery liquid or Ghee. 

For those of my friends who live in an apartment or who don’t have a window in their kitchen, please be advised to start the exhaust fan and Central Air system of your apartment/ home before starting the process. The smell of the the spoiled cream lingers on and although you will soon get used to it (because you will be cooking), any other person will find it unbearable. 

If you are thinking, this is too much hassle just to use the spoiled cream, then let me remind you that once you prepare the Ghee it can be kept at room temperature or in fridge for a really good amount of time. Also, you will get more than half of the cream back in the form of Ghee and the other half will be milk solids (also called Khakhri). Although this may be an acquired taste, let me tell you, khakhri tastes absolutely wonderful with some hot steamed rice and salt. So, you are in a win win situation here. You get to use the spoiled cream and taste a new thing! 

Make sure to always use a clean spoon for scooping out the ghee. Keep it in an airtight container on your kitchen counter or in the fridge. During summer, if you are not using it frequently, it is best to refrigerate it. It will get firm once it gets cold so bring it to room temperature before using it. 

Ghee can be used to sear or sauté foods on high heat. Since the milk solids have been removed, Ghee has a really high smoking point. You can use Ghee to prepare any dish but to help you start I have listed a couple of dishes (see Recommended Reading).

Ingredients:
  • Spoiled Heavy Cream (quantity doesn’t matter)


Others:
  • A good non-stick pan or a big heavy bottomed pot/ wok
  • A rubber spatula
  • An oven safe small dish (to transfer the hot Ghee)
  • A metal strainer


Directions:
  • Transfer all the spoiled cream into the pot and bring it to a boil. If it starts splattering too much then reduce the heat. Stir occasionally.


  • You will soon see the cream changing color. Keep stirring occasionally and turn down the heat to medium low.


  • Continue to cook the cream. Make sure to keep a close watch on it and stir it occasionally. Once you start seeing golden liquid floating with the cream, it means the Ghee has started to separate. Keep an oven safe dish and metal strainer handy.


  • You may cook all the cream and then strain it in the bowl. I had a small strainer so I started transferring couple spoonfuls of ghee into the bowl at this stage.
  • After a while, when you see only thick layers of cream remaining in the pot you may increase the heat a bit and allow it to boil quickly. It will turn foamy so be very careful. Keep stirring. 
  • When you see amber brown solids sticking on the spatula, it means the Ghee is ready and there is no more cream left to be boiled. It will also smell sweet.
  • Turn off the heat and remove the pot from the stove. 
  • Let it cool down for a few minutes. 
  • Transfer the hot Ghee very carefully into the metal strainer. The milk solids will collect on the strainer and the Ghee will drop into the bowl below.
  • Let it sit for a while so that all the ghee can transfer from the milk solids into the bowl.


You can keep the Ghee at room temperature and use it everyday. Or you can transfer it to a clean dry container and store in the fridge.
The ghee will solidify at room temperature but you can easily scoop it out with a clean spoon.


Enjoy the Ghee in any dish and the Khakhri (milk solids) with some hot steamed rice and salt. Try it! it tastes amazing!


I will say this is the yummiest Ghee I have ever had. No store bought Ghee can stand before this. 


Recommended Reading (Some recipes where you can use Ghee):

Monday, 2 October 2017

Doi Mach (Bengali Recipe: Succulent Fried Fish in Yogurt Gravy)


Photo Courtesy: Dr. Debarshi Chatterji

Bengalis are known for their love of fish. Bhat (steamed rice), Dal (lentils soup) with Mach Bhaja (crispy fried fish) or Bhat and Macher Jhal (fish curry with mustard paste) are the common lunch menu items in most Bengali families. Fish is also considered auspicious in the Bengali households and is served during weddings and other special occasions when it is not only bought to prepare the aromatic curries but also given as a gift. Yes! it will be interesting to know that there is a ceremony on the day of Bengali weddings called Gaye Holud in which the groom’s family members bring turmeric, fish and desserts for the bride and her family members. They also bring wedding presents and jewelry for the bride. The fish is considered to be the status symbol of the groom’s family and hence you will see huge fishes decorated with pan (beetle leaf) and sometimes custom made jewelry and clothes! Gaye Holud is celebrated by applying a paste of turmeric on the bride by all the married ladies of the family. It is a fun festive way to prepare and welcome a maiden to married life. The fish brought by the groom’s family is then cut and prepared as a main course dish.


Photo shows: Fish decorated with jewelry and clothes for the Gaye Holud ceremony

Now, as you know I have never been a huge fan of eating fish however, after coming to the U.S, I started trying out new foods and realized that I love fish but I am just a bit selective when it comes to dishes prepared with fish. I started with Grilled Fish and gradually progressed to other dishes like Sushi. Bengali cuisine is known for its varieties of delicious fish curries and there are quite a few dishes which suit my palate. First is, of course the Fish Curry prepared by my mom and the second is Doi Mach prepared by Debarshi and if you are like me, you will love Doi Mach. Since the fish is first fried in oil it develops a beautiful color and mouth watering taste.  After frying the fish, that same oil is reused to fry the ginger and garlic and I think this adds even more flavor to the gravy. Then this mixture is added to the yogurt marinade which helps to develop the flavors even more. There is only one important part of this dish and that is to have the correct consistency of onion. As per Debarshi, the onion should be cut finely preferably grated. Now I know grating an onion is difficult so last time we used the food chopper to cut the onion and it produced very similar result. Just make sure to run long pulses which will cut the pieces very finely. Finally, we will fry the onion in Ghee (clarified butter) and add the fish along with the marinade in it. Give it 20-30 minutes and it will be ready!

The flavor of Doi Mach is slightly tart due to the yogurt, it is also a bit spicy due to the addition of green chilies and Garam masala. The fish tastes succulent with the perfect texture and all the amazing flavors of the gravy. Ideally this dish is prepared with Rohu fish but all we got was Salmon so we made do with it. Now Salmon may start breaking after being cooked so handle it very carefully.

We enjoyed the Doi Mach with hot steamed rice and afterwards took a nice long afternoon nap. Sunday is a day of rest and it should be enjoyed with good food. So this weekend, try this beautiful fish gravy.


Ingredients:
  • Fish (preferably Rohu or try Salmon) – 1 ½ - 2 pounds, cut into 1-inch-thick pieces, washed and dressed
  • Salt – ½ teaspoon for the fish marinade + about ½ teaspoon for the yogurt sauce
  • Plain Yogurt – ¾ cup
  • Mustard Oil – ½ - 1 cup for frying the fish
  • Garam Masala – ¼ teaspoon
  • Ginger - 2-inch
  • Garlic – 3
  • Green Chilies - 3-4
  • Ghee - 2-3 tablespoons (or as required)
  • Onion – ½ of a big onion, grated
  • Sugar – ½ teaspoon (optional)

Let’s do some preparations first:
  • In a bowl take the fish pieces and sprinkle about ½ teaspoon of Salt on them.
  • Mix them together and leave them to marinate for an hour.
  • Make a paste of Ginger, Garlic and Green Chilies (Tip: Use Nutri Bullet with the Extractor blade).

Directions to prepare the Yogurt sauce:
  • Take a big bowl and add the Yogurt in it. 
  • Whip it with a fork. 
  • Add Salt (½ teaspoon), Sugar with a little water (about ¼ cup) and mix well.

Let’s fry the fish:
  • Heat a large nonstick skillet over high heat.
  • Add the Oil in it and when it begins to smoke, reduce the heat to medium low so that it cools off. This is done to remove the pungent taste and smell of the Mustard Oil.
  • Increase the heat to medium and carefully add a few fish pieces. Do not over crowd the skillet and fry in a single layer. 

Tips: 
  • Use a good non stick skillet to prevent the fish from sticking on it.
  • Add no more than 3-4 pieces at a time. 
  • Use a splatter screen to cover the skillet. It blocks the oil from sputtering all over the gas oven. (A splatter screen is a fine mesh with a handle and you can see through the mesh and fry the fish).


  • Shallow fry the fish till it turns golden brown. We do not want to cook it through or burn it too much, just sear it lightly on all sides.

If you are frying Salmon: 
  • Place the fish, skin-side up in the pan.  
  • Cook until golden brown on 1 side, about 4 minutes.  
  • Turn the fish over with a spatula, and cook until it feels firm to the touch and the skin is crisp, about 3 minutes more. 

  • Add the fried fish pieces carefully in the yogurt. When all the pieces have been fried, fry the Ginger, Garlic and Green Chilies paste in the remaining oil.
  • Transfer the paste along with the oil in the yogurt.
  • Let the fish sit in the yogurt for 15-20 minutes. This will help the fish to absorb all the beautiful flavors from the marinade.


(Photo shows: Fried fish dipped in the marinade)


Directions to prepare the Yogurt gravy:
  • Heat a big wok over medium heat.
  • Add Ghee in it.
  • After a few seconds, add the grated Onion in the ghee and fry.


(Photo shows the texture of the grated onion)

  • Grated onion will ooze out a lot of water but make sure to stir occasionally.
  • Fry till the Onion is golden brown in color. 
  • Add the Yogurt sauce with the fish. Transfer it very carefully in the wok otherwise the fish may break.
  • Cover and turn down the heat to low.
  • Add the Garam Masala, stir to mix.
  • Keep cooking for 10-15 minutes or until the oil separates and the gravy and fish is well cooked.


(Photo shows the separation of oil from the gravy. Notice the change in the color of the gravy, it will be a beautiful rich golden yellow)

  • Taste the Salt, add if required. Cover and simmer for 10 more minutes.
  • Serve the dish hot with steamed rice.

Tips:
  • We are frying the fish on a high flame in a nonstick pan, so that we can get a nice color and texture on the fish. We don’t want it to cook all the way. 
  • Do not use Greek yogurt. Plain yogurt is best for this dish.
  • Do not use Tilapia fish for this dish.
  • Ideally the fish should be fried in mustard oil, but feel free to use Canola oil. No need to heat up the Canola oil to a smoking point.
  • The ghee should be enough to fry the onions. If you want the dish to be low calorie or don’t want to add 2-3 tablespoons of Ghee, you can use oil to fry the onions and add one teaspoon of ghee at the end for fragrance.
  • We always fry the fish on our grill’s side burner. When cooked inside, its strong smell lingers inside the house so make sure to open a window or switch on the vent or air before frying.
  • Use raisins to make the dish more presentable.


Tip: You can also enjoy Doi Mach on Keto Diet. Just skip the sugar while cooking and serve with zucchini rice.


Recommended Reading:

Doing Low Carb diet? Try these as well: