Featuring over 350 tried and tested recipes that can be prepared at home. From comfort food to restaurant style. Plus 110+ articles on Kitchen and Cooking Tips, Restaurant Reviews and more.
Showing posts with label Kadhi (Gram Flour Fritters in Yogurt Sauce). Show all posts

Tuesday, 6 November 2018

Make Homemade Ghee from Spoiled Cream


If you have been following my blog, you must have read the word ‘Ghee’ several times in the list of ingredients. I love adding a dollop of ghee in whatever I am cooking. I think it adds a beautiful fragrance and gourmet flavor in the dish. Ghee is not only used in our everyday dishes (like Dal, Parathas and Curries) but also for the connoisseur’s items (like Biryani and Kababs). Apart from this, Ghee is widely used in the preparation of Bhog (meals offered to Gods) and is also added in Charanamrit (a thin beverage offered to Gods prepared with Milk, Sugar, Honey, Ghee and Yogurt). Ghee is also used in rustic dishes (like Litti Chokha – a dough ball prepared with roasted chick pea flour, served with cooked mashed eggplant dish and topped with lots of Ghee to make it moist) and comfort foods (like Khichuri and Dal). Ghee also rules the dessert market (Payesh and Halwa). But enough about where it is used, let me tell you how it is made:
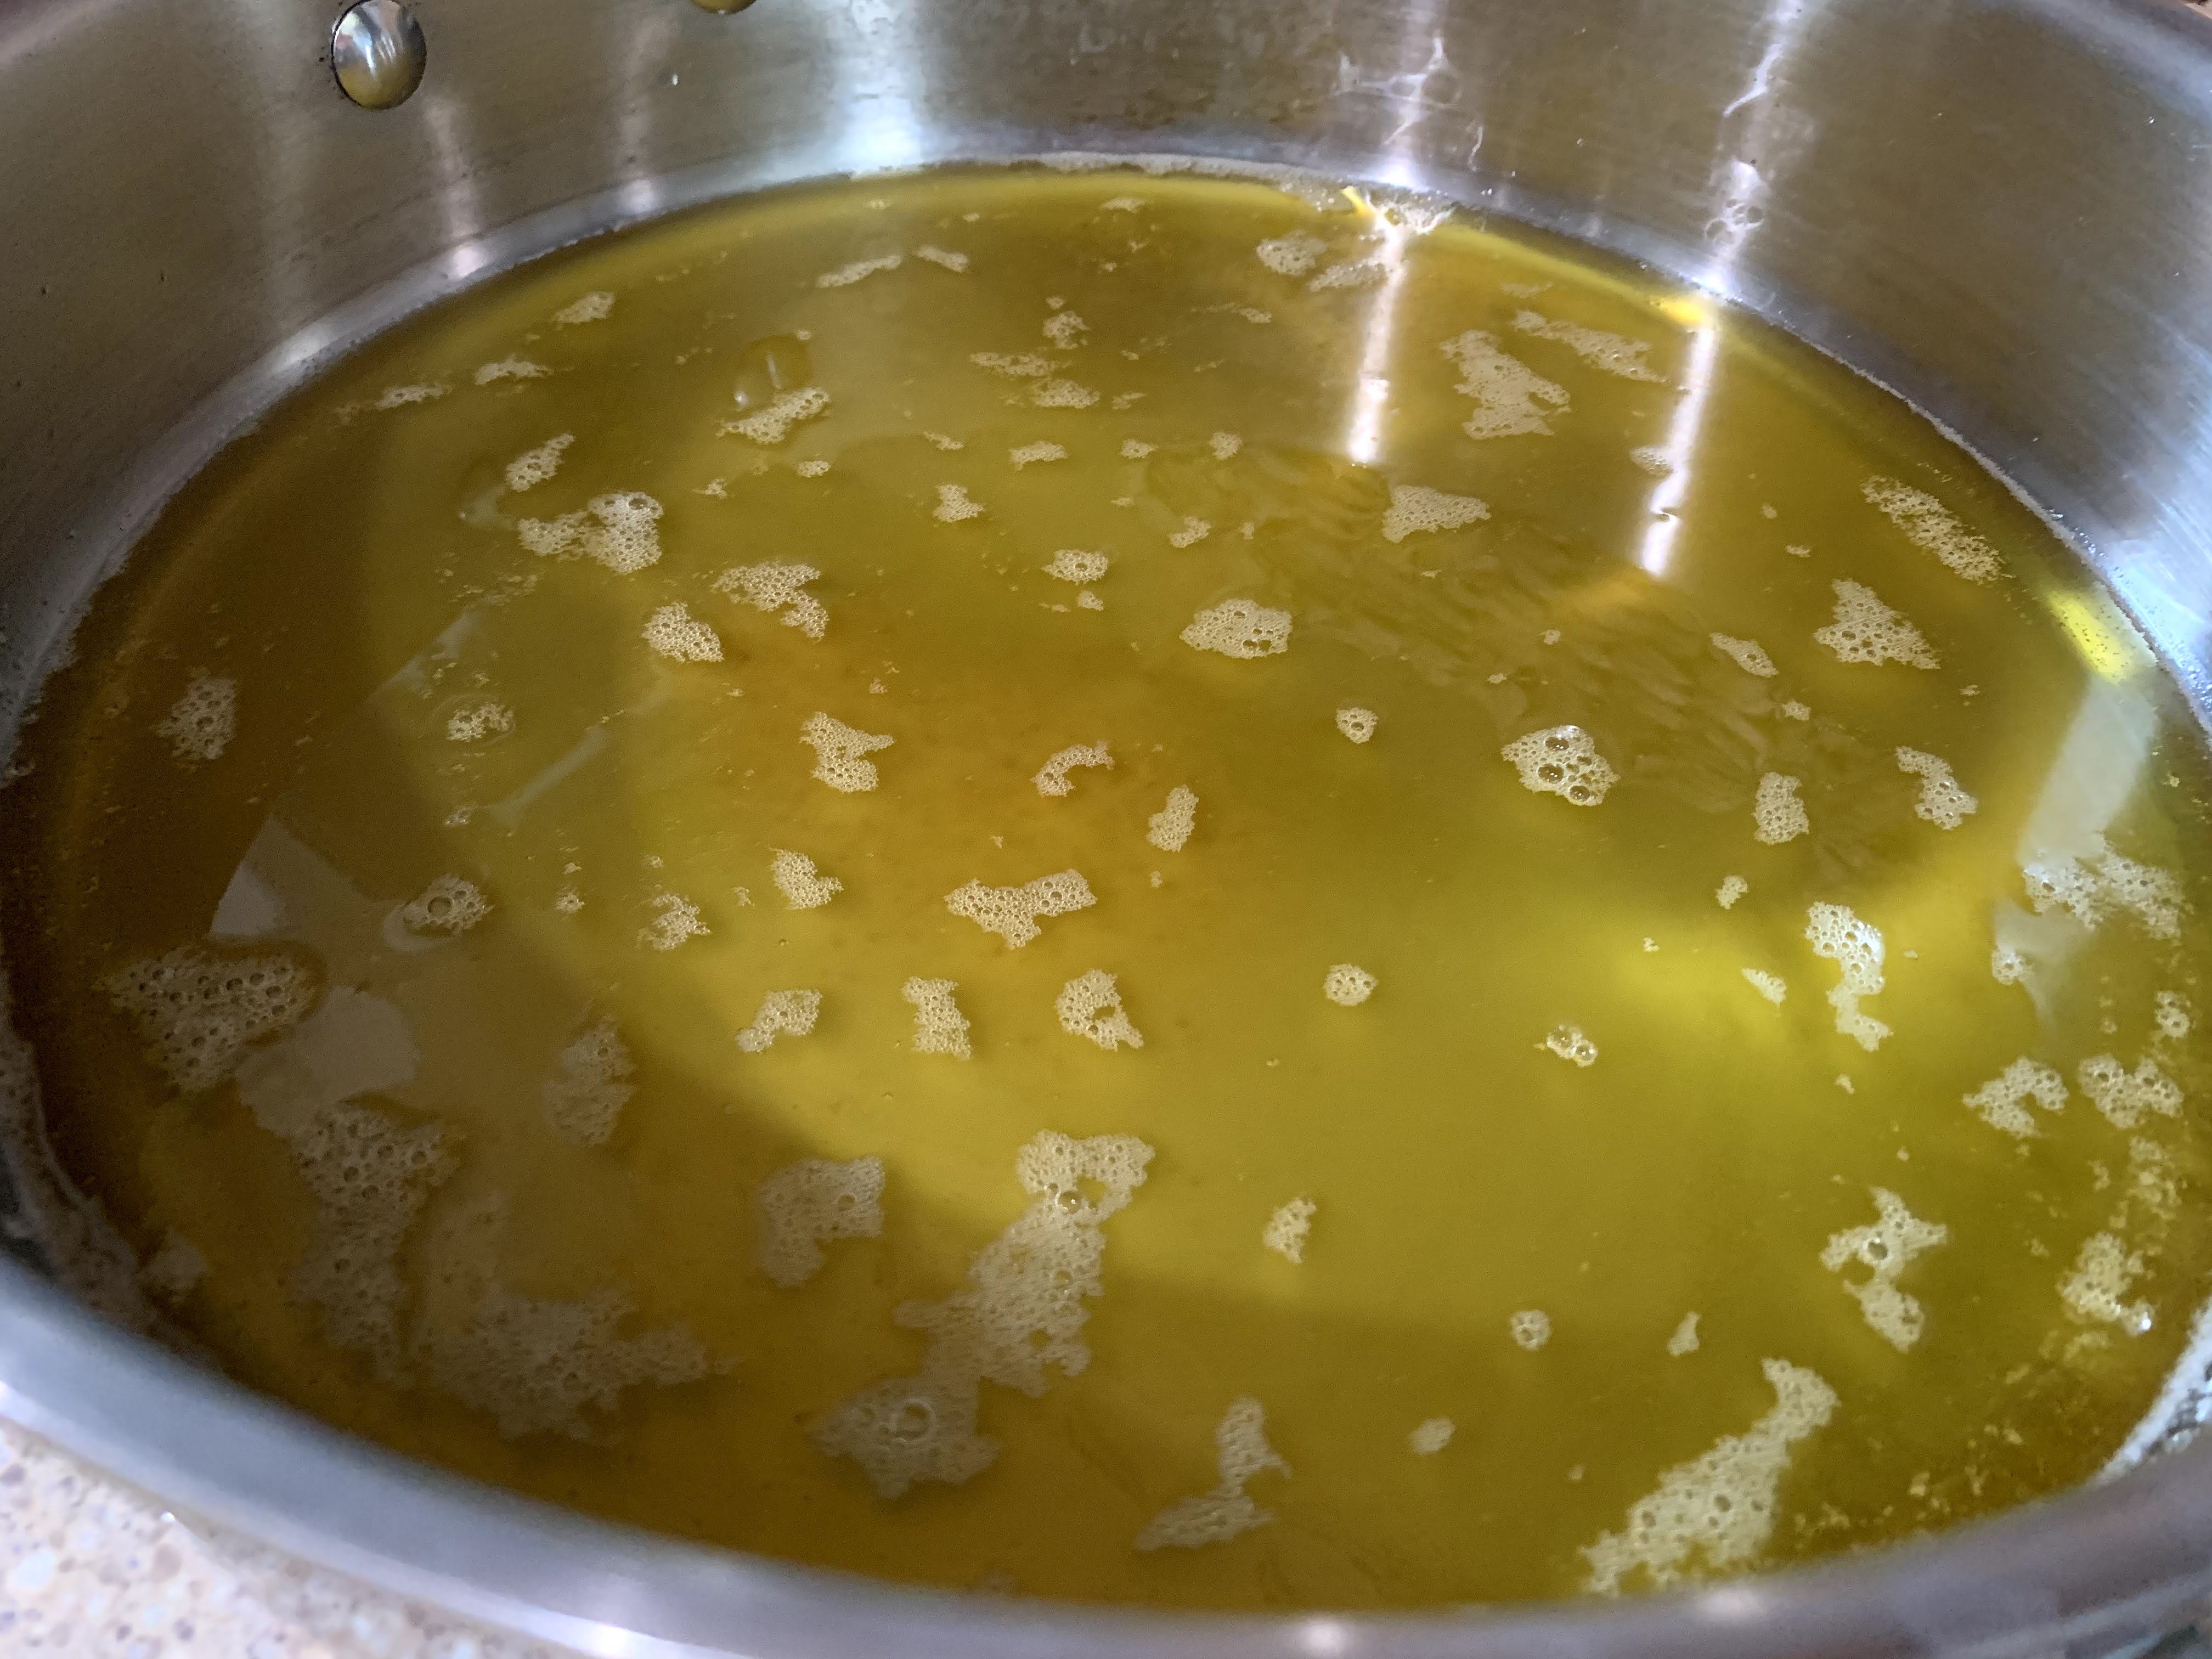

Ghee is made by boiling cream till the milk solids separate. Once you strain the milk solids you will be left with a beautiful golden colored clear liquid fat. This is Ghee! I did find several methods online to prepare Ghee at home but I am going to share with you the simplest method which I have seen my mom follow all these years.

Growing up I used to wait for days for mom to collect all the heavy cream. She used to boil the fresh milk everyday and once it would cool down she would scrape the top layer of the thick cream and keep it aside in a bowl. This cream was kept refrigerated and everyday a fresh layer of cream was added on top of it. Then after a week or so (or whenever enough cream had been accumulated) would be the day to make the Ghee. Mind you this is a smelly process. My mom used to warn everyone in advance to plan our day. Then she would start boiling the cream, stirring it often. I think this is the most difficult stage of the whole process. The initial smell of the boiling thick spoiled cream is not easy to bear. But if you can surpass it somehow you will be rewarded with a sweet buttery liquid or Ghee. 

For those of my friends who live in an apartment or who don’t have a window in their kitchen, please be advised to start the exhaust fan and Central Air system of your apartment/ home before starting the process. The smell of the the spoiled cream lingers on and although you will soon get used to it (because you will be cooking), any other person will find it unbearable. 

If you are thinking, this is too much hassle just to use the spoiled cream, then let me remind you that once you prepare the Ghee it can be kept at room temperature or in fridge for a really good amount of time. Also, you will get more than half of the cream back in the form of Ghee and the other half will be milk solids (also called Khakhri). Although this may be an acquired taste, let me tell you, khakhri tastes absolutely wonderful with some hot steamed rice and salt. So, you are in a win win situation here. You get to use the spoiled cream and taste a new thing! 

Make sure to always use a clean spoon for scooping out the ghee. Keep it in an airtight container on your kitchen counter or in the fridge. During summer, if you are not using it frequently, it is best to refrigerate it. It will get firm once it gets cold so bring it to room temperature before using it. 

Ghee can be used to sear or sauté foods on high heat. Since the milk solids have been removed, Ghee has a really high smoking point. You can use Ghee to prepare any dish but to help you start I have listed a couple of dishes (see Recommended Reading).

Ingredients:
  • Spoiled Heavy Cream (quantity doesn’t matter)


Others:
  • A good non-stick pan or a big heavy bottomed pot/ wok
  • A rubber spatula
  • An oven safe small dish (to transfer the hot Ghee)
  • A metal strainer


Directions:
  • Transfer all the spoiled cream into the pot and bring it to a boil. If it starts splattering too much then reduce the heat. Stir occasionally.


  • You will soon see the cream changing color. Keep stirring occasionally and turn down the heat to medium low.


  • Continue to cook the cream. Make sure to keep a close watch on it and stir it occasionally. Once you start seeing golden liquid floating with the cream, it means the Ghee has started to separate. Keep an oven safe dish and metal strainer handy.


  • You may cook all the cream and then strain it in the bowl. I had a small strainer so I started transferring couple spoonfuls of ghee into the bowl at this stage.
  • After a while, when you see only thick layers of cream remaining in the pot you may increase the heat a bit and allow it to boil quickly. It will turn foamy so be very careful. Keep stirring. 
  • When you see amber brown solids sticking on the spatula, it means the Ghee is ready and there is no more cream left to be boiled. It will also smell sweet.
  • Turn off the heat and remove the pot from the stove. 
  • Let it cool down for a few minutes. 
  • Transfer the hot Ghee very carefully into the metal strainer. The milk solids will collect on the strainer and the Ghee will drop into the bowl below.
  • Let it sit for a while so that all the ghee can transfer from the milk solids into the bowl.


You can keep the Ghee at room temperature and use it everyday. Or you can transfer it to a clean dry container and store in the fridge.
The ghee will solidify at room temperature but you can easily scoop it out with a clean spoon.


Enjoy the Ghee in any dish and the Khakhri (milk solids) with some hot steamed rice and salt. Try it! it tastes amazing!


I will say this is the yummiest Ghee I have ever had. No store bought Ghee can stand before this. 


Recommended Reading (Some recipes where you can use Ghee):

Wednesday, 31 January 2018

Boondi Raita


Boondi raita is one of my favorite condiments. Whenever I am preparing Kachoris with Kaddu Sabji I have to prepare this yummy raita but before I jump on to the recipe, let me tell you what Boondi and Raita means:

What is Boondi?
Boond means a single water droplet. Boondi is prepared with a batter of Besan (Gram Flour) and spices. Once the batter is ready, we hold a perforated spoon (a round spoon with multiple round holes) 3-4 inches above the oil and drop the batter on it slowly and steadily. The batter drops from those small round holes into the hot oil and immediately form a round shape, of the size of water droplets. They are then fried till golden and removed from the oil. I know the process seems quite easy, however you will be surprised to know that I have never attempted this myself. I always buy readymade Boondi from my local Indian store. It’s convenient and since we use only a small amount of Boondi for the raita, it lasts for several months. 


Photo shows a Perforated spoon


Photo shows a type of Boondi packet found in the Indian stores

What is Raita?
Raita is a yogurt based condiment served usually with lunch or dinner. In Northern India, Raita is often prepared with vegetables which can be raw (cucumber, onion, tomato) or cooked (Alu raita, prepared by boiling the potatoes first). Besides serving as an accompaniment to the main course, just like the Indian salad, a raita is quite a dish in itself and can be paired with fried breads (Kachoris) or rice dishes (Biryanis) for an added flavor. Now you can easily find a readymade raita masala in the Indian store and it tastes pretty good, however, you will see that this raita uses only a handful of ingredients which you can easily find in your pantry. I will therefore recommend not to spend money on the readymade masala.

Why Boondi Raita?
Boondi raita is my favorite because it is quick to prepare and delicious to eat. You don’t have to chop vegetables (cucumber, onion, tomato) or boil potatoes to prepare this raita and hence it can be prepared at the very last minute. I specially prepare it for our get together parties because it tastes great with everything. Also the yogurt works miracles for your digestion. Although I personally like a hot version of this raita, you can always skip the red chili so that the yogurt can immediately cool your taste buds and cleanse your palate for another bite. I never have any yogurt sitting in my fridge because I always find a way to use it. 

I love the crunchiness of Boondi and hence I always add it right before serving so that they retain their crunch. However, if you want, you can mix them a bit early so that they soak up the yogurt. Keep it refrigerated till you are ready to serve. Now, without further ado let’s move on to the recipe:

Ingredients:
  • Boondi – ½ cup, plain salted 

  • Yogurt - 1 cup, plain nonfat
  • Water – ½ cup
  • Chaat Masala - ½ teaspoon 
  • Fennel Powder – ½ teaspoon
  • Cumin Powder – ½ teaspoon 
  • Red Chili Powder – ¼ teaspoon
  • Black Pepper Powder – ¼ teaspoon 
  • Black Salt – to taste (about ¼ teaspoon)


Directions:
  • Take a medium size bowl and add the Yogurt in it.
  • Add all the spices (Chaat Masala, Fennel Powder, Cumin Powder, Red Chili Powder, 
  • Black Pepper Powder and Black Salt) along with the water and whisk to mix everything together well. 
  • Add the Boondi, mix, cover and refrigerate till ready to serve or just cover and refrigerate the yogurt and mix the Boondi right before serving.


Tips: 


Recommended Reading:

Friday, 8 September 2017

Kadhi (Gram Flour Fritters in Yogurt Sauce)


Today I am going to share a vegetarian dish with you and although it uses very few ingredients it is loaded with spice and flavor. The name of the recipe is Kadhi (Gram flour fritters in yogurt sauce). Now let me tell you, Kadhi is not a Bengali dish but my mom has always been an avid cook and we have always enjoyed different cuisines in our home. Be it Chinese, Punjabi, North Indian or South Indian dishes, all we had to do was request mom for it and she would try it for us and every once in a while she would surprise us by preparing this delicious dish.

As you know, I was in Delhi for more than seven years. I never thought that all those years of eating multi cuisines will actually help me while living alone. Punjabi food is very different than Bengali food and I just love it! Be it the heavy Parathas, Butter Chicken and Naan, Chole Bhature or Kadhi Chawal, I enjoy every bite of it.  I think it is important to know different cuisines because they make your life really easy. You have tons of foods to choose from and never have to eat the same meal everyday. I often used to get a plate of Kadhi Chawal from the office cafeteria and now I prepare it whenever I want. 

So, let me tell you more about this delicious dish. Kadhi is prepared in two phases. In phase one, we will prepare some gram flour fritters. Now if you have already tried my Pyaz Ke Pakore recipe, this is going to be really easy for you. In phase two, we will prepare a thick yogurt and gram flour based sauce. We will be using Asafoetida, Garam Masala, Cumin Seeds and Ghee to develop that delicious flavor and aroma in the sauce. Don’t worry about the list of ingredients, you should be able to find them in your local Indian store. 

When buying gram flour for this recipe, do check that it is not meant for preparing sweets. Gram flours are mostly of two varieties – fine and granular. The fine smooth flour is used for making the batters of fritters and Cheela while granular gram flour is used for making sweets like Besan ka Laddoo. Last time, I mistakenly got the granular gram flour packet and although it tasted the same, I could see that the fritters didn’t have that smooth texture. Before starting on the sauce, prepare the batter for the Pakoris and leave it for at least 15 minutes so that it absorbs water. You can also prepare some extra batter and use your favorite vegetables to prepare fritters. Store the gram flour in an airtight container away from heat and light.


Now let’s talk about Ghee (clarified butter). Although Ghee is higher in calories, it brings that aromatic flavor in a dish which cannot be substituted by anything else. However, if you are not planning to use it everyday, make sure to put it in fridge. When ready to use, keep it outside for a while so that the ghee softens. Do not heat the container in the microwave.

To prepare Kadhi, you will need a bowl, whisk, wok and spoon and a deep pan or wok for making the sauce. This recipe does not require any time consuming preparations like chopping a load of vegetables but the sauce is cooked on simmer so I suggest to start with the sauce then fry the Pakoris and then cook roti or rice.

While making the Pakoris do not add any baking soda in them. Kadhi Pakoris are dense unlike the Pyaz Ke Pakore which we want light and crispy. Dense Pakoris wont absorb the sauce thus retaining their shape and taste. If you are using the leftover Pyaz Ke Pakore in the Kadhi, add them in the sauce just before serving. Keep adding water and stirring the sauce till the gram flour added in it is all cooked. The stirring will also make sure there are no lumps in it. If you think the consistency is too thin, turn up the heat a bit so that it gets thicker.

Since Kadhi is prepared with yogurt it is considered a cool summer dish and is usually paired with steamed rice. However, I also love it with Rotis, onion rings and a green chili. Do not be afraid to add the red chili powder, it will bring a hint of heat in the mild dish.

Bon Appetit!


Ingredients (This recipe serves two):

For the sauce:
  • Plain Yoghurt - 1 cup 
  • Gram Flour – ¼ cup 
  • Turmeric – ¼ teaspoon
  • Chilli Powder - ¼ teaspoon
  • Salt - to taste (about ¼ teaspoon)
  • Garam Masala – ½ teaspoon
  • Water - 3 Cups 
  • Oil – 2 tablespoons
  • Asafoetida - ½ teaspoon
  • Cumin Seeds - 1 teaspoon
  • Whole Red Chili – 2 – 3


For tempering the sauce:
  • Ghee – ½ tablespoon
  • Red Chilli Powder - ½ teaspoon


For The Pakoris:
  • Gram Flour – 1 cup
  • Salt – to taste (about ½ teaspoon)
  • Baking soda - a pinch
  • Oil – 1-2 cups


Let’s do a little preparation for the Pakoris:
  • Sift the Gram Flour to remove any lumps. 
  • Add the Salt and Baking Soda in it and mix well.
  • Add about ½ cup of water in it. Mix well to form a smooth batter. It should have a thick consistency. 
  • Let the batter rest for at least 15 minutes. 


Directions to prepare the Sauce:
  • Sift the Gram Flour to remove any lumps. This also makes it light and easier to mix.
  • Mix the Gram Flour, Turmeric, Chilli Powder, Salt and Garam Masala in a big bowl.
  • Add the Yoghurt gradually to this mixture to form a smooth paste, when it becomes difficult to mix start adding the water.
  • Heat the Oil in a large wok over medium high heat.
  • Add the Asafoetida, Cumin Seeds and Whole Red Chilies.
  • When the Cumin Seeds begin to sizzle, add the mixture prepared above and mix.
  • Bring to a boil then turn the heat to low. Cover and cook.
  • Keep cooking till the Gram flour cooks properly (about 15-20 minutes) stirring occasionally.


Directions to prepare the Pakoris:
  • Heat a wok on medium high heat.
  • Beat the batter with a spoon. 
  • When you see small bubbles on the surface of the oil, carefully start dropping the batter in the oil using a small scoop or spoon. Do not add too many Pakoris in the oil all at once as it will drop the temperature of the oil and make the Pakoris greasy (Tip: Try to use a spoon with a long handle or a Measuring Cup with Funnel Spout so that you can drop the batter closer to the oil, remember the farther you are the more it can spill making the oil jump).
  • Fry the Pakoris till they are light golden brown in color. 
  • Carefully remove with a spider spoon and place in a dish lined with kitchen paper.


Directions to temper the Kadhi:
Indian cooking often involves tempering hence my mom has given me a special temper pan. It’s a small pan about the size of a cup. It has a sturdy handle and a flat base which makes it easier to place on the stove top. Now, if you have even a slightest doubt that the pan will not stay put on the stove top, it will be best to hold the handle till it heats up and the spices sizzle. You can get the temper pan from Amazon.com using the keyword - Tadka pan.


  • Add the Ghee and Red Chili Powder in the pan and heat it over medium high heat.
  • Once the Chili powder melts in the ghee and you start getting an aroma, turn off the heat and carefully pour it over the Kadhi (cover immediately, sometimes the hot spices make the water in the dal or Kadhi jump).
  • Add the Pakoris in the Kadhi and mix well.
  • Serve hot with steamed rice or Roti.


Tip:
  • If you don’t have a temper pan, use a small frying pan for this step.


We had a game viewing party and we cooked a couple of dishes. Debarshi prepared (from the top left) Tandoori Chicken, Coconut Lamb and Pulao. I prepared the Naan and Rajma.


Recommended Reading:

This recipe has been featured on the #sharphomeusa instagram account.