Featuring over 350 tried and tested recipes that can be prepared at home. From comfort food to restaurant style. Plus 110+ articles on Kitchen and Cooking Tips, Restaurant Reviews and more.
Showing posts with label Un-Sweet Tea. Show all posts

Tuesday, 31 July 2018

Jalapeno Poppers with Cream Cheese and Bacon


These Jalapeno Poppers are a great addition to our movie nights. Since they do not contain any added carbs they are also a nice appetizer in our Keto diet. However, the beauty of this dish is, you can enjoy them anytime you want, Keto or not. They are the perfect party finger foods. If you don’t mind a little heat in your food, you will become seriously addicted to these. They taste absolutely creamy, cheesy and decadent. 

I love these types of recipes where you don’t have to work a lot to eat something delicious and this recipe is incredibly easy. All you have to do is mix the cream cheese with the cheddar, garlic and onion and stuff it in halved jalapeños, then bake. That’s it! no mess no fuss. Yeah don’t forget to wear gloves otherwise there will be a lot of mess and fuss. Believe me, last time I did this mistake and after a while my hands started burning really bad and if that wasn’t the whole punishment! I accidentally touched my face! Ah! So you can understand how a small step is so important.

If you have friends coming over, having a movie or game night and want to prepare something quick then this is definitely the best thing to go for. Everyone just loves these irresistible Poppers. Plus, the convenience of using only a handful of ingredients is always a plus side. As I always say, the less time you spend in the kitchen, the more time you have with your loved ones.

For the Keto dieters, these Jalapeno poppers are not just party food but just the right food for their diet. The cheese and bacon adds in all the necessary fats and since we wont be wrapping the bacon around the jalapenos, it also saves a ton of time.

Bon Appetit!

Ingredients (serves 2):
  • Jalapeno – 2, medium, washed
  • Cheddar Cheese - 2 tablespoons, shredded or cut into small cubes
  • Cream Cheese - 1 ounce, softened
  • Onion - 1 tablespoon, chopped
  • Garlic - 1 clove, minced
  • Bacon - 2 slices (pre-cooked)


Others:
  • Parchment Paper
  • Disposable gloves


Core the Jalapenos:
  • Coring will help to remove most of the heat because we will be cutting out and removing the insides of the pepper. 
  • Start by wearing disposable gloves so that the seeds do not burn your hands. Always wash your hands after touching the Jalapenos and do not touch your eyes or face while cutting them.
  • Cut the stems and slice the jalapenos in half.
  • Take a spoon or a short knife and scrape out the membrane working from the bottom to the top of the pepper. 
  • Your jalapenos are now ready to be filled.


Directions:
  • In a small bowl, mix the Cream Cheese, Cheddar cheese, Onion and Garlic. 
  • Crumble the Bacon strips and stir in the above mix.


Tip: If the Cream Cheese is too hard, put it in the microwave and heat for a few seconds.

  • Preheat the oven to 400 degrees F. 
  • Line a baking sheet with parchment paper.
  • Fill the Jalapeno halves with the mixture pressing lightly to stuff it properly.
  • Place onto the lined baking sheet.


  • Bake about 15 minutes or until the peppers are soft. Remember if the peppers are not yet soft then they will taste very hot.
  • Remove from the oven and serve hot.


Tips:
  • When properly cooked, the peppers wont taste hot but still carry a hint of heat and flavor.
  • For an enhanced palate, use a flavored cheddar cheese.
  • Make sure not to overfill your jalapeno halves because the cheese will ooze out when they bake.
  • Don’t forget to wear gloves and wash your hands well after handling the jalapenos.
  • Make sure to soften the cream cheese. I always keep it outside, on the kitchen counter for 15-20 minutes before mixing it in any dish. It makes it soft and easier to mix in.
  • You can prepare some extra filling and use it as a dip or a spread.
  • Buy Jalapenos which are about 3-4 inches long. The smaller ones are harder to stuff in. 
  • If you like spicy and hot food, feel free to leave some of the seeds in the jalapenos (keep a drink ready at hand, just in case).

Cooking the Bacon:
  • I find cooking the Bacon in the microwave a lot easier than doing it on the stovetop. 
  • Place a sheet of paper towel on a microwave-safe plate.
  • Lay the Bacon slices on the paper towel in a single layer.
  • Place another sheet of paper towel on top.
  • Heat in the microwave on high for 2-3 minutes (usually the packet will have the cooking time mentioned on it).
  • Remove from the microwave, wait for a few minutes then crumble.


Monday, 31 October 2016

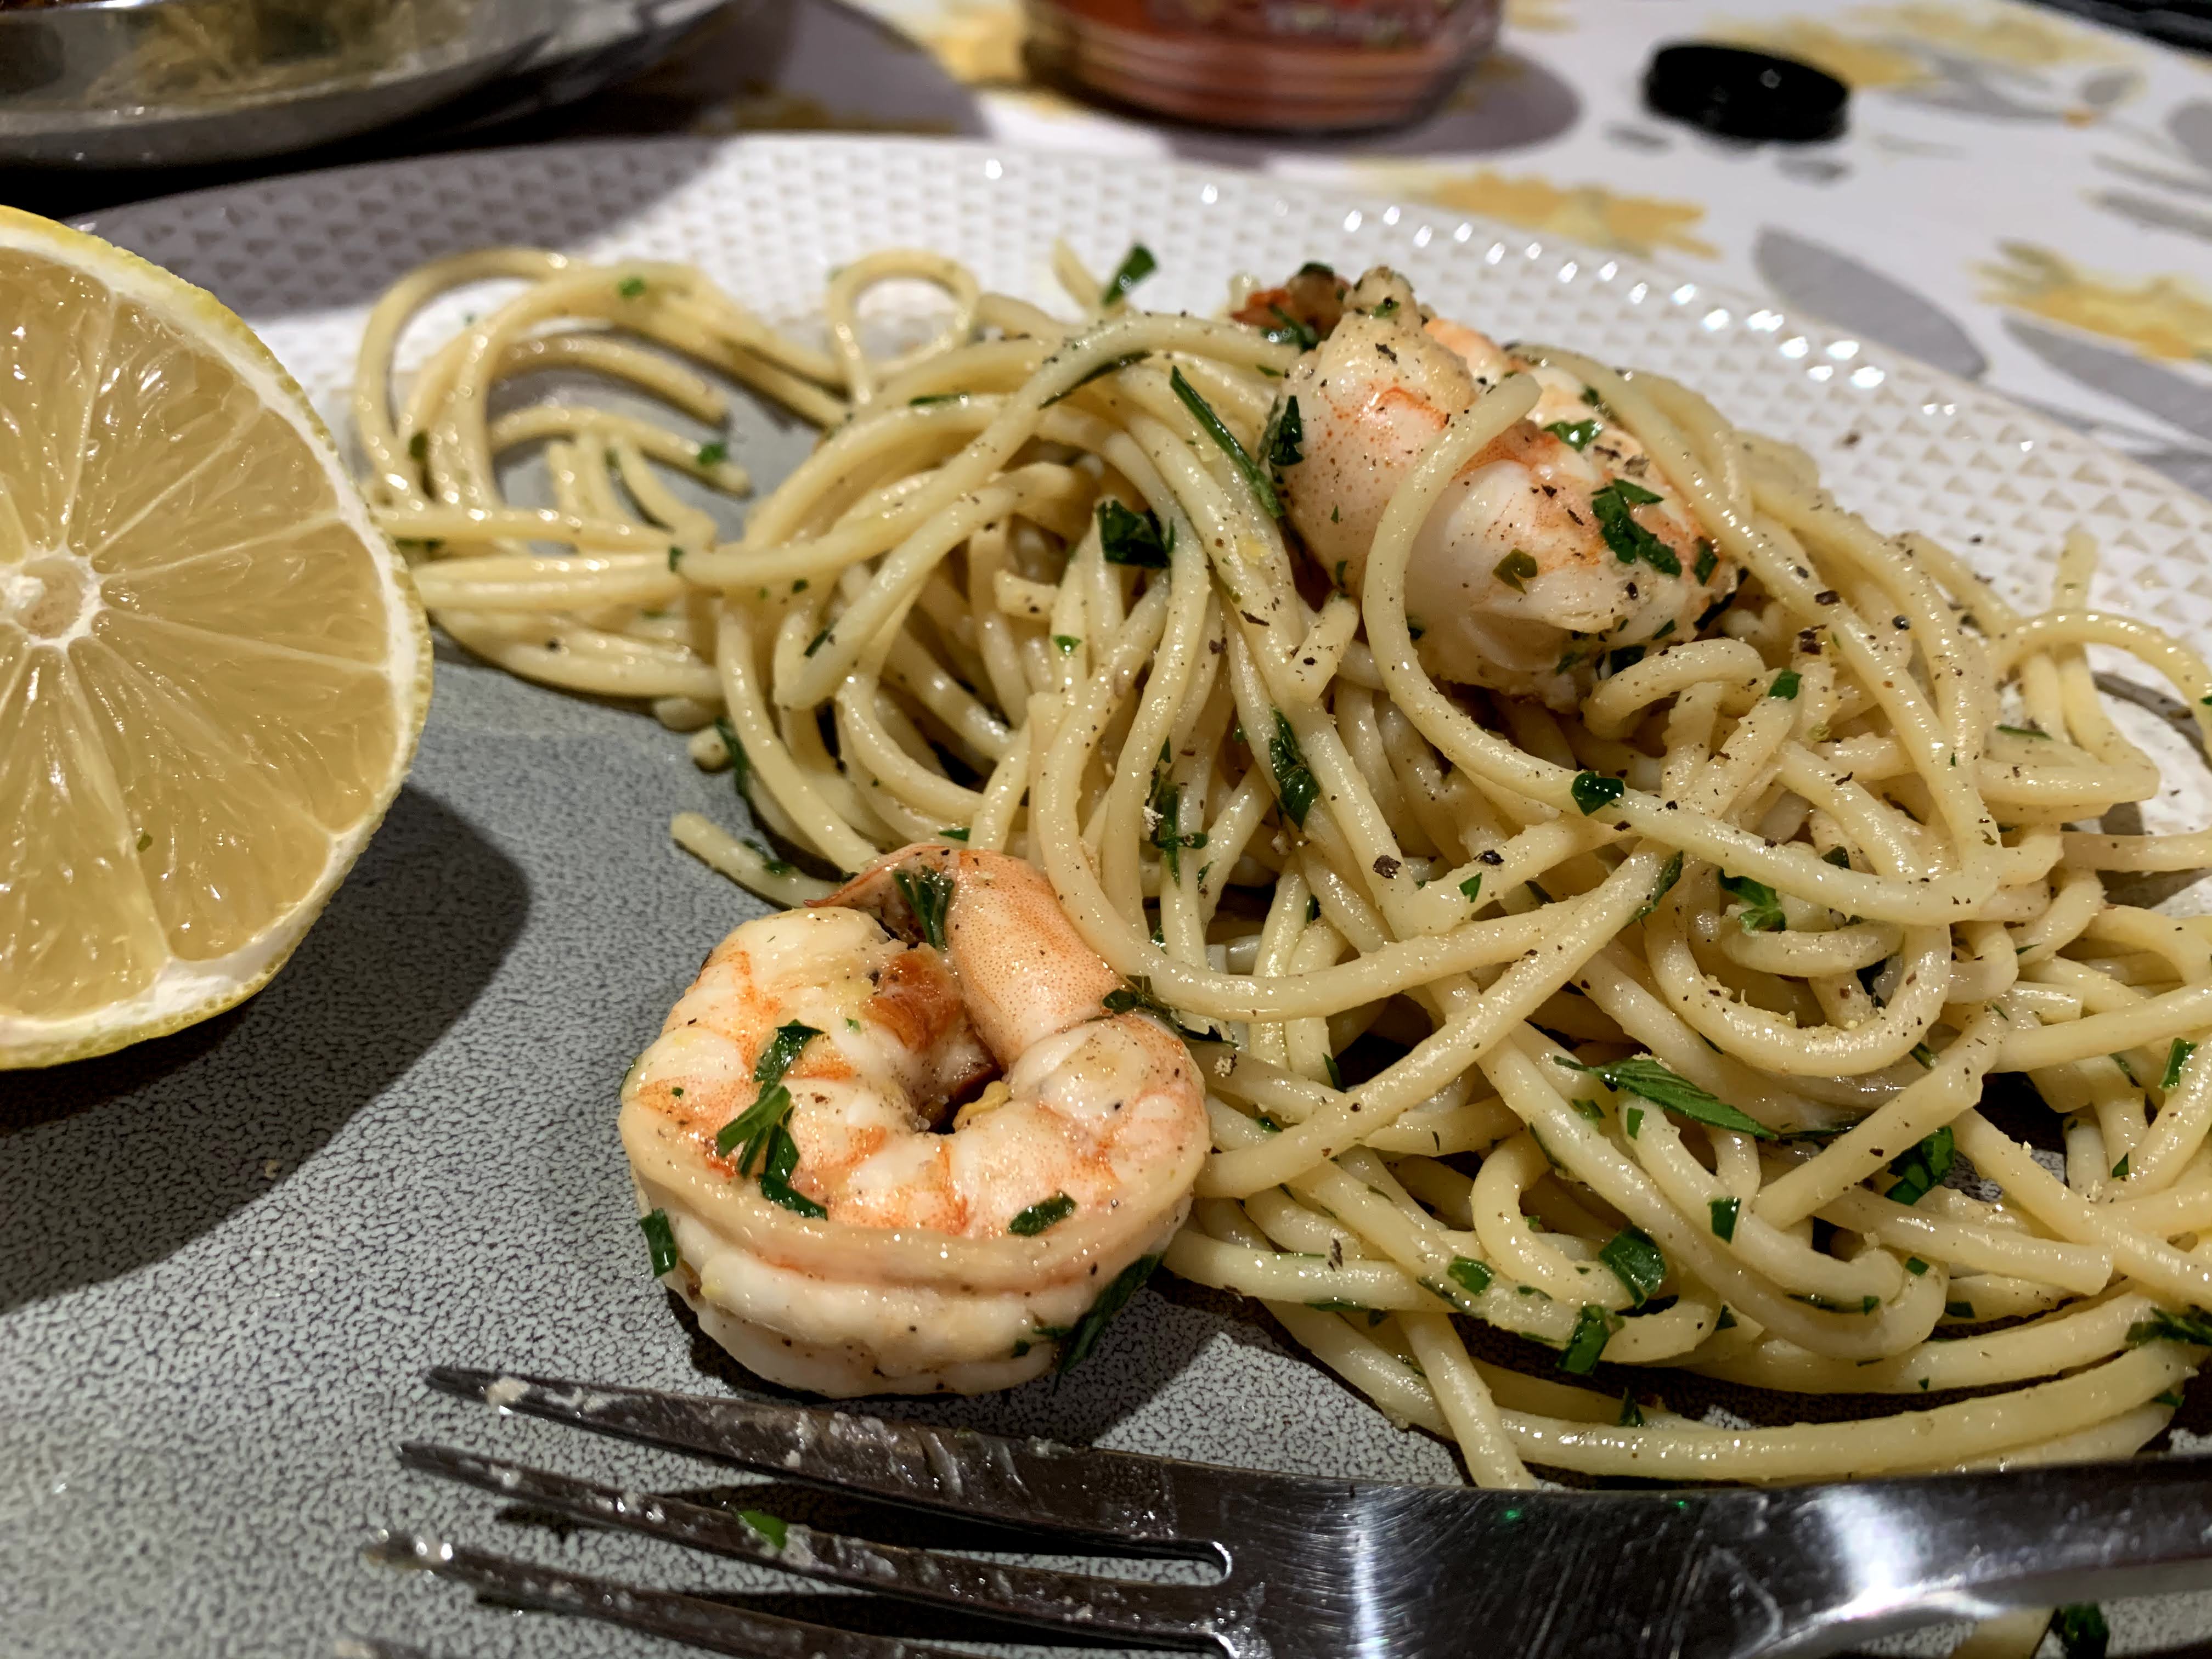
Buttery Lemony Garlicky Shrimp Scampi Pasta


A couple days ago I was going through my cook book and I found an amazing recipe which I haven’t prepared in a long time and I thought, this recipe should be on my blog because this creamy garlicky pasta is an amazing date night treat. So foodies, I present to you - Buttery Lemony Garlicky Shrimp Scampi Pasta.

Now let me tell you that this flavorful pasta is a very popular dish often served in restaurants and if you like to cook this can be a very good opportunity to impress your loved one. While trying a new recipe or dish always remember to check for ingredients which you may be allergic to. Certain seafood’s like Crab meat or Shrimp are not for everyone so, I always advise to ask your guests/ family members for any allergies they may have. For those who love Shrimp but have never had an Italian pasta before, this can be a very good meal to start with. Plus, your Date may be reluctant for a big piece of steak but a leaner protein will certainly be more acceptable. I have prepared this pasta quite a few times as a Date Night dinner for Debarshi and it always turns out pretty good. All you need to do is prepare the pasta and serve it with a piece of French bread or a bowl of salad, fill up two glasses with your favorite drink and enjoy a candlelight dinner with your date.


I love that this pasta recipe is so different than my Chow Mein recipe in which we used a lot of vegetables, meat and sauces and we prepared the pasta by stir-frying it with different ingredients. Now this pasta is prepared in a totally different way. We will use Parsley and Lemon which will create a fresh and citrusy flavor while the Shrimps and Garlic will bring a unique sea food aroma in the entire dish. We will begin by first cooking the Shrimp in the spices and then prepare a creamy sauce of Butter, Olive Oil, Shrimp Shells’ water, Garlic, Parsley and Lemon. The Shrimps will be then mixed with the thin Linguine Pasta and cooked in this scrumptious sauce. 

This recipe also introduced me to a new herb – Parsley, which I have never used in India. Indian cuisine uses a variety of herbs, Cilantro and Mint being the two most common of them. When I saw Parsley the first time I actually confused it with Cilantro as the two look so much alike. However, Parsley has a very different taste than Cilantro. Now, if you are unable to get any fresh Parsley you can use the dried one which is easily available in any grocery shop in the spice aisle. This brings us to my favorite part of the recipe - Spice Mix.

I found that there are readymade spice mix packages of this pasta readily available in the market. I have used this a couple of times and it works great. The spice package is usually labelled as ‘Shrimp Scampi seasoning mix’ and I always use the brand ‘McCormick’. If you cannot find this particular brand, you can still use any other brand you may find with just a small additional step which is, cross check the ingredients included in the mix. Sometimes the spice mix may not have all the ingredients in it so always check and buy any ingredients which we need for the recipe at the same time. Also, for a new cook peeling and deveining the Shrimp can be overwhelming. Many stores have people assigned in the meat section to do this task for you. You will need the shells for the Pasta so don’t forget to take them back.

This Pasta can be easily prepared in 15- 20 minutes so you may want to arrange the table, candles etc. before you start cooking. While preparing this dish for the first time, I would recommend you to follow the recipe as it is because the Butter and All Purpose Flour Linguine Pasta gives it the actual restaurant flavor. Once you get familiar with the taste and cooking method don’t be afraid to improvise. You may use any other type of pasta available in your pantry and if you are cutting on calories you can even choose Wheat Pasta and cook with Olive Oil instead of Butter. For your convenience I have also added a guide on ‘How to Cook Perfect Pasta’.

Try it and let me know how it turns out. Bon Appetit!


Ingredients:
  • Linguine (Angel Hair or other pasta) - 8 Ounces 
  • Olive Oil - ¼ Cup
  • Butter - ¼ Cup (½ stick) 
  • Large Shrimp - 1 Pound, peeled and deveined, reserve the shells
  • Garlic Cloves - 6, grated
  • Onion - ¼ cut in cubes 
  • Red Pepper Flakes - 1 Teaspoon
  • Salt - ½ Teaspoon
  • Freshly Ground Black Pepper - ½ Teaspoon 
  • Parsley - 1 Small Bunch, leaves chopped
  • Lemon - 2, juice + zest or 2 Tablespoons White Wine


Let’s Prep:
  • In a bowl, combine the Garlic, Lemon Zest and Juice (of 1 Lemon), Olive Oil, Red Pepper Flakes, Salt, Pepper and the Shrimp. 
  • Set aside to marinate.


Let’s make the Shrimp stock: 
  • Heat a small pot, over medium heat
  • Add the Shrimp shells and Onion. 
  • Cover with water and bring to a boil. 
  • Reduce the heat and simmer for 20 minutes. 
  • Strain into a bowl and discard the shells and the onion.
Tip: If you forget to reserve the shells or don't want to do this step, add ½ teaspoon Onion Powder in the Shrimp marinade.


Let’s cook the Pasta:
  • Bring a large pot of water to a boil over high heat and add a generous amount of salt. 
  • Add the Linguini and cook until just tender, 2 minutes less than instructed on the package. 
  • Drain and reserve ½ cup of cooking water. 
  • See the tips on ‘How to Cook Perfect Pasta’.


Directions for Shrimp Scampi:
  • Heat a big pot over high heat. 
  • Add the Butter.
  • Remove the Shrimp from the marinade (but reserve the marinade) and add the Shrimp to the pot. 
  • Cook until they turn pink and start to caramelize, about 3 minutes, stirring it occasionally.

  • Remove the Shrimp from the pot to a plate and add the reserved marinade. 
  • Let it cook for a few minutes then add about 1 cup of Shrimp Stock and about ½ cup pasta water. 
  • Continue to cook until this sauce reduces by half. 

  • Add half of the chopped Parsley and check the acidity. If you want more acid add the Zest and Juice of the second Lemon and stir to combine. 
  • Adjust the seasoning with Salt and Pepper. 
  • Add in the Shrimp, rest of the chopped Parsley with the Pasta and toss to combine with the sauce. 
  • Turn out into a serving bowl and serve immediately.


Tips:
  • Use a package of Garlic Butter Shrimp Scampi Seasoning Mix. Check the ingredients of the package it should have the following: Garlic, Red Pepper Flakes, Salt, Butter and Parsley. If anything is missing, then buy those ingredients otherwise this package is sufficient to prepare the pasta. 
  • You can use 1 stick of Butter instead of Olive Oil for more taste.
  • If you want to cook ahead, fry the shrimp, reduce the marinade with the pasta and shell water and cook the paste before hand. Before serving, microwave the shrimp and pasta to warm them up, heat the sauce and add everything together. Fry for a few minutes so that everything mixes nicely. Sprinkle the leftover chopped parsley and serve.


Make it Healthy:
  • Use only ½ cup of Olive Oil to prepare the pasta. 
  • Use a Wheat Pasta.


How to Cook Perfect Pasta


Recommend reading:

Monday, 24 October 2016

Southwestern Style Roasted Sweet Potatoes & Red Peppers


I like doing creative things. I love to read and write and that’s how I thought of starting this blog. I felt that this can be a good channel to share my writings with everyone. Cooking of course is my favorite activity and I cook everyday. However, sometimes I just feel the need to do something more, like last week, while browsing for recipes, I saw a photo of a painting in a kitchen and it was so beautiful that I forgot all about the recipe and started browsing for paintings. When Debarshi came home, I told him that I wanted to try painting. 

Now I have never taken any painting lessons, in fact I have not painted anything in a long time, so I spent a lot of time trying to decide what to paint. I watched tutorials on painting and then we bought all the painting materials. 

Although I painted like an amateur, I thoroughly enjoyed it. Painting these pictures made me feel so calm and relaxed, it was like reliving the childhood memories. I loved playing with colors and enjoyed every second working on it.


Finally, when I completed the paintings I turned my attention to my second favorite hobby - Blogging. It was then that I realized that I have not written anything for this week’s blog. Hmm. What to do? I decided this week I will share a quick vegetable side dish recipe with you.

The recipe I am going to share with you today is a Sweet Potatoes & Red Peppers dish. This is a sweet and tangy southwestern recipe with the sweetness of Sweet Potatoes and Red Peppers and the bold flavors of Chipotle Chile Pepper, Onion and Garlic. 


I love sweet potatoes and I eat them whenever I can. I have prepared this side many times including our Housewarming Party and believe me everyone loved it. Preparing this dish is basically a three step process - Cut, Toss and Bake and the readymade spice makes everything even easier. I usually use the McCormick Southwest Sweet 'n Smoky Seasoning’ spice to prepare it. It has the perfect blend of all the spices and the vegetables taste great with it. You can find it in any grocery store in the spice aisle, however, if you want to prepare it from scratch I have written the ingredients for your convenience. 


Now if you are not very fond of Sweet Potatoes or want to avoid all that carb, you can still try this recipe with Shrimp or any other meat. It is very helpful for those who are on Keto diet (Low Carb High Fat Dieting Plan) and want to try new flavors. I will be uploading some more quick recipes soon but in the meantime do give this a try!


Serve it with homemade Breadsticks and an entrée of your choice. Bon Appetit!


Ingredients:
  • Sweet Potatoes – ½ pound or 3 cups, peeled and cut into 1-inch chunks
  • Red Bell Pepper – ½ medium, cut into 1-inch chunks
  • Red Onion – ½ medium, cut into 1-inch chunks
  • Sweet Onion – ½ medium, cut into 1-inch chunks
  • Oil - 1 tablespoon 
  • McCormick Perfect Pinch Salt Free Southwest Sweet 'n Smoky Seasoning - 1 tablespoon
  • Salt – ½ Teaspoon

Directions:
  • Take a big baking pan and cover it with foil. Grease it lightly with oil.
  • Preheat the oven to 400°F. 
  • Take a large bowl and toss the Sweet Potatoes, Bell Pepper and Onion with oil. 
  • Sprinkle the Seasoning and Salt; using a spatula, toss to coat evenly.
  • Spread in a single layer on the foil-lined baking pan. 
  • Bake for 40 minutes or until Sweet Potatoes are tender, stirring halfway through cook time. Poke with a fork to check tenderness.
  • Serve with home made Breadsticks and an entrée of your choice.

Make the Southwest Sweet 'n Smoky Seasoning spice at home:
  • Chipotle Chile Pepper – 1 teaspoon
  • Onion powder- ¼ teaspoon
  • Garlic powder – ¼ teaspoon
  • Sun Dried Tomato – 2, chopped
  • Brown Sugar – ¼ teaspoon
  • Smoked Paprika – ¼ teaspoon
  • Lemon – half, juiced

Recommended Reading:

Monday, 1 August 2016

Grilled Salmon with Shrimp and Peppers


Photo and Recipe Courtesy: Dr. Debarshi Chatterji

This weekend Debarshi prepared a delectable dinner. He grilled a Salmon fillet with Shrimps and Peppers and it was so good that I couldn’t resist myself from sharing the recipe. This is a delicious quick recipe and if you like to cook this can be a very good surprise for your next date night. Serve these with a loaf of French Bread and a drink of your choice.

Make it even special, make some homemade Bread and brew some Unsweet tea. Arrange some flowers and candles on the table and put on some light music. Make every date night special with these easy recipes.


Ingredients:

For the Salmon and Peppers:
  • Salmon Fillets – 1 Pound 
  • Tandoori Masala - 3 Tablespoons
  • Onion Powder - 1 Teaspoon
  • Garlic Powder - 1 Teaspoon
  • Ginger Powder - 1 Teaspoon
  • Red Chili Powder - 1 Teaspoon
  • Salt - (To Taste) About ½ Teaspoon
  • Black Pepper Powder - 1 Teaspoon
  • Garam Masala - 1 Teaspoon
  • Turmeric Powder - ½ Teaspoon
  • Olive Oil – 4-5 Tablespoons
  • Peppers – 2-3 small Red and Yellow peppers with one Poblano pepper


For the Shrimp:
  • Tandoori Masala - 2 Tablespoons
  • Onion Powder - 1 Teaspoon
  • Garlic Powder - 1 Teaspoon
  • Ginger Powder - 1 Teaspoon 
  • Red Chili Powder - 1 Teaspoon
  • Salt - (To Taste) About ½ Teaspoon
  • Black Pepper Powder - 1 Teaspoon 
  • Garam Masala - 1 Teaspoon 
  • Turmeric Powder - ½ Teaspoon 
  • Olive Oil – 3-4 Tablespoons
  • Shrimp - ½ Pound 
  • Yogurt – 1 Cup


For serving:
  • Lemon – 1, cut into wedges

Let’s do a little prep:

For the Salmon and Peppers:

  • In a small bowl mix all the spices (Tandoori Masala, Onion Powder, Garlic Powder, Ginger Powder, Red Chili Powder, Salt, Black Pepper Powder, Garam Masala, Turmeric Powder) with the Olive Oil. 
  • Brush this marinade all over the Salmon and the Peppers. Use all of the marinade as a lot of it drips while grilling. 
  • Cover and refrigerate for at least an hour.


For the Shrimp:

  • Take a big bowl and mix all the spices (Tandoori Masala, Onion Powder, Garlic Powder, Ginger Powder, Red Chili Powder, Salt, Black Pepper Powder, Garam Masala, Turmeric Powder) with the Olive Oil and Yogurt. 
  • Add shrimp to the bowl, and stir until evenly coated. 
  • Cover and refrigerate for at least an hour.


Directions for Grilling the Salmon and Peppers:

  • Make sure to use a clean grill and keep an oven safe dish lined with an aluminum foil nearby to transfer the grilled Salmon and Peppers.
  • Preheat the Grill on high heat. (Keep one of the burners on medium heat if you want to cook the Shrimps at the same time.)
  • Oil the grates with a cooking spray (oil it well to prevent any sticking).
  • Arrange the Salmon (skin side) and the Peppers on the Grill. Brush the marinade over the fish liberally.
  • Cook for 6- 8 minutes and very carefully and gently turn sides. 
  • Lower the heat to medium high.
  • Cook the other side for another 6- 8 minutes or until the fish flakes easily with a fork. 
  • For the Peppers you may want to keep them for 3-8 minutes until they look charred and the skin softens.


Directions for Grilling the Shrimp:

  • Use a clean part of the grill, removing any burnt pieces. 
  • Preheat the Grill on medium heat.
  • Oil the grates with a cooking spray (oil it well to prevent any sticking).
  • Thread the Shrimps onto skewers. Pierce once near the tail and once near the head. 
  • Cook for 5-7 minutes and keep turning sides for an even cooking. 
  • Keep grilling until the Shrimps look opaque and take off the grill to keep them moist.
  • Serve the Salmon, Shrimp and the Peppers with a Lemon wedge. 

Tips:
  • You may want to keep one part of the grill on medium heat and put the Shrimp on it right when you are cooking the Salmon and Peppers. This will cook the Shrimp slowly and it will still be warm when the Salmon and Peppers are done.
  • You may discard the marinade or reuse it to grill something else.
  • If you're using wooden skewers, soak them in water for 20 minutes before grilling.
  • I like to use Metal skewers, these are comparatively expensive than the wooden skewers but they are sturdier and more durable. Plus, they don’t require soaking in water. Now my skewers don't have a wooden grip so I always use mittens for holding them because they get very hot on the grill.
  • Do not re-use the plates in which you kept the raw fish. Always transfer the grilled fish to a clean platter. This will prevent any cross contamination of germs from the raw fish.
  • Before cooking Salmon or Shrimp for guests or your Date, always ensure they are not allergic to it.


Recommended Reading: